

Graduation Nails 2027: 30 Elegant Looks That Feel Personal and Totally You
Save these graduation nails ideas for 2027: milky pinks, sheer nudes, soft florals and gold accents that look polished in graduation photos. Pick one.
So, what kind of girl are you planning to be when you cross that stage in 2027?
The timeless one with a clean French tip? The romantic type who loves barely-there shimmer? Or the one who wants a little sparkle to hold her diploma?
Graduation is more than a ceremony. Your hands will be in every photo, every handshake, every toast. Nails quietly become part of the memory, which is why I’ve been collecting the most wearable, Pinterest-worthy graduation nails ideas for 2027, the kind that feel like you on your best day.
Let’s dive in.
Modern French with Soft Diagonal Layers
This is where classic meets modern at its best. A soft pink base with diagonal white tips that flow more than they structure, like movement running across the nail.
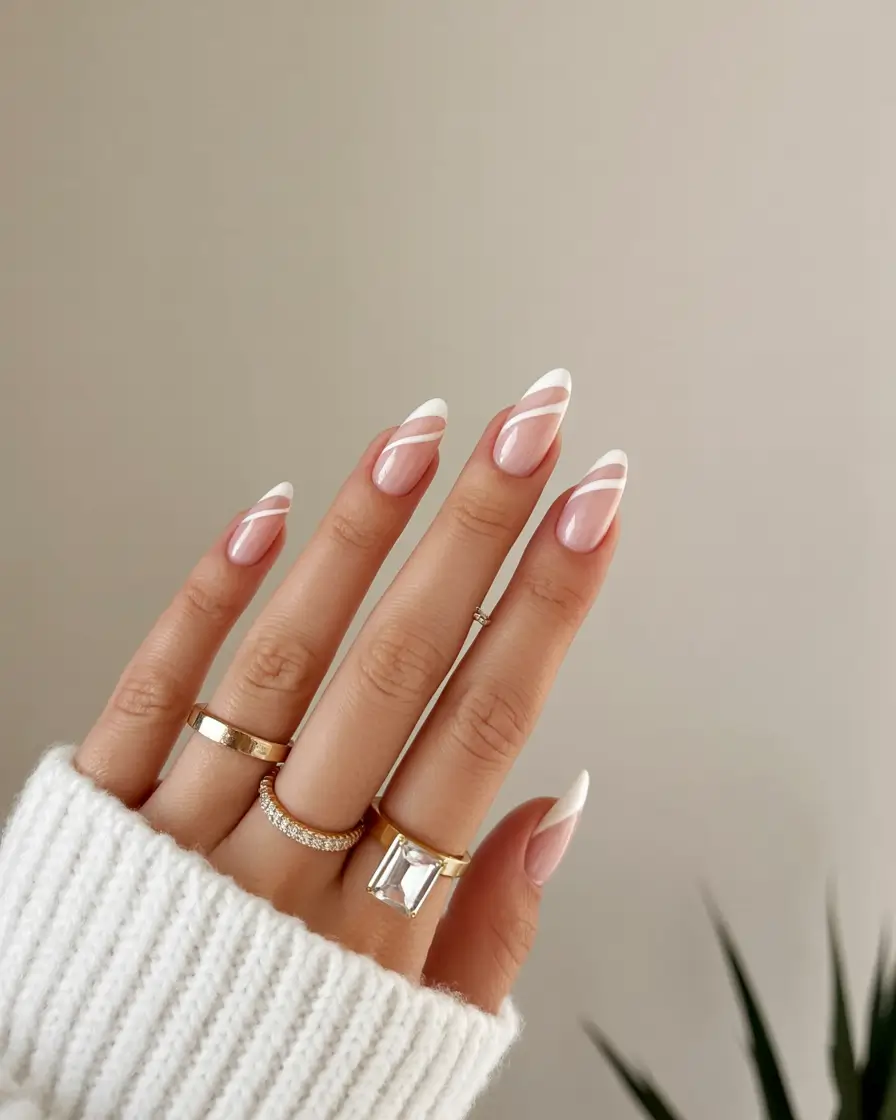
I’d use a sheer pink base with a creamy white gel for the angled tips. Keep the lines soft, neither too sharp nor too geometric.
I sketch the angle lightly before committing. That helps keep both hands balanced.
This design feels fresh. You’re taking something traditional and giving it your own spin, which honestly feels very “graduation energy.”
Classic French with a Delicate Bow Twist
This design feels special right away, like a gift. A clean French tip, crisp and timeless, with the tiniest black bow that adds just enough personality without taking over.
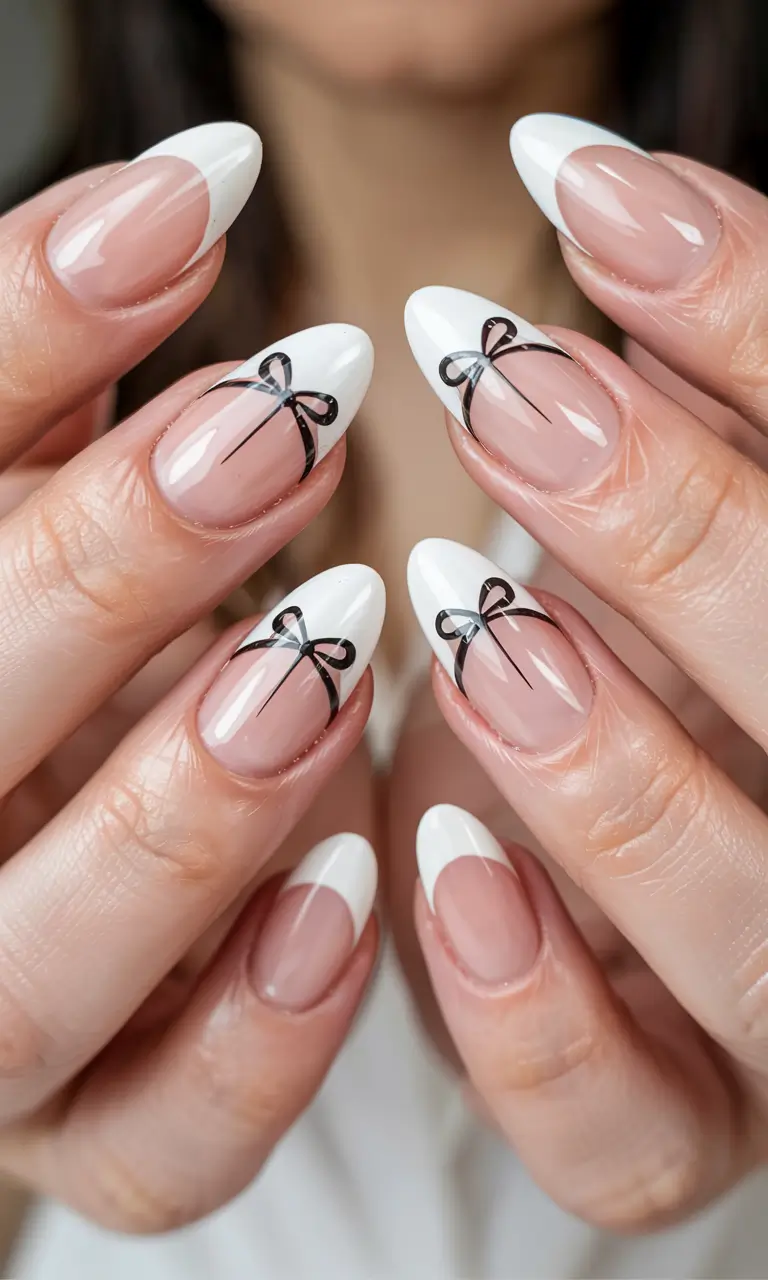
For this one, begin with a sheer pink base that looks glossy and natural. Then build a soft white tip with a slightly rounded edge. The bows need a fine liner brush and a steady hand, or decals if you’re realistic about a busy week.
My rule for this: paint the French first, seal it, and only then add the bow. That keeps the lines crisp. Nail artists like Betina Goldstein often stress layering for longevity, and it shows in designs like this one.
I love this for graduation because it feels symbolic. It’s like closing one chapter and stepping into the next, clean and polished but still you.
Soft Ombré with Tiny Gold Heart Details
This set is effortlessly romantic. A soft ombré fades from blush pink into milky white, finished with tiny gold hearts that look almost like jewelry for your nails.
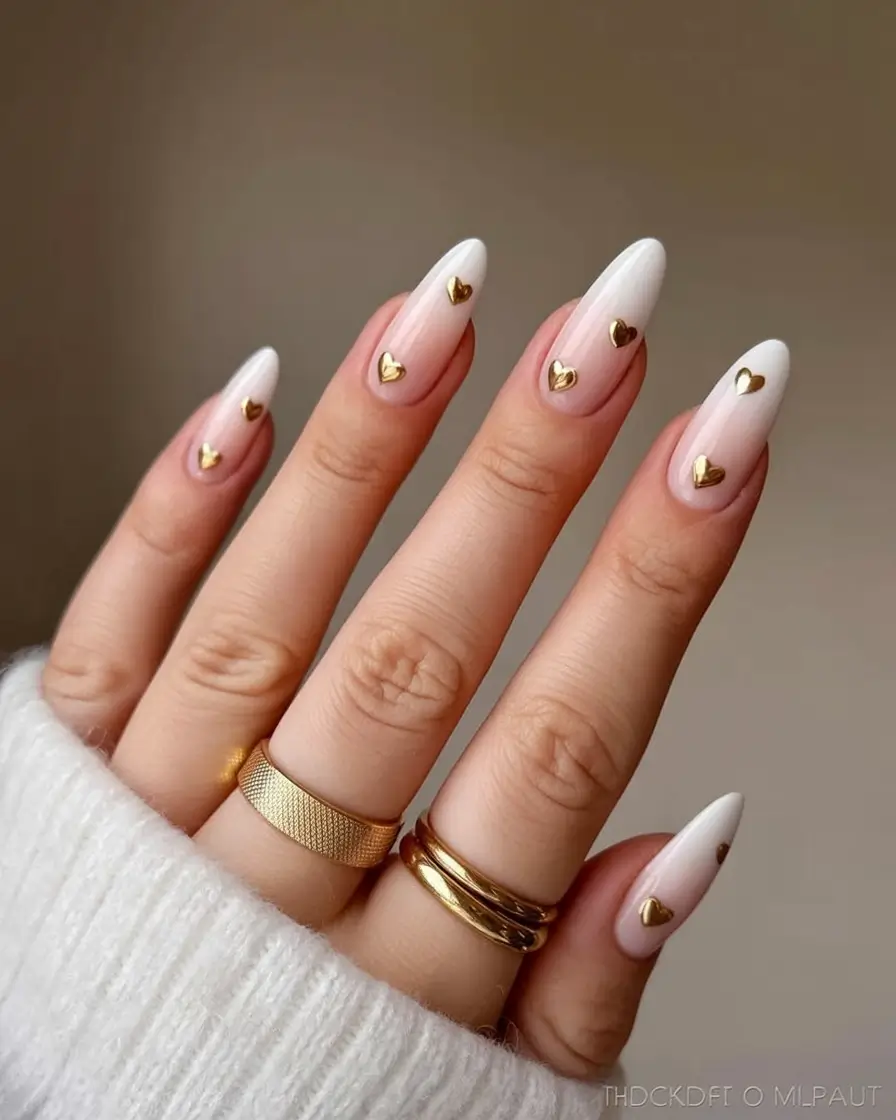
Start with a baby pink base and blend it into soft white using a sponge or airbrush. The hearts can be applied as metallic studs or painted carefully with gold gel.
Placement is everything. Don’t crowd the nail. A few tiny hearts, spaced apart, keep the look delicate rather than decorative.
I love this because it feels sentimental without being obvious. It’s a quiet nod to the people, memories, and journey that brought you here.
Minimal Blush Nails with a Fine Gold Line
And finally, the quiet luxury option. A soft blush base, perfectly shaped, with a single thin gold line across each nail. It’s subtle, yet it changes everything.
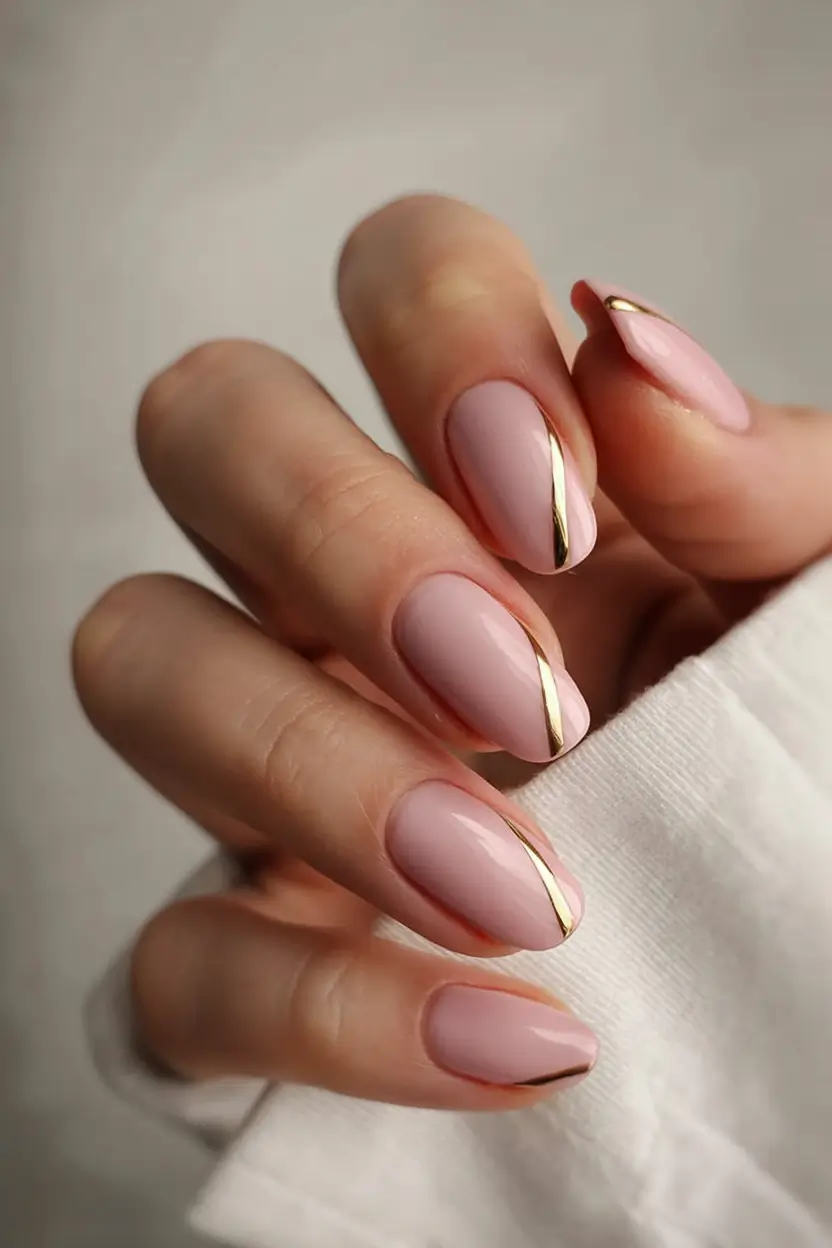
Use a milky pink gel that’s sheer but buildable, plus a metallic gold liner for the ultra-thin accent. The line should look fluid, as if it were drawn in one breath.
Keep your hand steady and don’t fuss over the line. One clean stroke looks better than trying to perfect it over and over.
This is the set I’d pick for something modern and understated that still feels intentional. It complements rather than competes, and sometimes that’s exactly what you need.
Soft Blush with Warm Vanilla Tips
A subtle twist on the classic French, warmer and softer, almost creamy. A blush-toned base melts into a pale vanilla tip, giving the manicure a cozy, understated mood.
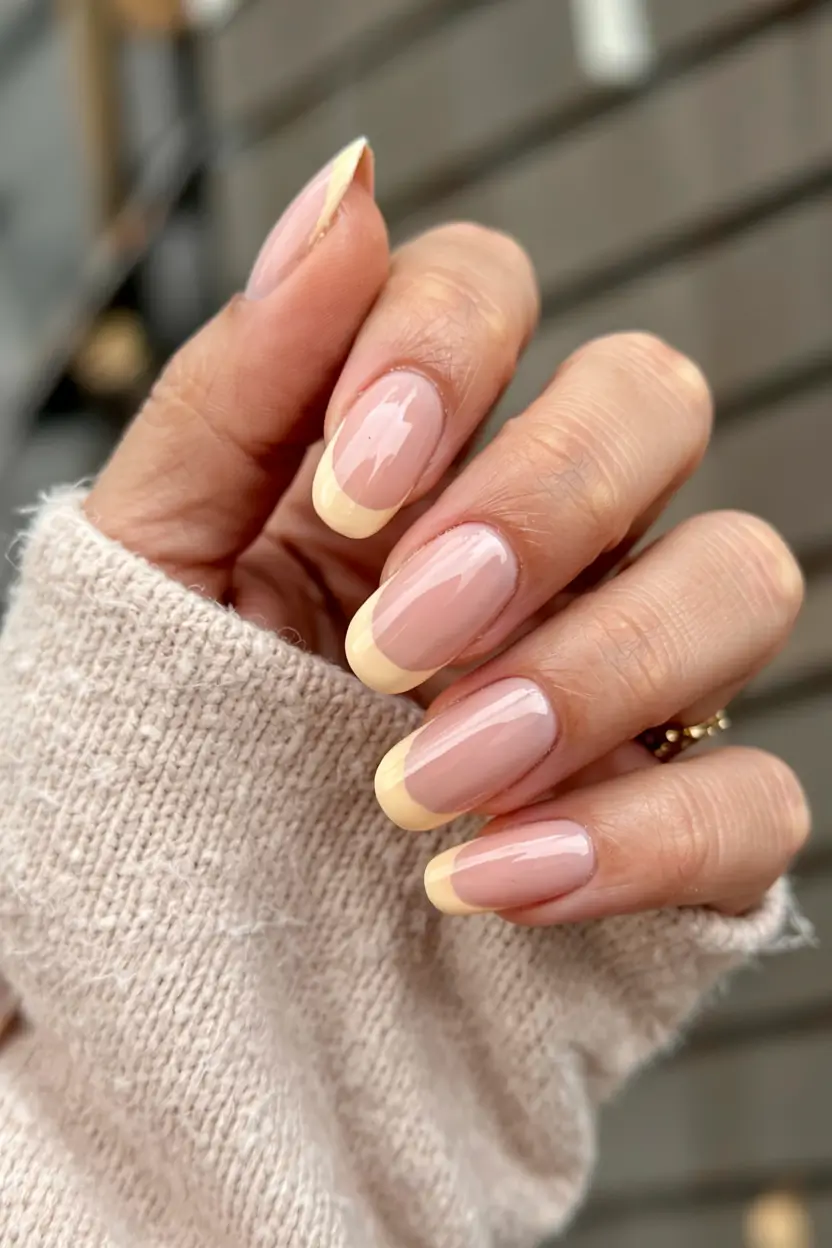
For this effect, pick a neutral pink base such as Essie “Topless & Barefoot,” then use a soft cream for the tips instead of stark white. It’s a small switch, but it changes the whole feel.
Blend the edge slightly instead of drawing a hard line. A micro-gradient at the tip looks more modern and less traditional.
This design feels like comfort, like your favorite sweater or your go-to lipstick. It’s familiar, yet polished enough for a milestone day.
Soft White Minimalism with a Statement Accent
Clean, structured, and a little architectural. A soft white base covers most nails, with one accent nail carrying a subtle gold sunburst design. It’s minimal, but every detail is intentional.
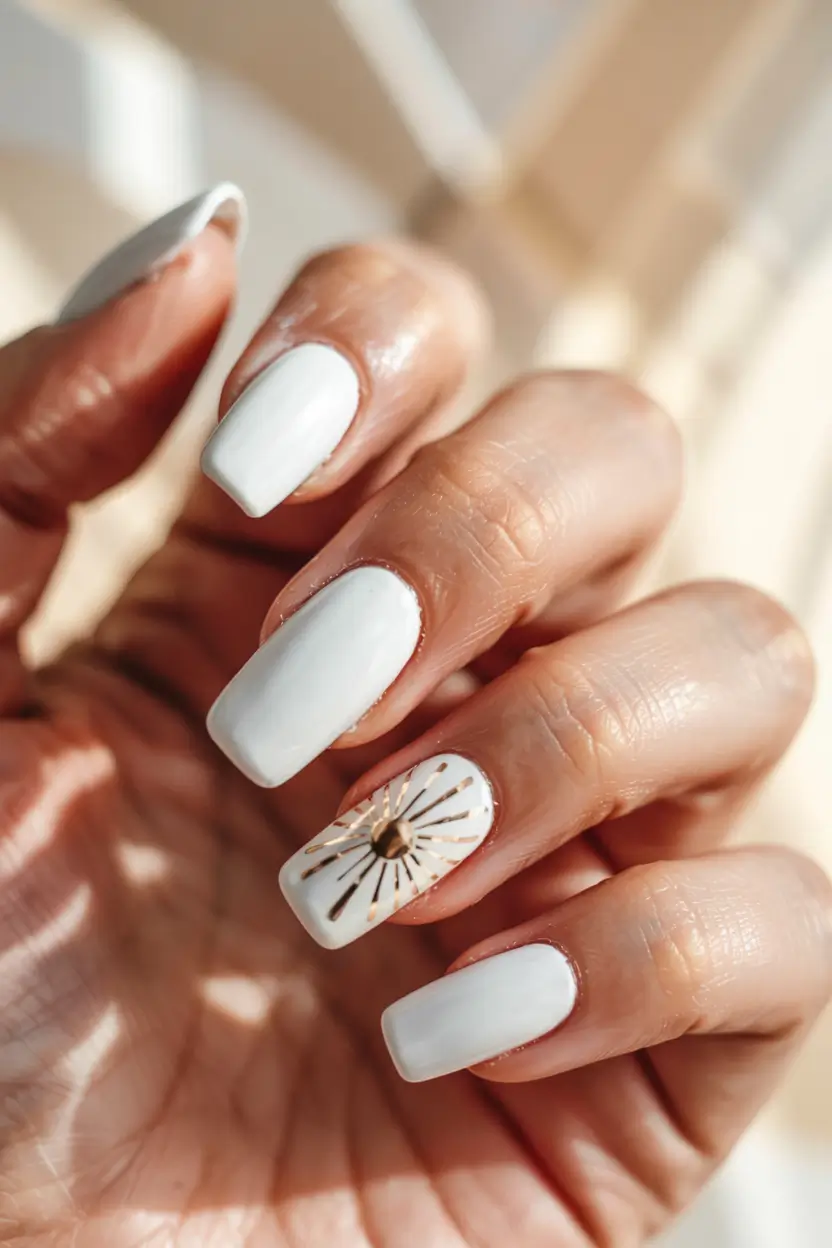
For this, use a creamy white gel that isn’t too stark, more of a soft white. The accent nail needs a fine detail brush and a metallic gold liner. It’s all about precision and symmetry.
If you’re doing this at home, sketch the design lightly before committing with polish. Even professionals map out geometric patterns first, and it makes a real difference.
I see this as the choice for someone who loves clean lines, structured outfits, and maybe a tailored blazer moment. It’s modern, confident, and quietly striking.
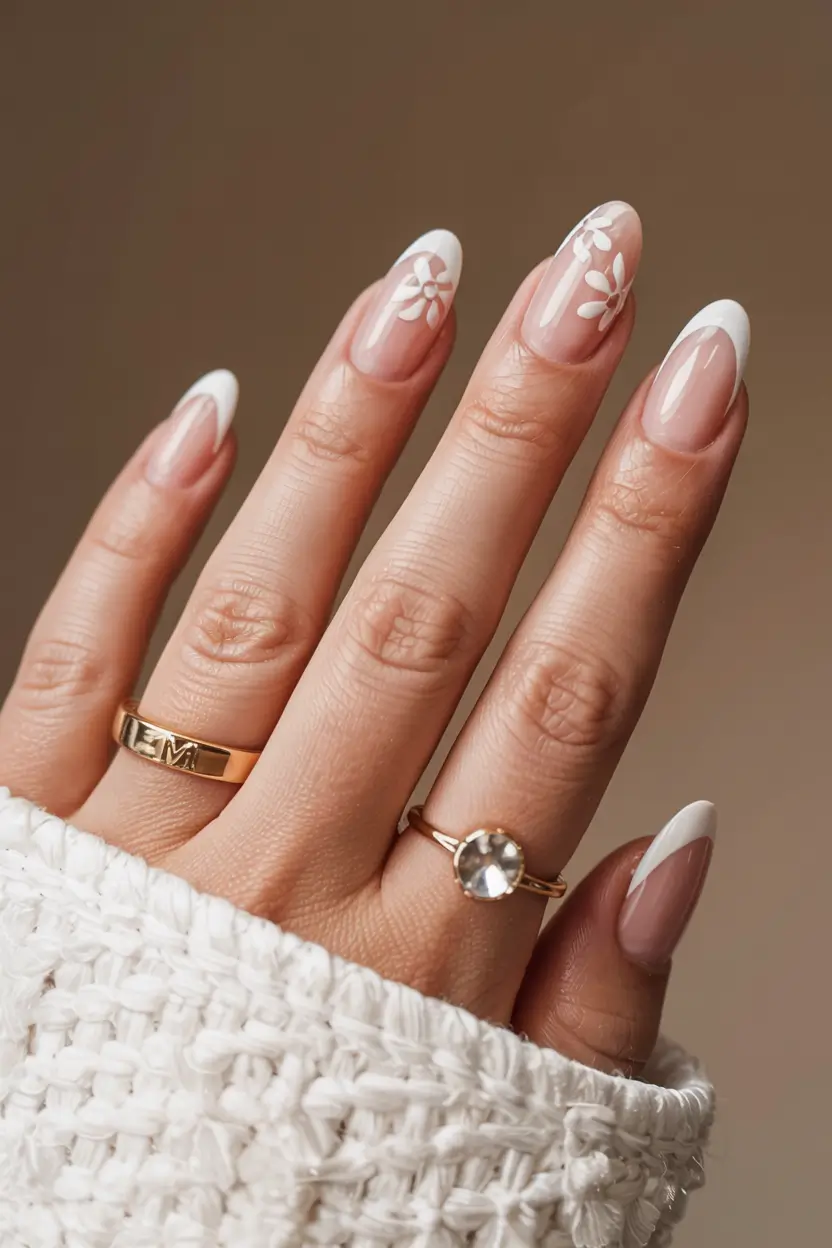
Modern French with Minimal Floral Accents
This look feels like a quiet upgrade. It’s a classic French tip, but softer, thinner, and more refined, with tiny floral touches that seem to have been added at the last minute, in the best possible way.
I usually build the base with a sheer pink gel that enhances the natural nail without covering it. The tips are done with a highly pigmented white, applied with a lighter hand so they stay delicate.
For the florals, less is more. One or two nails, tiny petals, maybe a dot in the center. Celebrity nail artists often say, “Know when to stop,” and this design lives in that restraint.
I love this for graduation because it feels timeless without being dull. It takes something familiar and makes it yours, which kind of mirrors the whole graduation moment, doesn’t it?
Pure Glossy White for a Clean New Chapter
A fresh, glossy white manicure has an almost symbolic quality. No accents, no distractions, just a clean, luminous finish that feels like a reset. It’s simple, yet it carries weight.
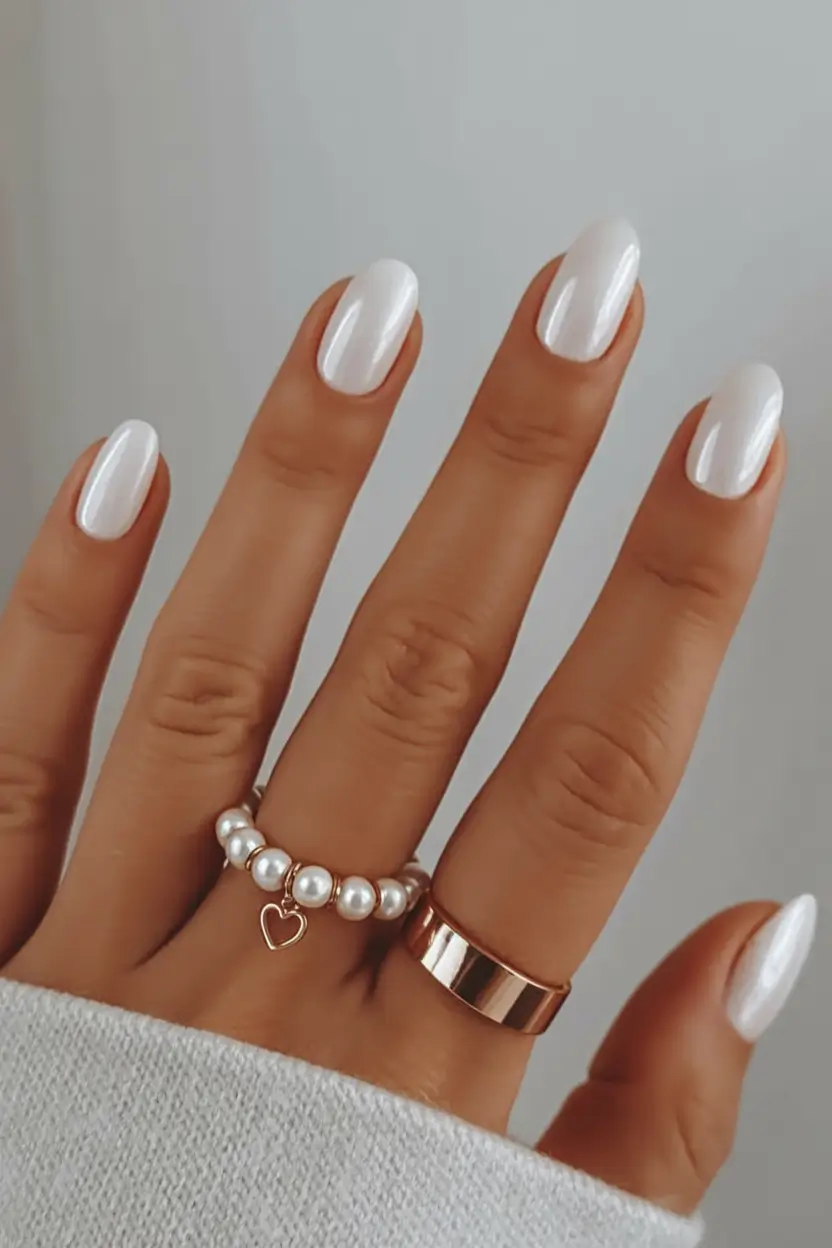
To get this right, focus on prep above everything else. Smooth the base, shape the nails evenly, and choose a high-pigment white like OPI “Alpine Snow” or Gelish “Arctic Freeze.” Apply two thin coats, avoid streaks, and seal with a glassy top coat.
All-white nails show every flaw, so patience matters. Celebrity manicurists often say minimal doesn’t mean easy, and this is exactly that kind of manicure.
I’d choose this when I want to feel grounded. Clean, ready, and stepping into something new without carrying anything extra.
Deep Blue French with a Gold Accent Curve
And finally, something with a little edge. A deep blue French tip, bold and confident, softened by a thin gold curve that follows the line of the nail. It’s graphic but still elegant.
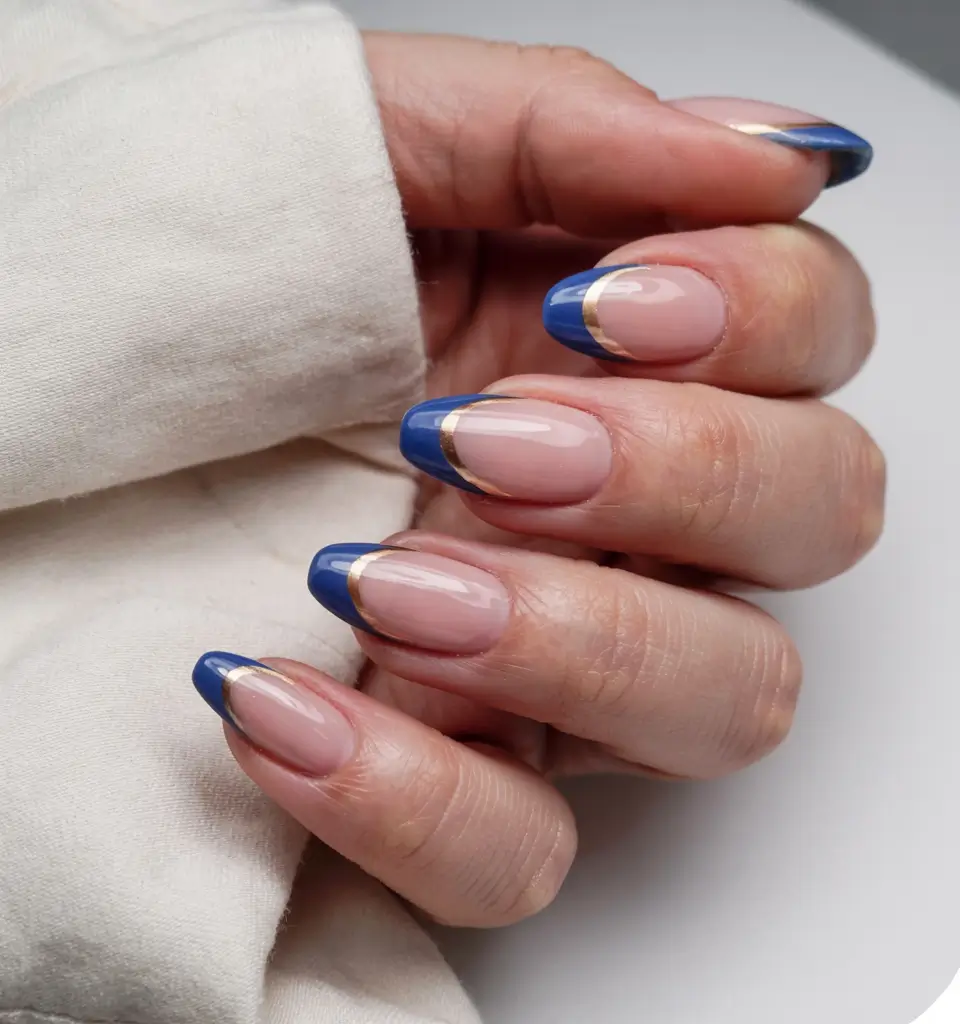
For this, go with a rich navy gel and a metallic gold liner. Keep the base sheer and glossy so it balances the intensity of the color.
Map out the curve lightly before committing to color. The gold line should feel fluid, not forced.
This one is for the girl who wants something a bit different. It’s still polished and graduation-appropriate, with a touch of personality and confidence.
Milky Pink with Subtle Gold Botanical Accent
This design whispers luxury. A soft, milky pink base with a single accent nail featuring delicate gold botanical details, thin branches and tiny leaves that look almost like pressed gold.
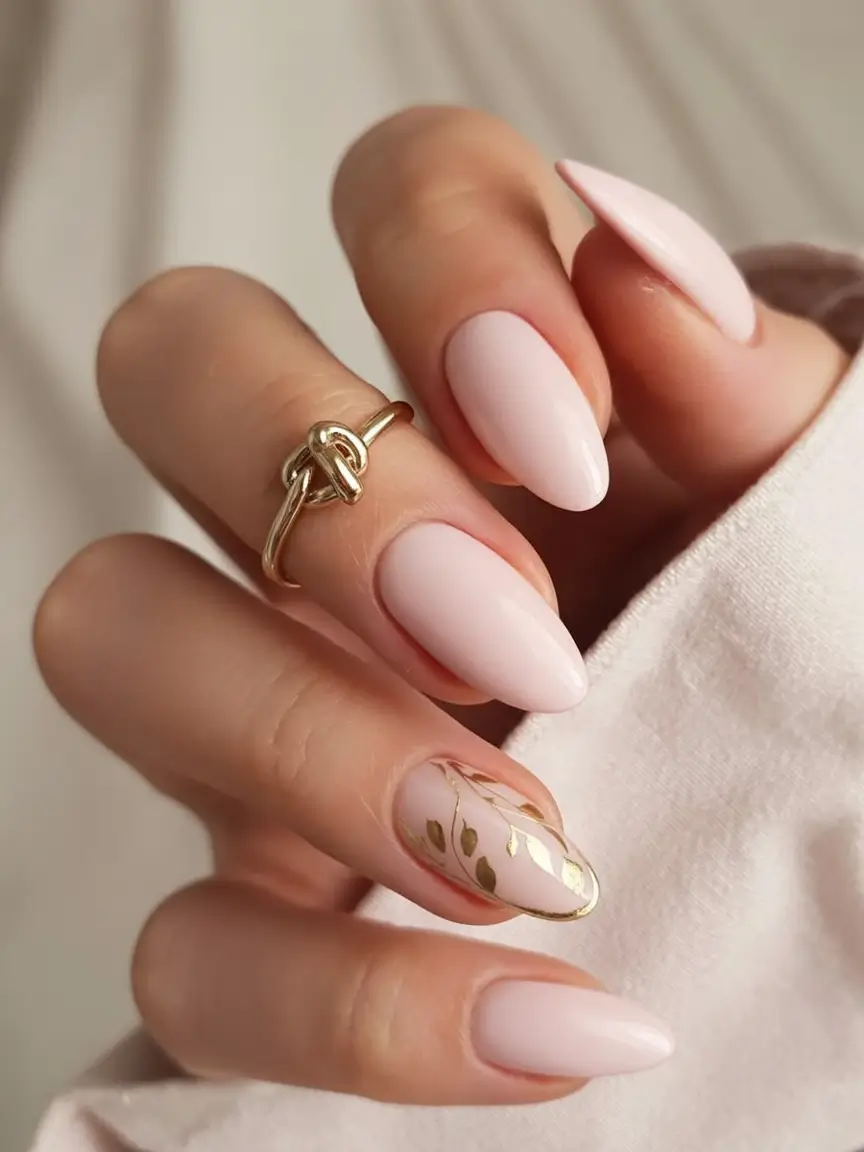
Use a blush-toned builder gel for the base, then a fine liner brush with metallic gold gel for the detail. This design depends on precision, so use light strokes and minimal pressure.
Anchor your hand against the table while drawing the fine lines. It keeps everything steadier and cleaner.
This feels like quiet confidence. You don’t need sparkle or bold color, just one beautiful detail done well.
Golden Veins and Soft Florals on Sheer Nude
This design is almost poetic. A translucent nude base lets the natural nail show through, layered with delicate white florals and irregular gold accents that look like little bursts of sunlight. It isn’t perfect, and that’s exactly why it works.
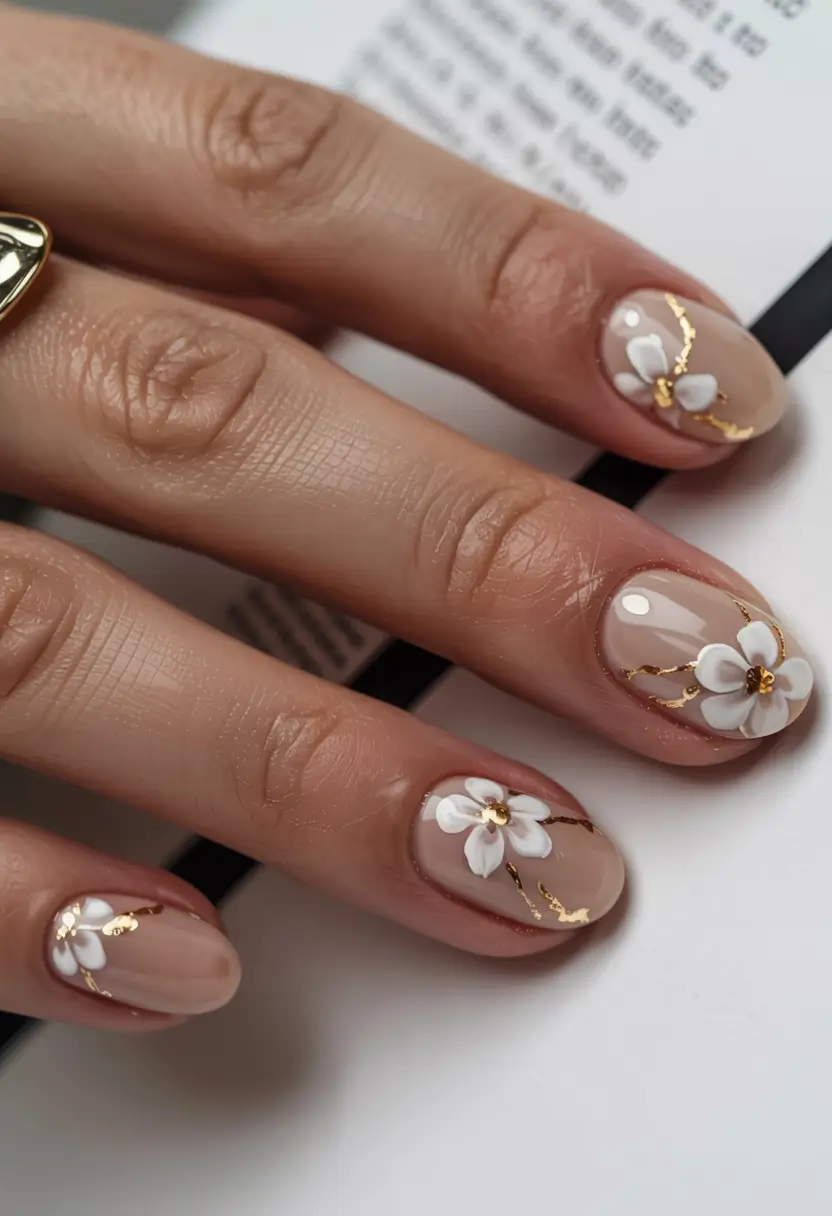
To recreate it, start with a sheer builder gel, such as The GelBottle “BIAB 19” or a soft pink jelly base. Dot the flowers with a tool so they sit slightly raised for a 3D effect. The gold lines can be made with foil flakes or metallic gel paint. Keep those lines organic and a little imperfect.
I apply the florals first, cure them, and then add the gold between them rather than outlining everything. That negative space is what keeps the design elegant. Editorial nail artists often say, “Leave room for the eye to rest,” and this look follows that rule.
I’d wear this if I wanted something romantic without being predictable. It makes a quiet statement, as if you didn’t try too hard but everything somehow came together.
Short Milky White for Effortless Minimalism
Not every graduation manicure needs length or detail. Sometimes simplicity done well is enough. A short, rounded nail in a milky white shade, clean, glossy, and completely effortless.
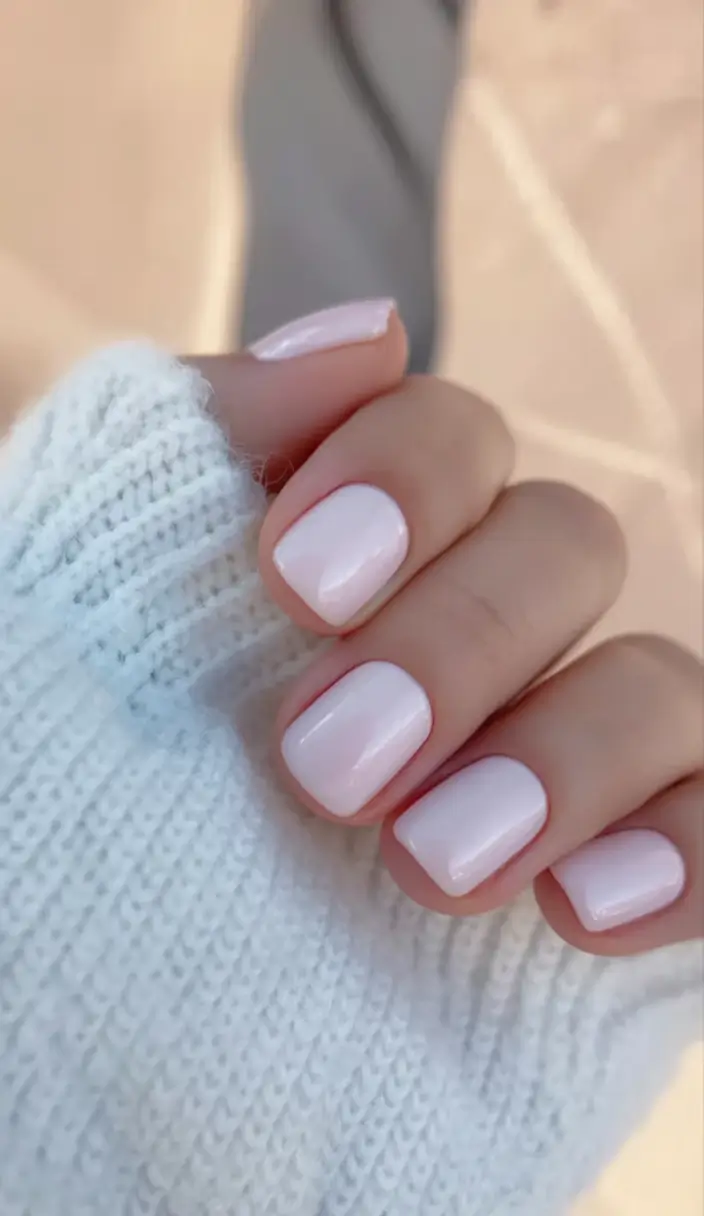
Go for a sheer white polish layered to build opacity, such as Essie “Marshmallow” or a BIAB shade for a smooth, natural finish.
The application is straightforward, but precision counts. Even edges, clean cuticles, and a high-shine top coat make all the difference.
This is for the girl who wants zero fuss and knows she doesn’t need extras to feel put together. Honestly, that’s a power move.
Soft Ivory Glam with a Graduation Accent
I keep returning to this look because it balances sentiment and polish so well. A creamy ivory base, almost bridal but not precious, carries one accent nail that quietly takes over the room. Tiny crystals catch the light, fine white detailing softens everything, and the small graduation cap is playful without feeling childish.
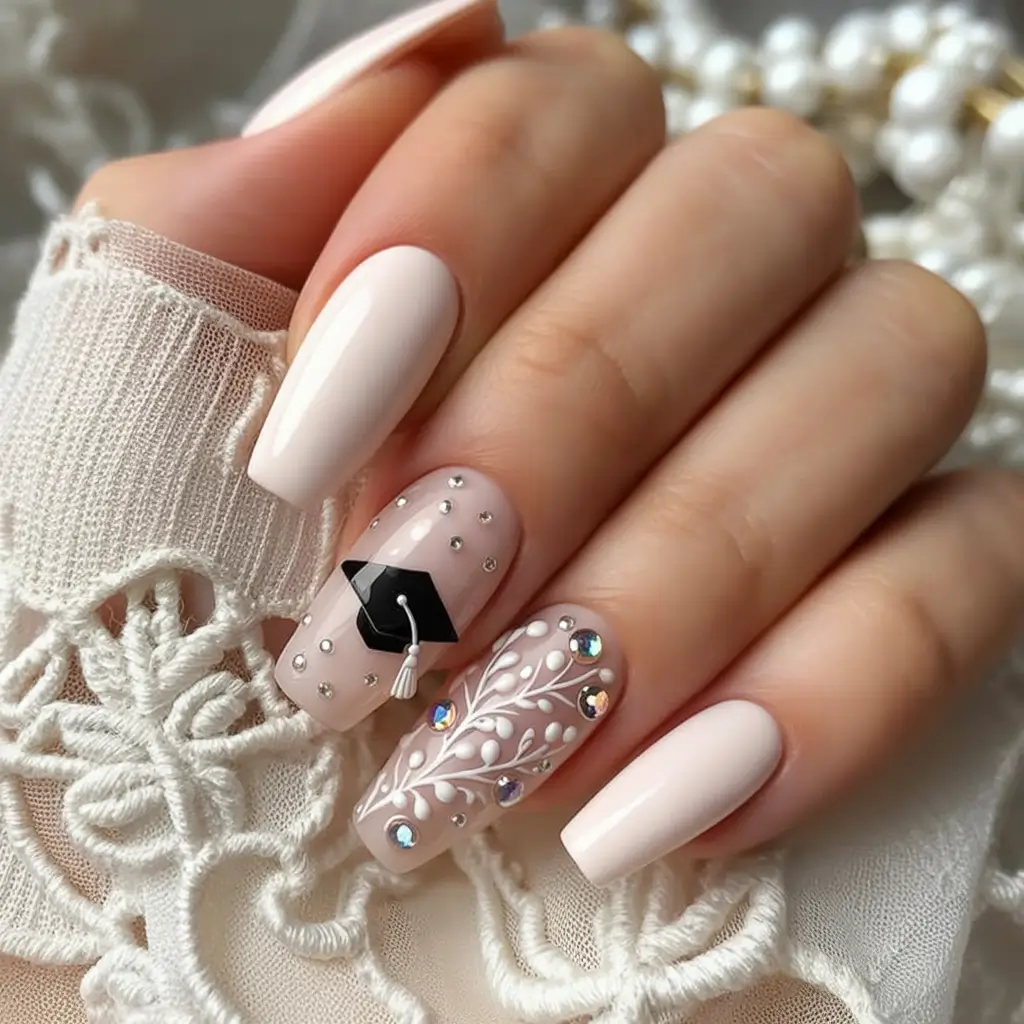
If I were recreating it, I’d reach for OPI “Funny Bunny” or Essie “Marshmallow” for that milky base. The detailing calls for a fine liner brush and a steady hand, and Beetles Gel Art Liners are my go-to for that. For the crystals, Swarovski flat-back rhinestones (or good dupes) give a luxe sparkle without looking overdone.
I’ve found that this kind of manicure works best built in layers. Lay down the base color, seal it lightly, then add the art, especially when gems are involved. Celebrity nail artist Tom Bachik always stresses sealing rhinestones properly so they stay put, and nothing ruins a graduation party like a lost gem halfway through.
Honestly, I love this one for what it means. It feels like carrying a small symbol of your achievement on your fingertips, and it will still look chic in photos five years from now.
Soft Pink with 3D Bow and Pearl Details
This one is a bit more playful and still polished. A soft pink base, delicate French accents, tiny pearls, and a standout 3D bow that pulls the eye straight away.
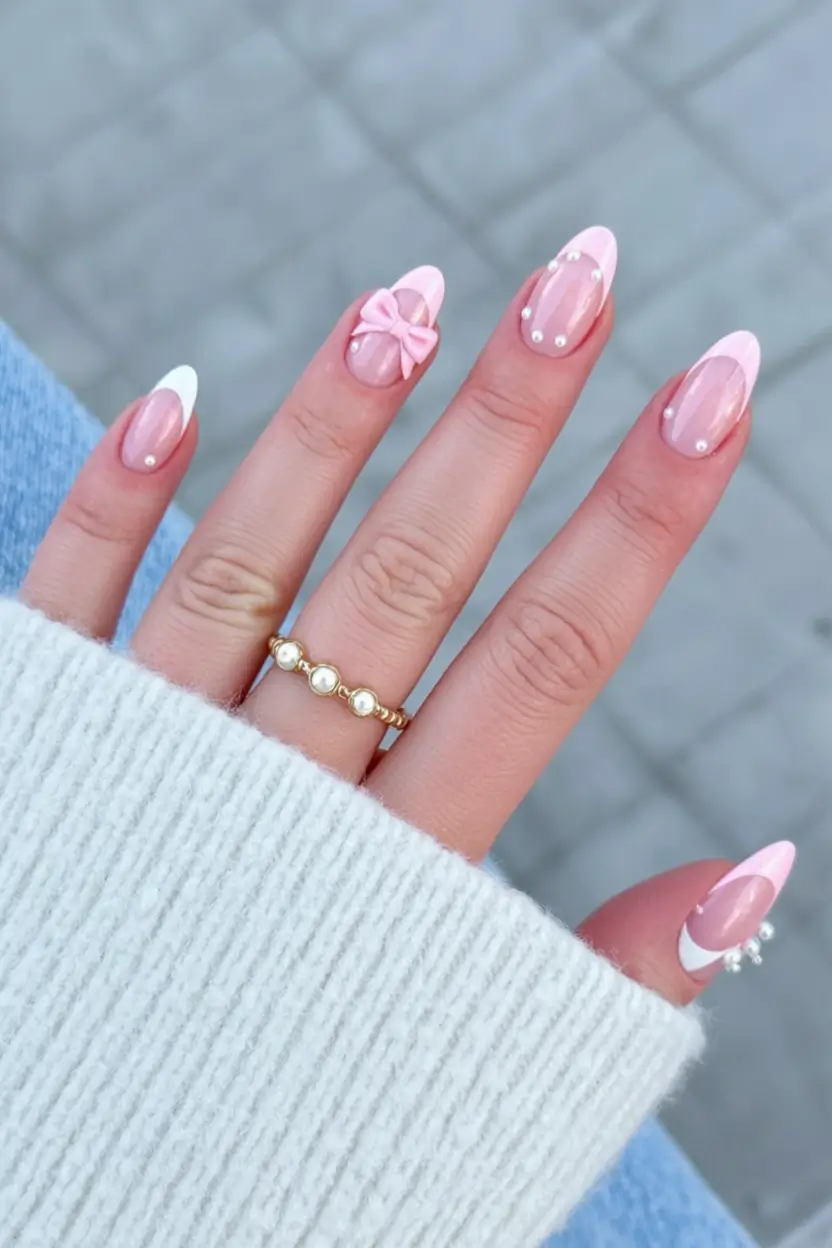
Build the base with a blush-toned gel, then add French tips on select nails. Sculpt the bow with builder gel or use a pre-made charm, and place the pearls with care so the design stays balanced.
I always secure 3D elements with builder gel instead of glue. They last longer and look more integrated into the nail.
This design is a moment. It’s for the girl who wants something extra but still soft and feminine. Honestly, graduation is a pretty good excuse for that.
Minimal Nude with Whispered Silver Tips
Nails that don’t shout can still say a lot, and this look proves it. A sheer nude base, close to your natural nail but a bit more polished, has the faintest silver shimmer along the tips. It works like jewelry, only softer.
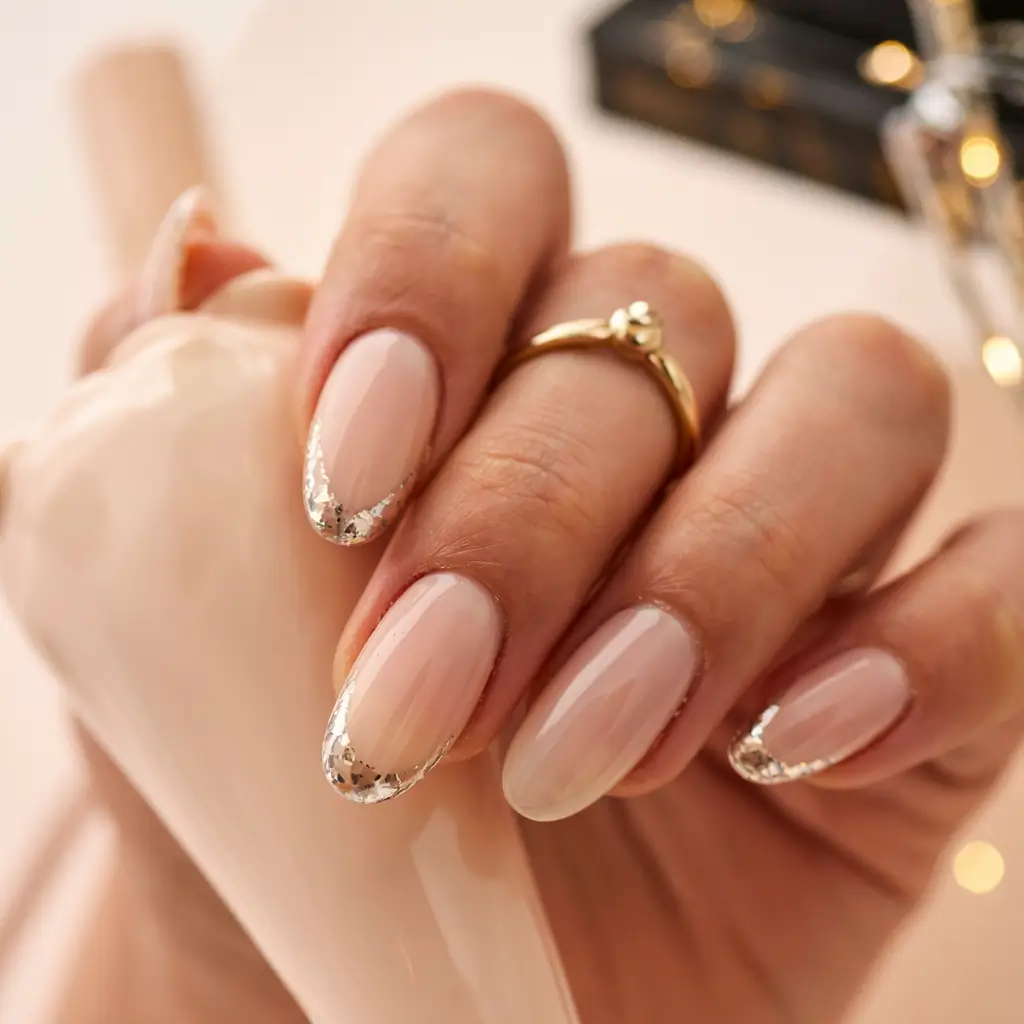
The base matters most here. Think Essie “Ballet Slippers” or Chanel “Ballerina,” a translucent pink-beige that evens out the nail. For the tips, a micro-glitter polish or a chrome powder brushed lightly along the edge does the job. It shouldn’t read as a French tip. It should look more like a reflection.
The secret is precision and restraint. I use a very thin brush and drag it gently across the tip with barely any pressure. Celebrity manicurists often say negative space designs work because they let the natural nail breathe, and that’s why this style always feels so expensive to me.
This is the set I’d pick if your graduation outfit is bold, like a statement dress or bright heels. It balances everything around it. It also won’t clash with anything, even if your plans change at the last minute.
Classic French with a Single Crystal Accent
There’s something very satisfying about this take on the French tip. Clean white edges, a soft pink base, and one tiny crystal placed right near the cuticle. That’s it, and that’s the whole statement.
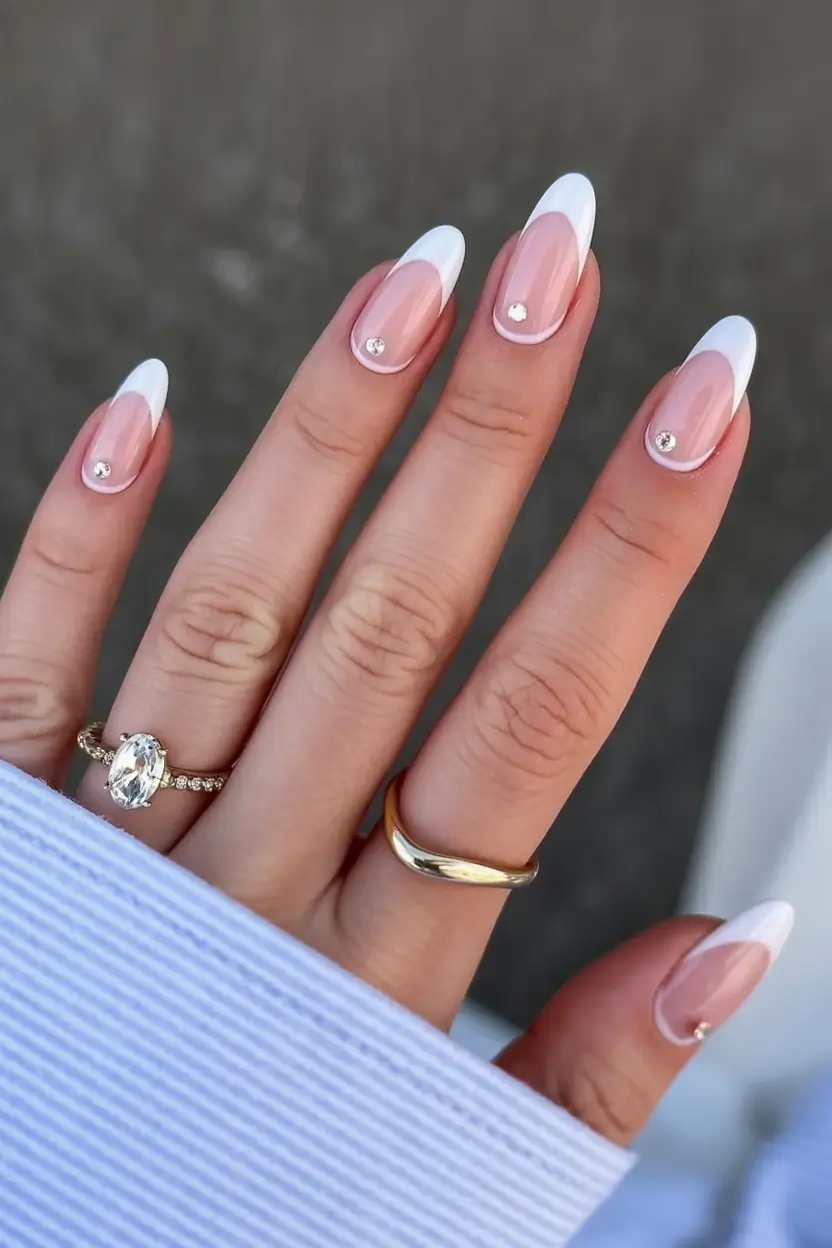
Use a sheer pink gel base and a highly pigmented white for the tips. The crystals, whether Swarovski or a good dupe, should be set with nail glue or gel and sealed carefully around the edges.
Don’t cover the crystal directly with top coat, because that dulls the shine. Seal around it instead. It’s a small detail, but it makes a difference.
I love this because it shows restraint. You know you don’t need more, and that confidence comes through.
Blue Floral Story on a Porcelain Base
This one feels like something you’d find in a tiny boutique: unexpected, detailed, and quietly beautiful. A crisp white base with soft blue florals and touches of green creates an almost porcelain effect. It’s delicate without being fragile.
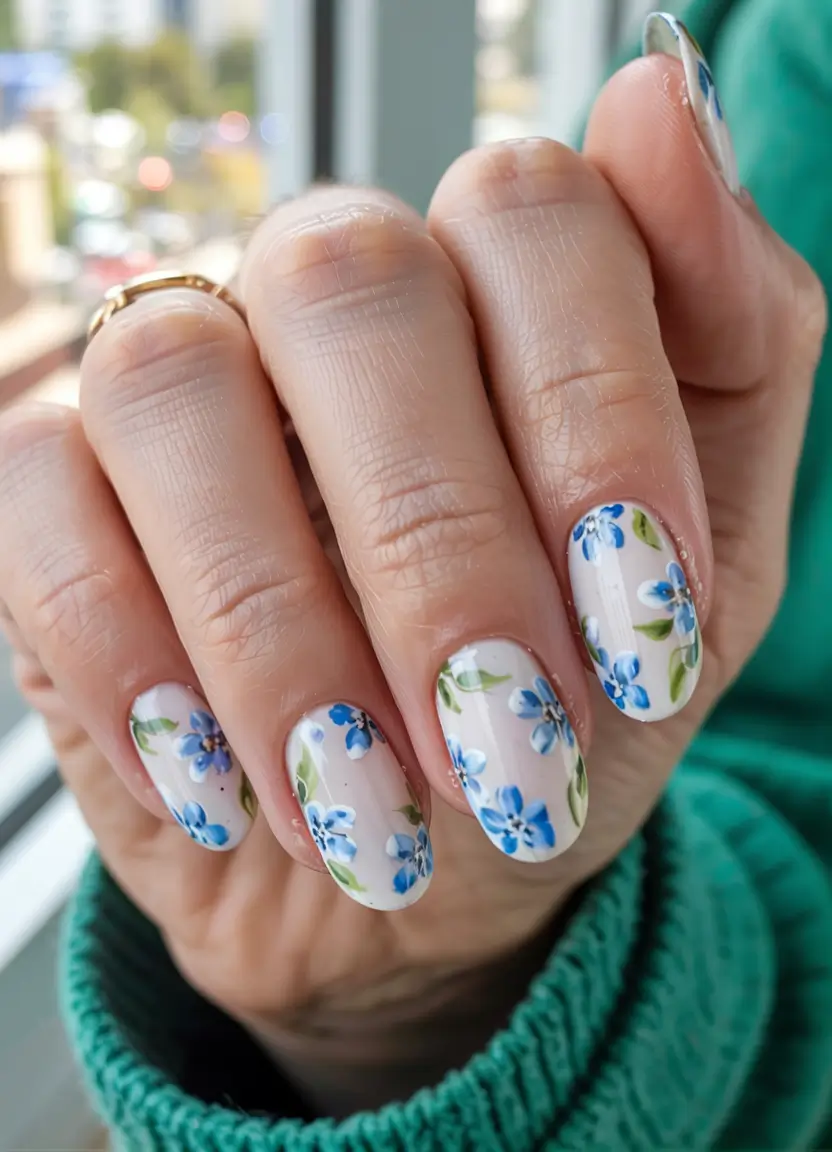
I’d begin with a solid white gel, such as OPI “Alpine Snow.” The floral detail works best with ultra-pigmented gel paints in blue and soft green, plus a little white for highlights. A fine liner brush is essential. This is more painting than polishing.
With florals like these, I vary the size and placement. Not every flower should look identical. That slight irregularity gives the design a hand-painted, artisanal feel.
This is perfect if your outfit is simple and you want your nails to carry some personality. It isn’t loud, but it definitely has a point of view.
Milky Pearl Nails with Barely-There Sparkle
You know that soft glow your skin gets after a really good skincare routine? This manicure gives your nails the same effect. It’s milky and semi-opaque, with a micro shimmer that shows up only when the light hits just right.
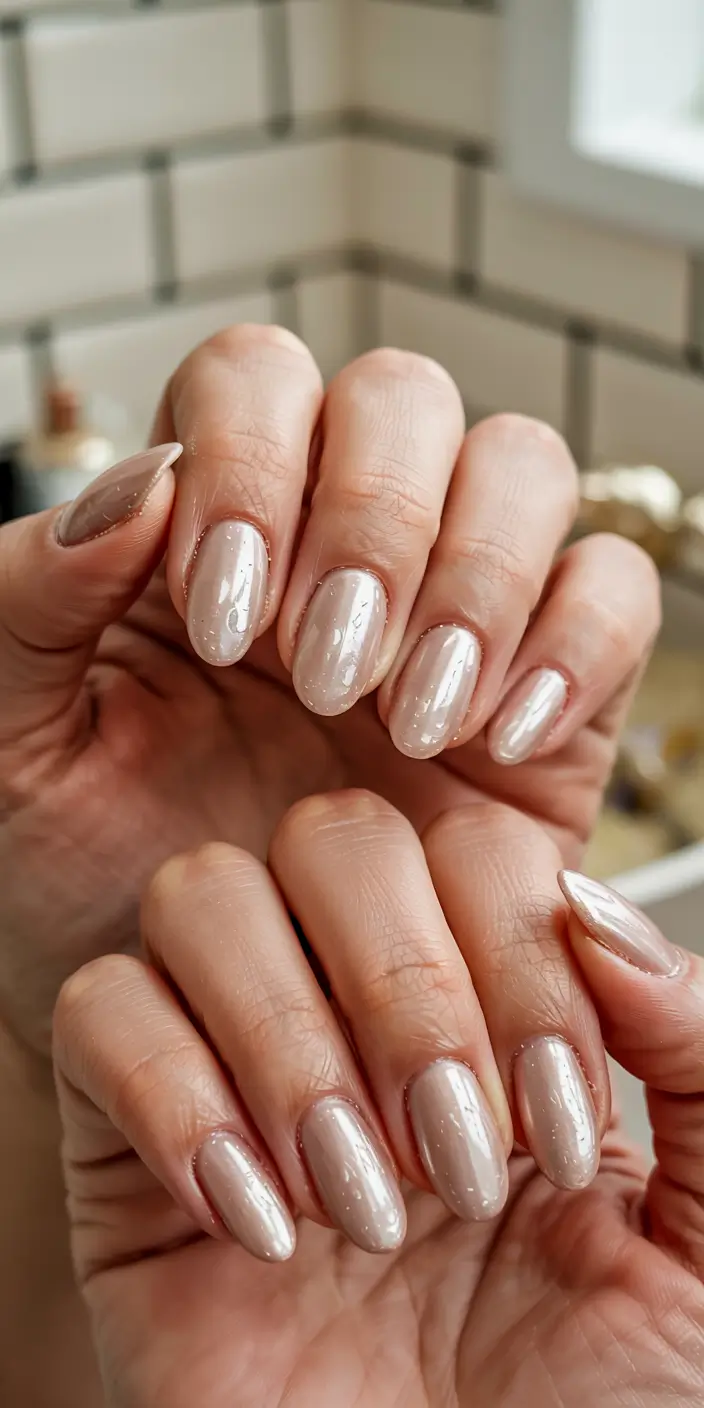
For this effect, go with a sheer white or pink base, like Essie “Mademoiselle,” layered under a pearl top coat such as OPI “Kyoto Pearl.” The shimmer should be ultra-fine, with no chunky glitter. The goal is glow, not sparkle overload.
Application is simple but deliberate. Two thin coats, a shimmer glaze, then a high-gloss top coat. Sometimes I rub a drop of chrome powder lightly over the surface for the glazed finish everyone is obsessed with right now.
This is the manicure I recommend when you can’t decide. It’s a safe choice, in the best way. It lifts your hands without competing with your outfit, your jewelry, or the moment itself.
Sage Green with Subtle Sparkle Fade
And we end on something moodier. A muted sage green paired with a soft nude base and a delicate sprinkle of glitter that fades like morning dew. It’s earthy and calm, yet still a little celebratory.
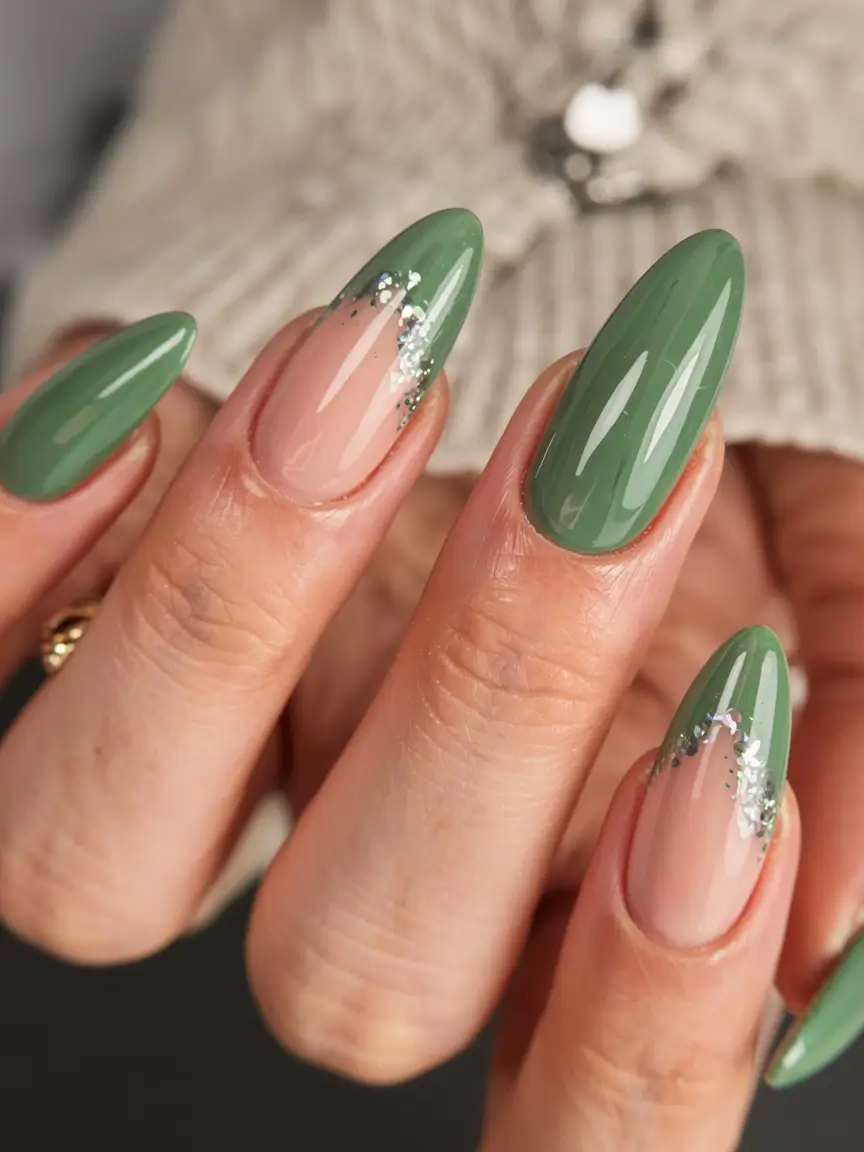
For this, use a dusty green gel. Olive & June and OPI both have lovely versions. The accent nails start with a sheer nude base, then a fine glitter is dabbed lightly near the tip and blended downward.
The trick is keeping the sparkle controlled. Too much and the soft, diffused effect disappears. I tap off the excess glitter before applying, which keeps everything airy.
This design feels grounding, like you’re stepping into your next chapter with intention rather than rush. Honestly, that energy feels just right for graduation.
Butter Yellow with Liquid Gold Details
This one surprised me. Yellow isn’t usually my first pick, but this soft, buttery shade with fluid gold accents is warm, confident, and a little unexpected.
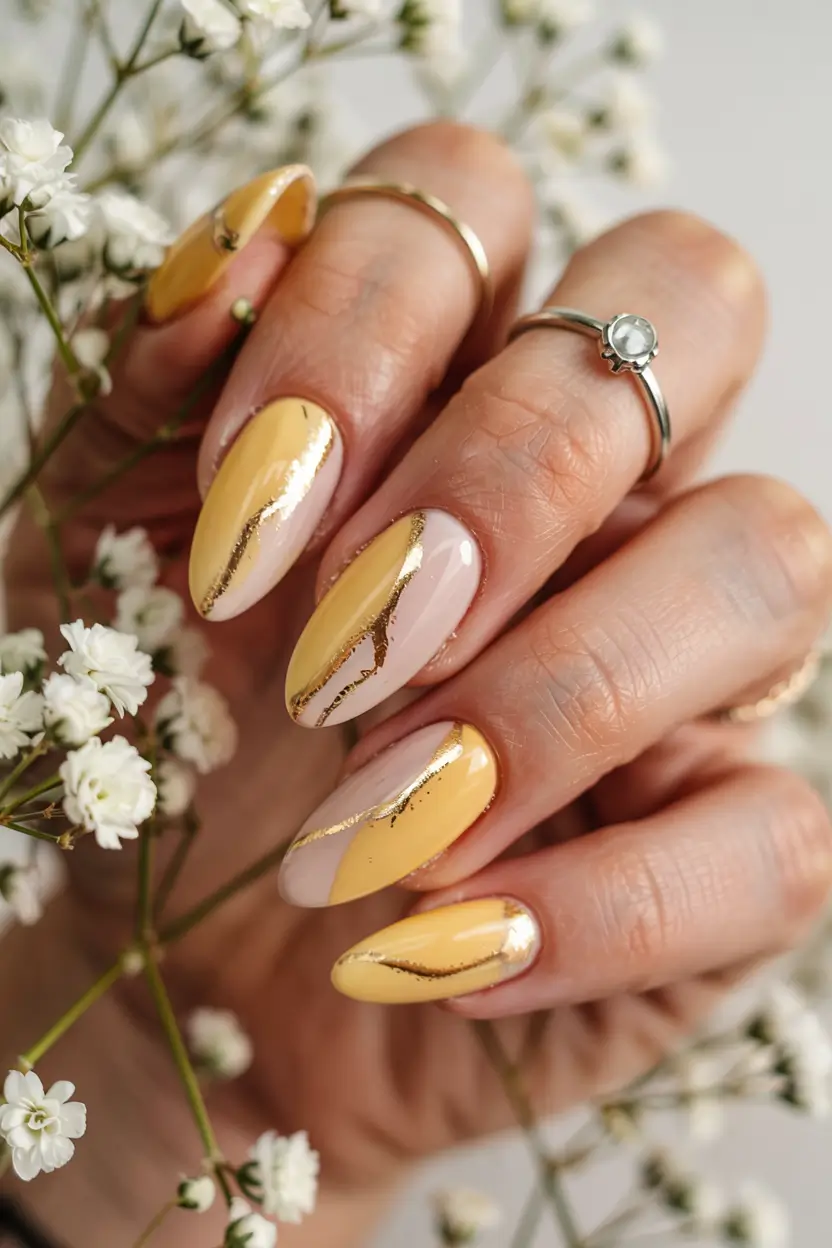
For this look, choose a pastel yellow gel that’s creamy rather than neon. DND and Gelish both have soft yellows that don’t streak. The gold detail can be done with foil gel or a metallic liner, painted in loose, imperfect lines.
I always apply the base first, cure it, and then sketch the gold lines loosely, with no ruler and no symmetry. That organic movement is what makes the design feel elevated instead of graphic.
This is one of those sets that feels like sunshine. If your graduation day leans celebratory and vibrant, this might be your moment.
Glossy Nude with Melted Glitter Tips
If intricate designs aren’t your thing but you still want something special, this one is for you. A glossy nude base with glitter that seems to melt from the tips, soft and diffused, almost like champagne bubbles rising.
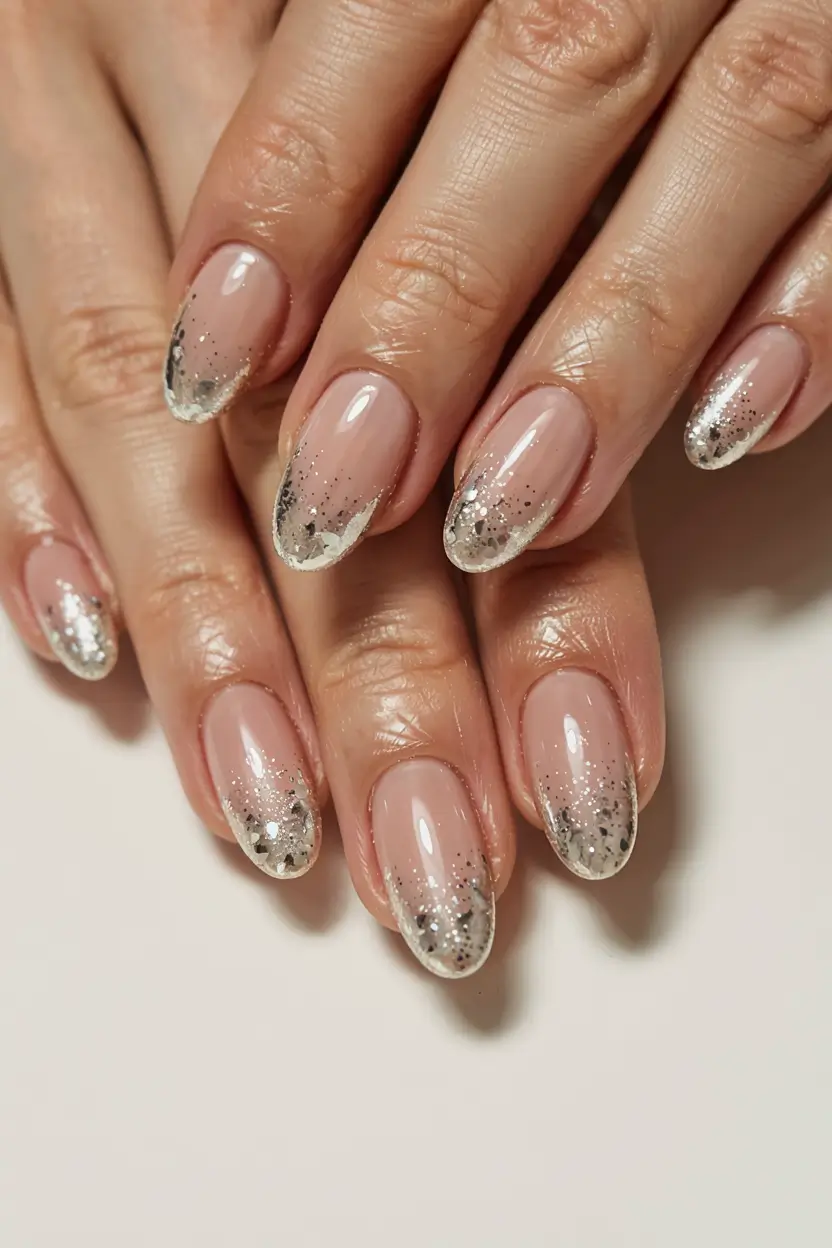
I usually create this with a sponge, dabbing fine glitter polish at the tips and fading it downward. The gradient looks seamless, with no harsh lines. Zoya and Essie both make fine-glitter shades that don’t look chunky.
Layering is the key. Start sheer and build up slowly. It’s tempting to go all in with glitter, but the charm lives in that barely-there transition.
Honestly, this is the set I’d choose if I wanted something celebratory with very little effort. It’s a quiet nod to the moment. Yes, we’re celebrating, and we’re doing it with taste.
Sheer Nude with Floating Silver Foil
This is for anyone who doesn’t want full nail art but still wants something that catches the light when she moves. A soft nude base with scattered silver foil that looks almost weightless, as if it’s floating.
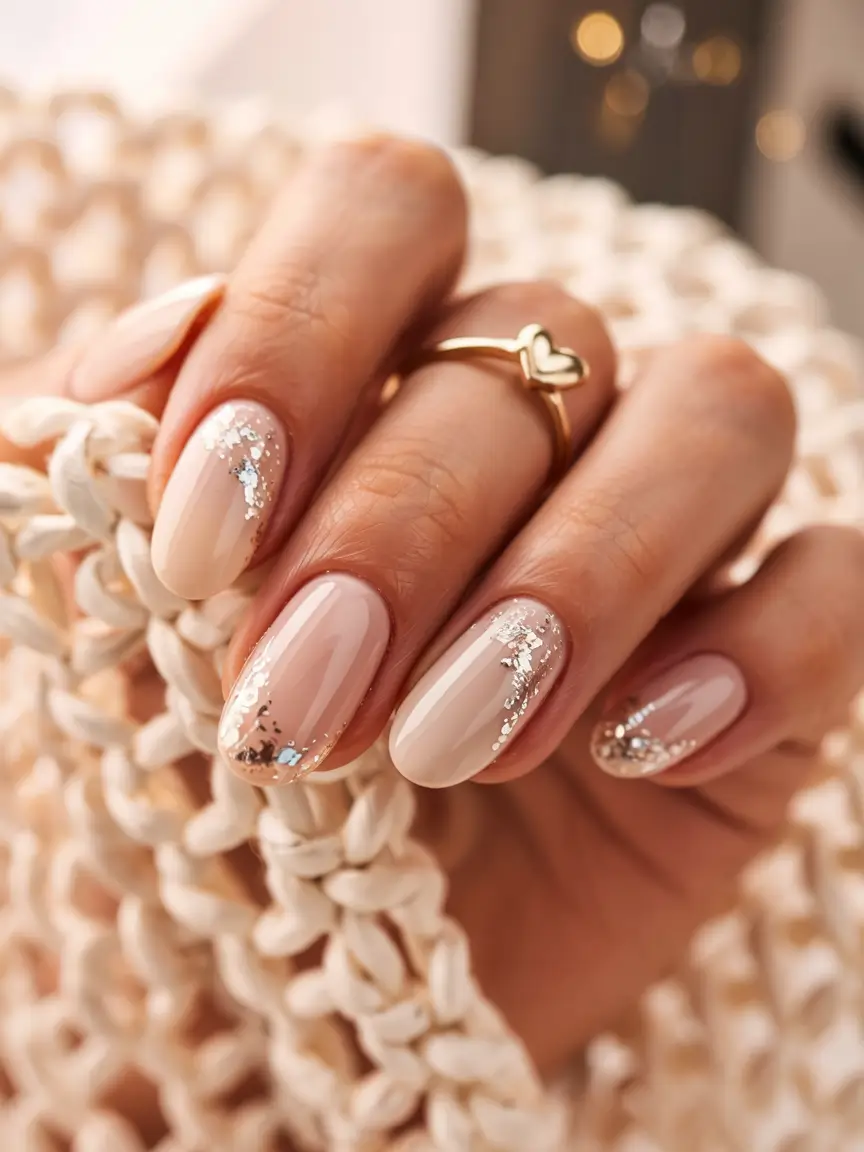
I usually make this with a builder gel base, pressing foil flakes lightly into a tacky layer. Placement is the key: random but intentional. Keep the foil away from the cuticle and don’t crowd the tip.
I like to seal foil with two thin top coats instead of one thick one. It keeps the surface smooth without dulling the shine.
This is one of those looks that feels effortless yet elevated. You didn’t overthink it, but it still feels exactly right for the moment.
Delicate Florals with Gold Framing
This one is like spring in a manicure. Soft blush tones, tiny white blooms, and a thin gold outline along the shape make it romantic without tipping into sugary. It also has structure, which keeps it grown-up.
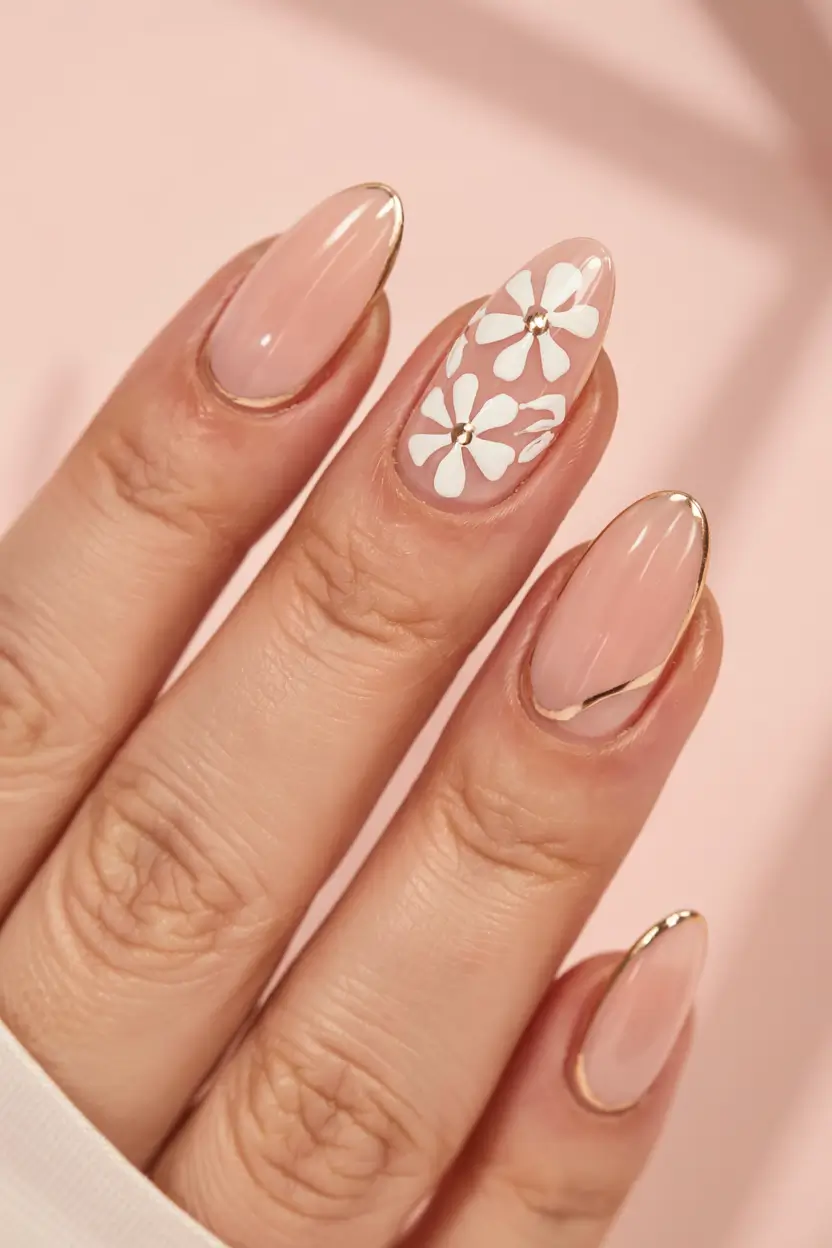
I’d start with a builder gel in a natural pink for a smooth, glossy base. The flowers are easiest with a dotting tool and a fine brush, and they shouldn’t be too perfect. A petal that’s a little uneven is what makes the design feel current.
Gold accents are everywhere right now, and it’s easy to see why. A thin metallic liner, such as one from Daily Charme, adds just enough contrast without overpowering the softness of the design.
A friend wore something similar to her graduation, and every time she moved her hands the gold caught the light. It wasn’t loud, but people noticed. That’s the sweet spot, right?
Playful Pastel Florals on a Bare Base
This one feels like pure joy. A sheer base with tiny, colorful florals scattered across every nail. Nothing is rigid or overly serious, just soft color and movement.
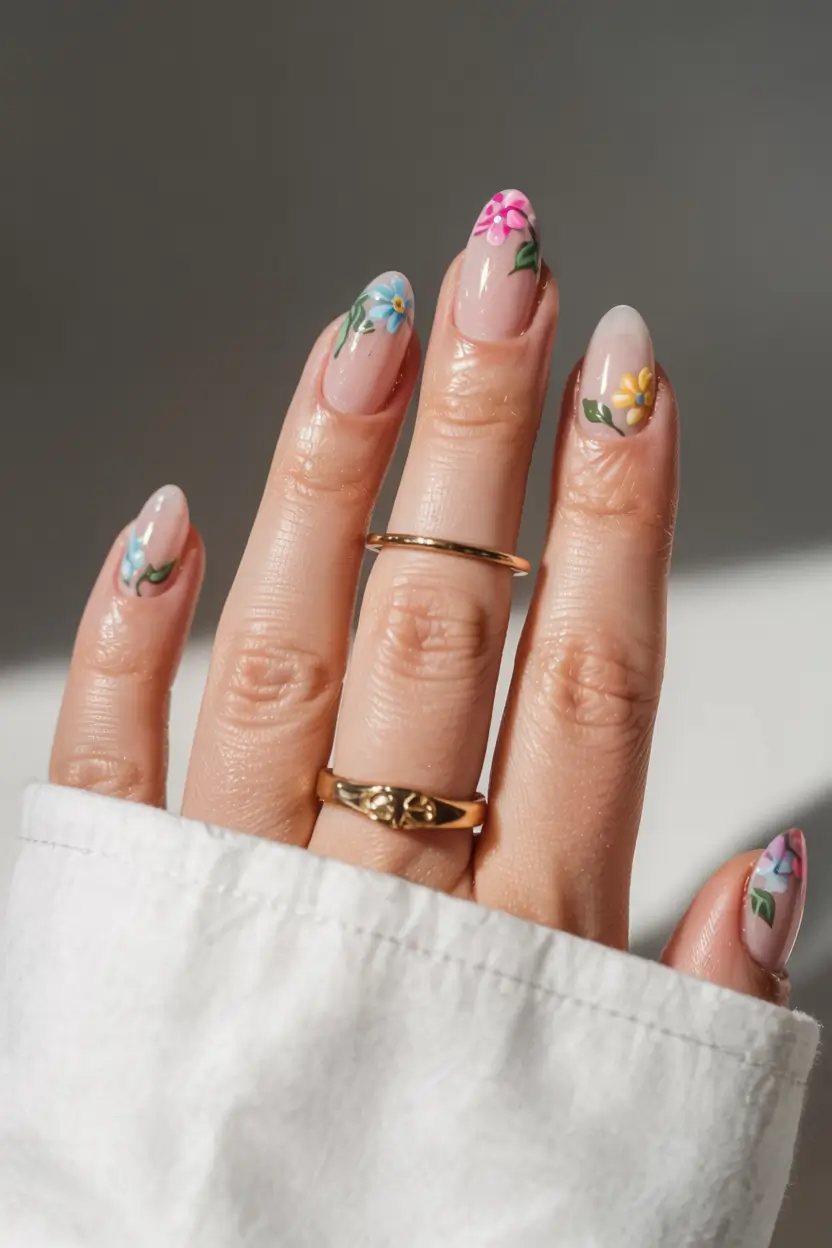
Use a jelly nude base, then go in with a dotting tool for the flowers, mixing soft pinks, yellows, and blues. The leaves can be added with a fine brush in muted green.
With designs like this, don’t overplan. Let each flower land where it feels right. That spontaneity gives it the carefree energy of a spring day.
If your graduation feels more like a celebration than a ceremony, this is the one. It’s light, happy, and a little nostalgic.
Muted Lavender for a Soft Statement
And then there’s this: no art, no shimmer, no extras. Just a perfectly shaped almond nail in a calming lavender shade. It’s minimal but far from boring. Honestly, it’s magnetic.
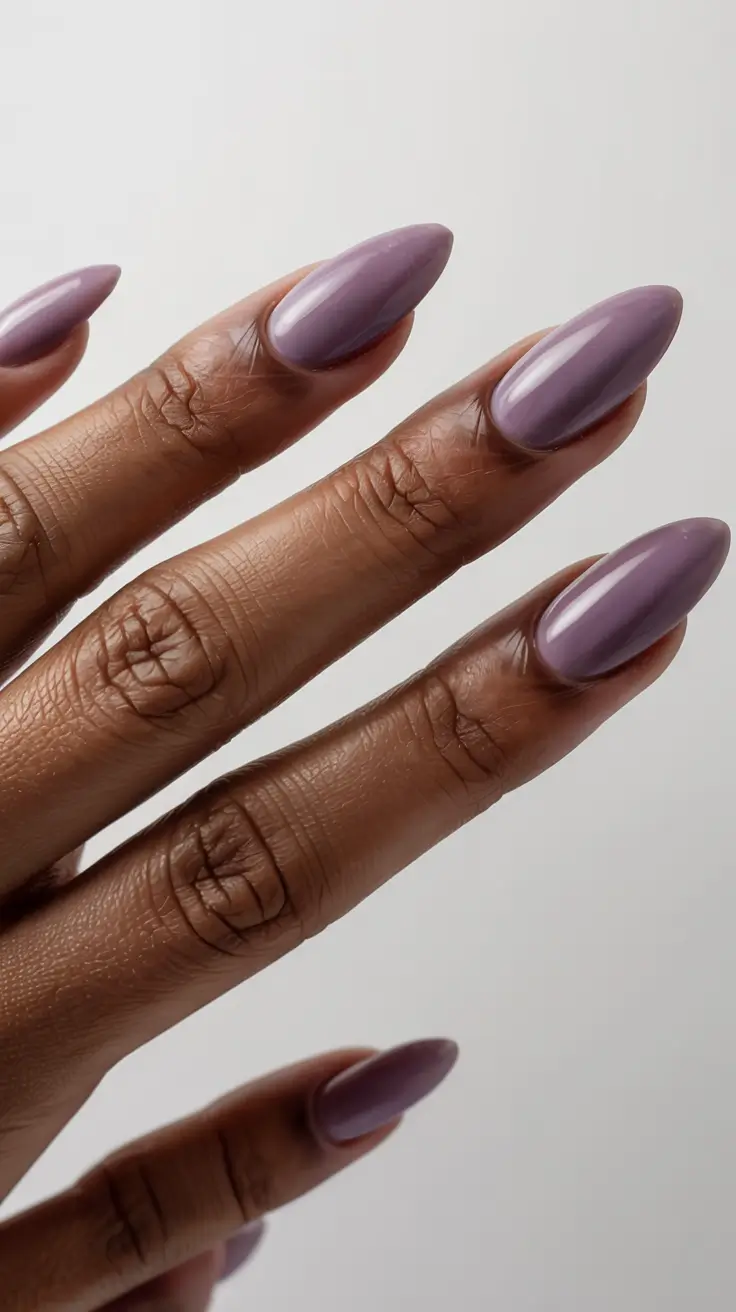
For this one, I’d choose a gel polish like OPI “Do You Lilac It?” or a slightly muted version for a more grown-up feel. The finish is what matters most: ultra-glossy, smooth, and free of streaks.
It all comes down to prep. Clean cuticles, even shaping, and a flawless base. With a single color, every detail shows, so give yourself time.
I love this for anyone who wants to move away from neutrals without going too bold. It feels fresh, a little unexpected, and very now. It’s like quietly stepping into a new chapter with confidence.
Soft Pink French with Gold Sparkle Details
This one feels celebratory in a soft, feminine way. A glossy pink base is paired with curved white tips and subtle gold glitter accents that catch the light just enough.
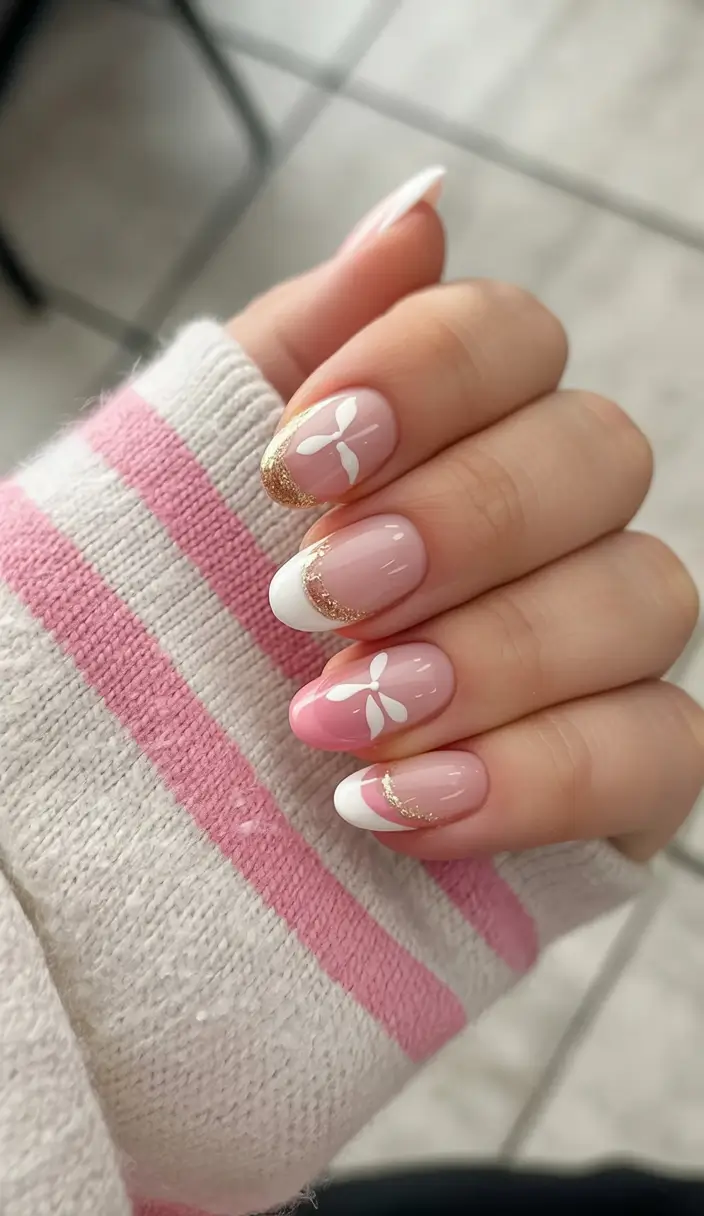
Recreate this with a builder gel in a natural pink, then use a creamy white for the tips, keeping them rounded and soft. Add the gold detail with fine glitter gel or a touch of foil, applied lightly along the curve.
Balance is what matters. Too much glitter and the delicate feel is gone. A whisper of it looks intentional and polished.
This is the kind of manicure that feels like a quiet celebration. It isn’t loud or overdone, but it’s special enough for the moment.
Soft Pink with Graphic Black Graduation Accent
And finally, something unexpected. A soft pink base, glossy and clean, paired with a bold black graphic accent that subtly nods to graduation. Minimal, with a bit of edge.
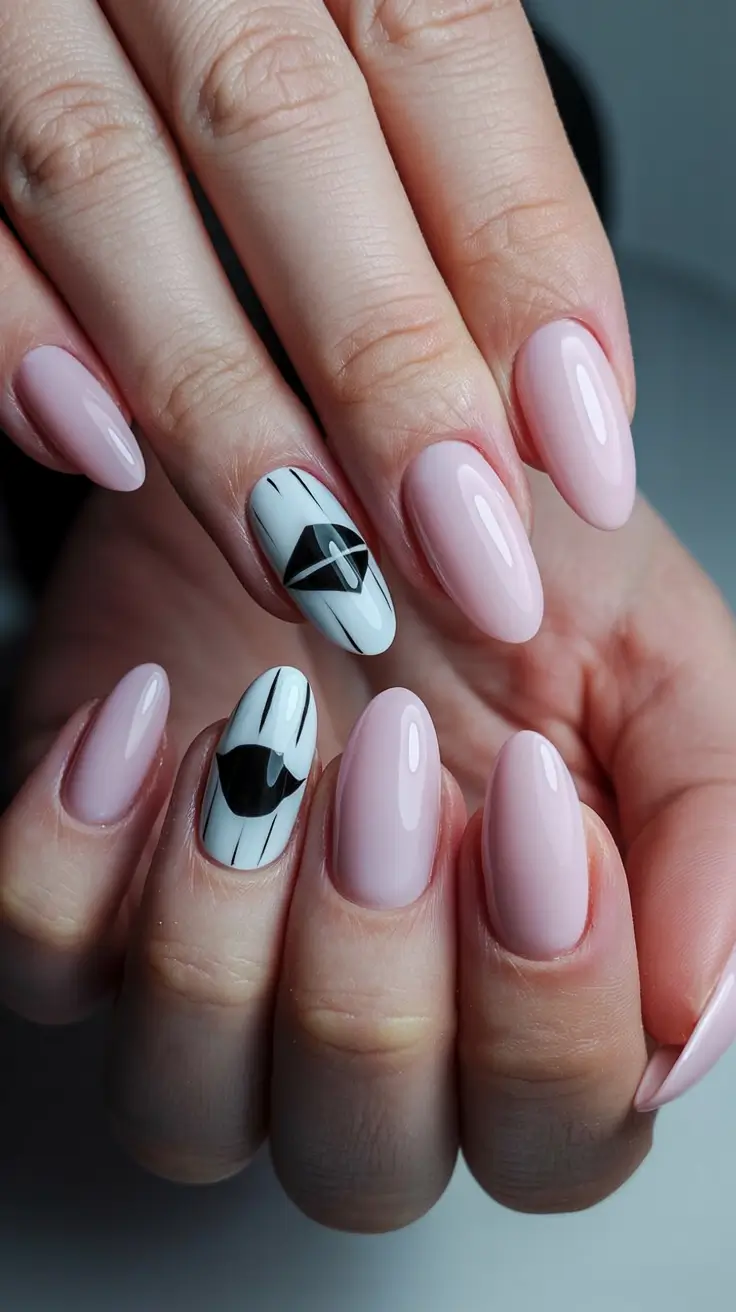
For this, use a neutral pink gel for the base and a fine liner brush with black gel for the graphic detail. Clean lines are everything here.
Less is more. Keep the design focused on one or two nails so it stays intentional rather than busy.
This feels like confidence. You’re ready for what’s next and not afraid to show a little personality as you step into it.
Almond French with Tiny Floral Details
If classic French tips got a soft, romantic update, it would look like this. The same clean white tips, paired with tiny, almost hand-drawn florals that feel fresh and a little whimsical.
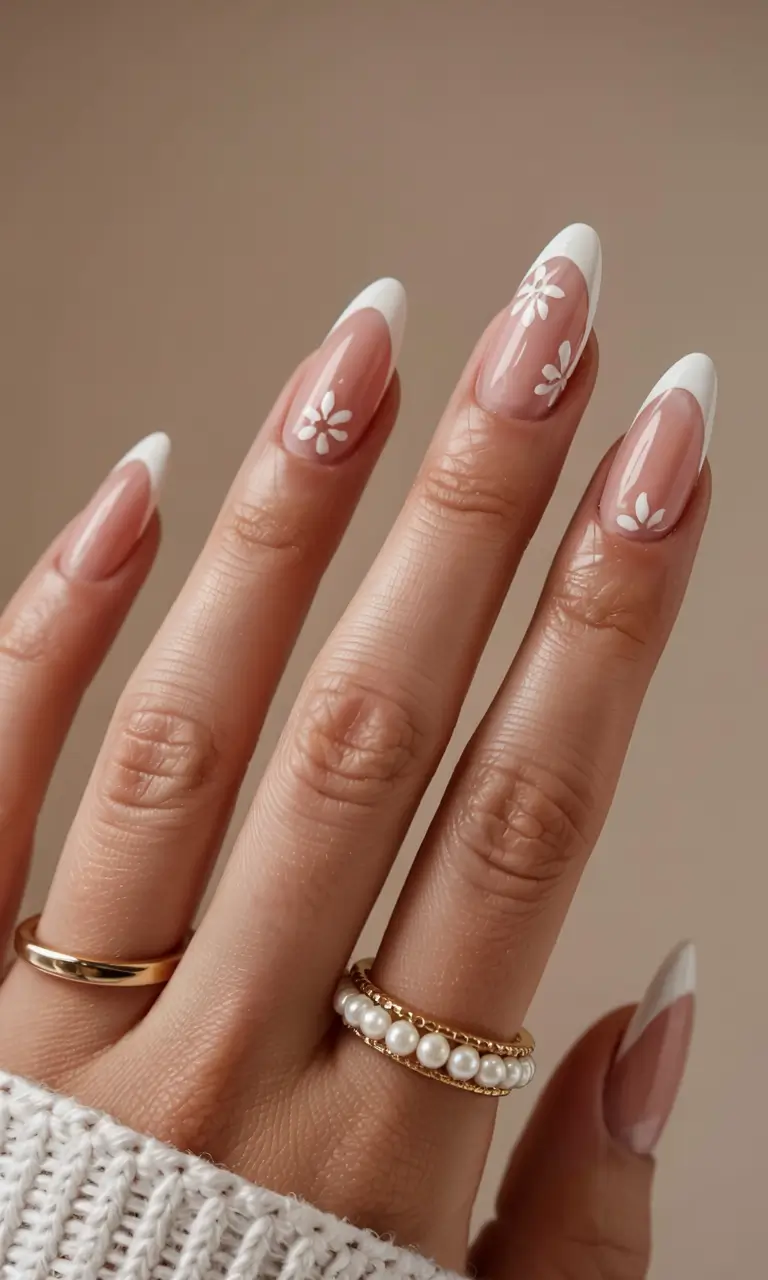
Start with a neutral, sheer, glossy base. Then create a soft French tip that’s slightly thinner than the traditional version. Add the flowers with a dotting tool and a micro brush, keeping them small and spaced out.
With designs like this, restraint is everything. Not every nail needs a flower. Let a couple of them breathe. That’s what keeps it modern instead of busy.
This design has a very “main character” energy for me. It’s subtle and feminine but intentional. These nails don’t shout, yet they’ll get compliments all day.
Glossy Pink Fade That Feels Like Summer
This one has pure mood. A soft ombré begins with a natural base and melts into a juicy pink at the tips. It feels fresh and glowy, the kind of manicure that says, “Yes, I just graduated and I’m stepping into something new.”
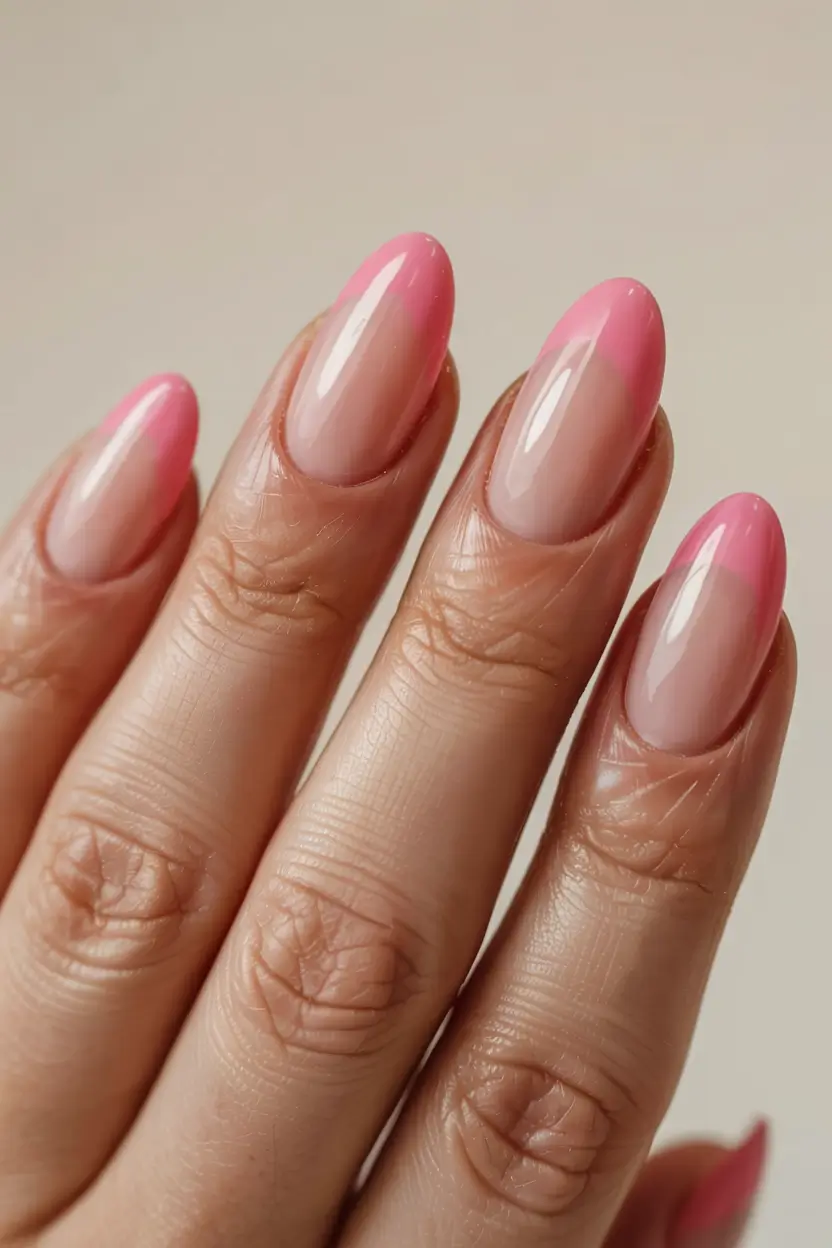
I usually create this gradient with a sponge or airbrush, using two gel shades. OPI “Bubble Bath” works as the base and a vibrant pink like “Strawberry Margarita” for the tips. Blend, blend, blend, and avoid harsh lines.
If you’re doing this at home, my honest advice is not to rush the fade. Build it slowly in thin layers. Celebrity nail artist Betina Goldstein often says patience is what separates DIY-looking nails from editorial ones, and she’s right.
This is the kind of look that photographs beautifully. It catches the light, flatters nearly every skin tone, and feels more playful than a typical neutral. It’s ideal if you’re in between phases, still classic but ready for a little color.
Classic French, But Sharper
French tips aren’t basic anymore, and this version proves it. It’s cleaner, sharper, and far more flattering. The white is crisp, the base is sheer and glossy, and the almond shape is slightly elongated, which makes your fingers look longer and more refined right away.
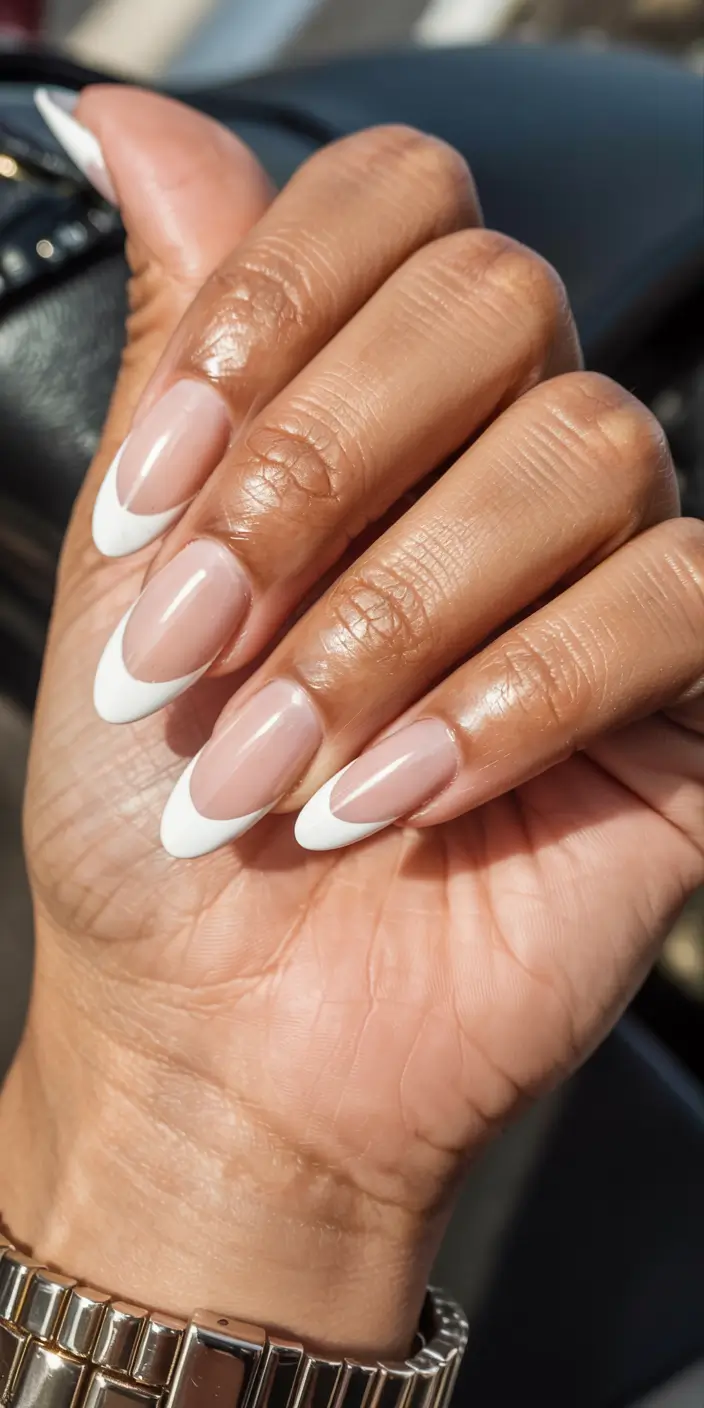
I’ve recreated this at home more times than I can count, and the biggest lesson is that the curve decides everything. The tip can’t be too thick or too flat. Ultra-pigmented whites from The GelBottle Inc. or Bio Sculpture make the clean edge far easier to draw in one smooth stroke.
If you’re doing it yourself, try turning your hand upside down while you paint the tip. It follows the natural arc of the nail without much effort. It sounds odd, but it really helps.
This is one of those graduation nails ideas for 2027 that never looks dated. Years from now you’ll scroll past the photos and think, “Okay, she clearly knew what she was doing.”
