
I keep seeing pearl nails everywhere this winter, and not the fussy kind. It’s a softer, more wearable take: milky bases, subtle shimmer, a few well-placed accents. I was skeptical at first, but after trying a few, I get the appeal.
This roundup has 38 takes on Winter Pearl Nails, from barely-there sheers to full-on stiletto drama. Whether you’re a short-nail minimalist or a long-coffin maximalist, there’s something here. I’ve tested enough of these to know which ones chip by day three and which ones survive a week of typing. Consider this your honest guide to the trend.
Subtle Pearlescent Square Nails
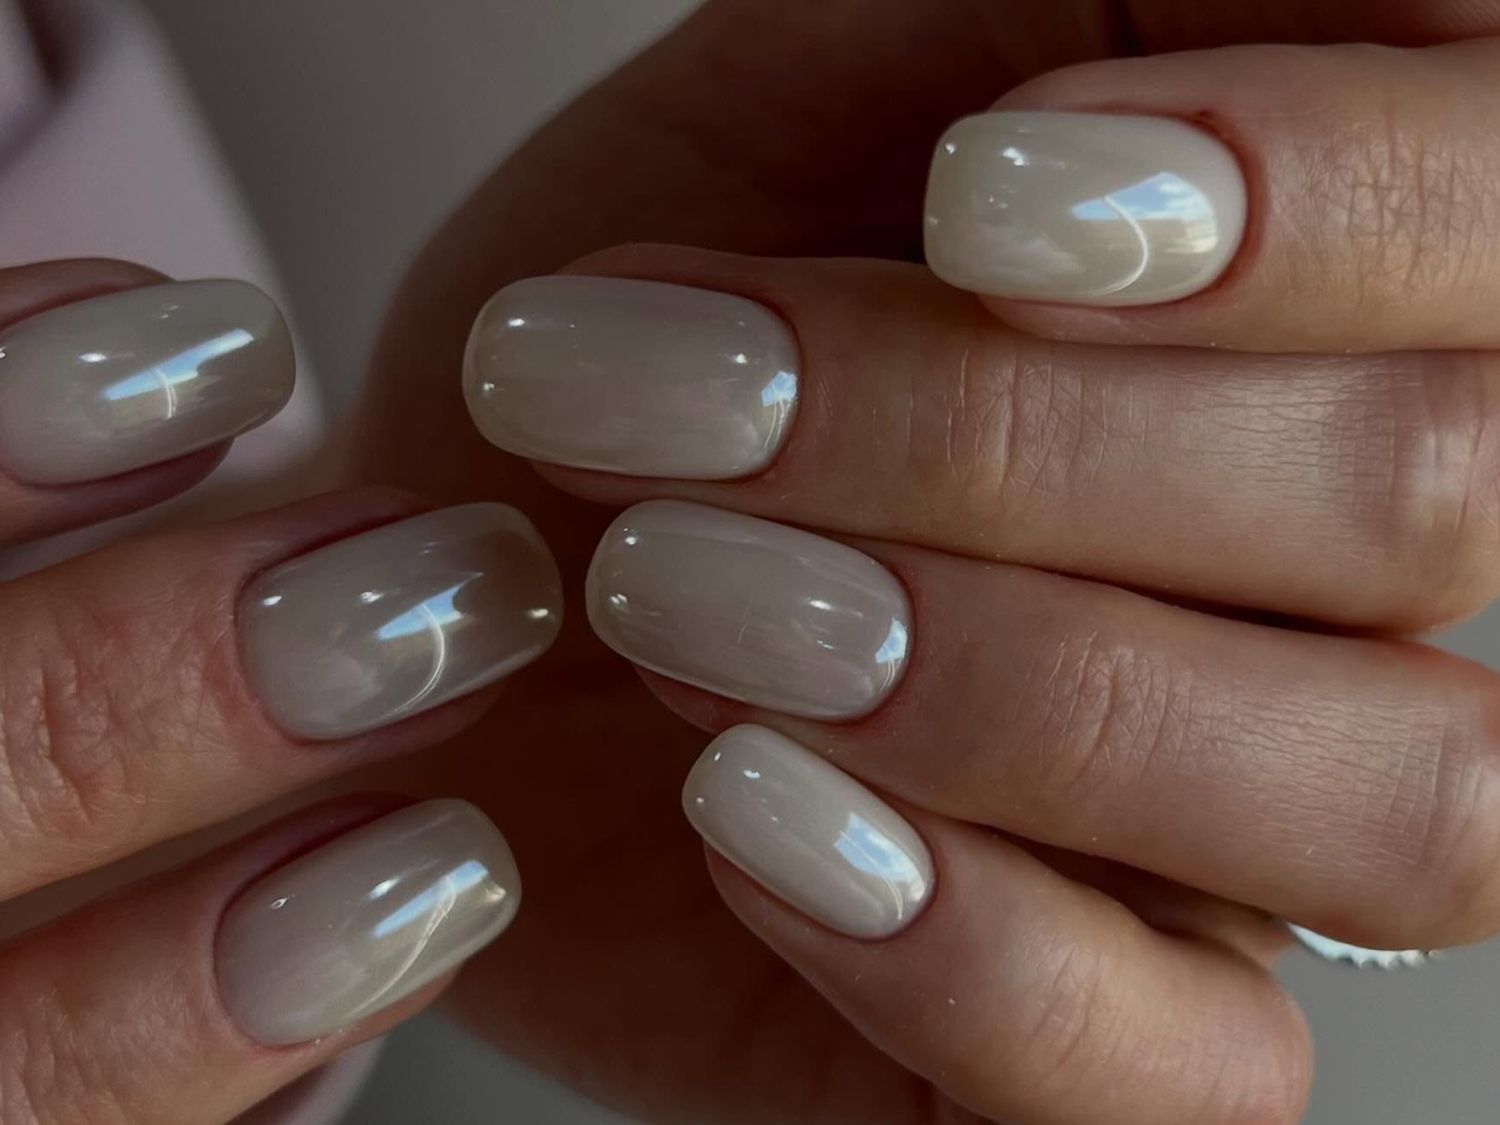
This is the shade that makes you look at your own nails and wonder why you ever paid for beige before. The pearlescent square nails in a light beige base catch the light like a very polite disco ball. Not flashy, not flat. Just enough shimmer to remind you it is winter and your nails can still look alive. The square shape keeps it grounded. No frills, no fuss, just a clean line and a finish that says you thought about it. You did.
Iridescent Pearlescent Oval Nails
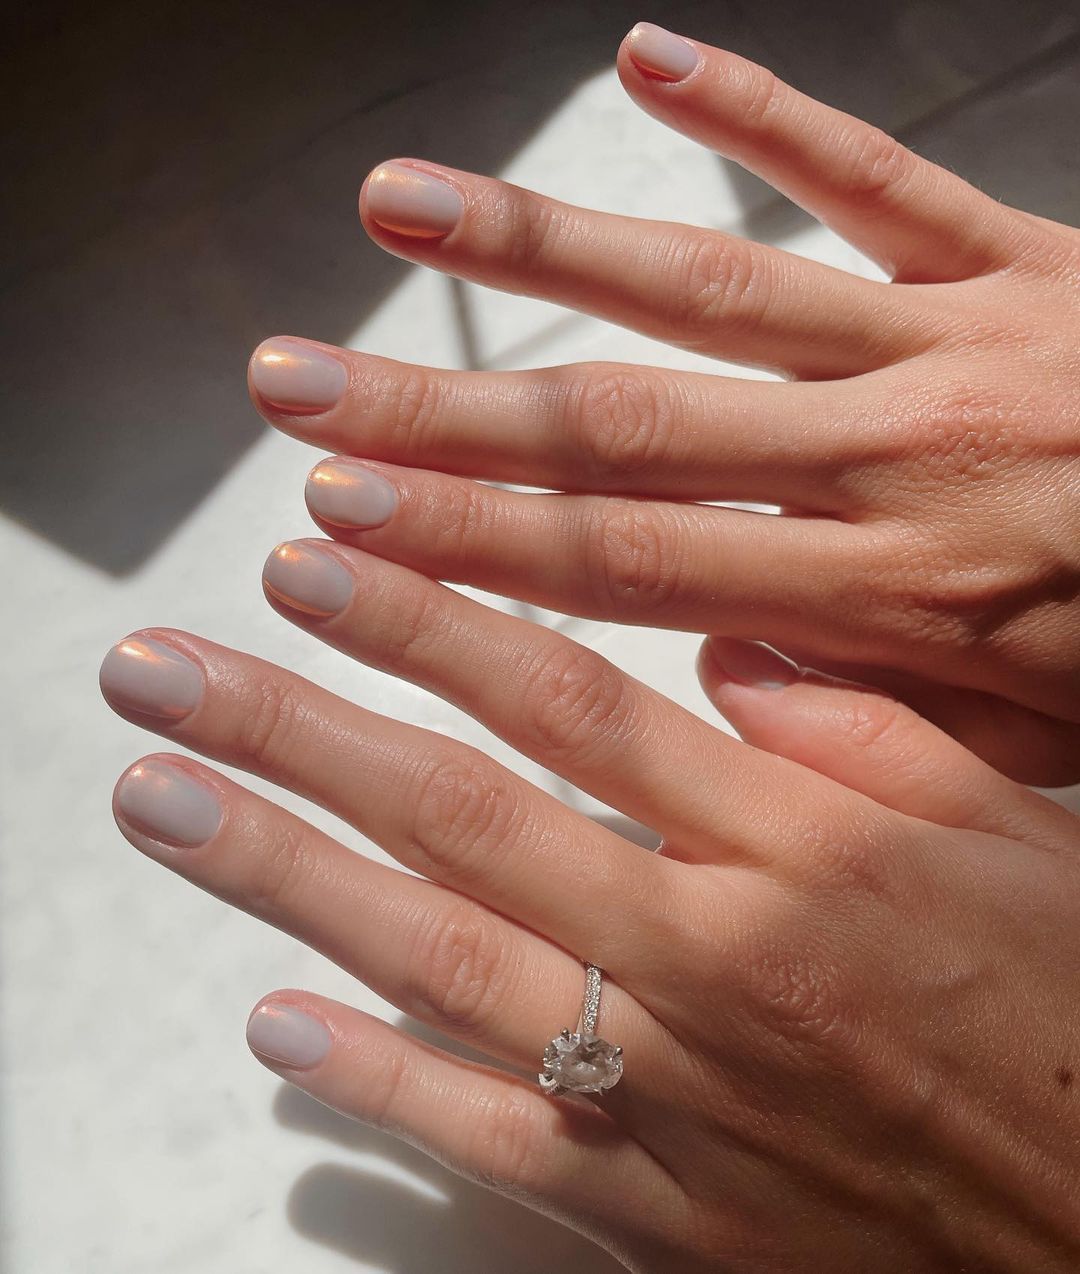
Can a nail color actually shift moods depending on the light? These iridescent oval nails do. The color shifts from a soft pink to a whisper of blue to something that looks almost silver in the car. Two weeks in, the shimmer is still strong. Tip wear shows as a slight dullness at the edge, nothing a top coat touch-up would not fix. The oval shape helps — no sharp corners to catch on sweater cuffs. I wore these through a week of typing and one unfortunate run-in with a cardboard box. Still intact. Still shifting.
Cool Grey Pearlescent Shimmer Nails
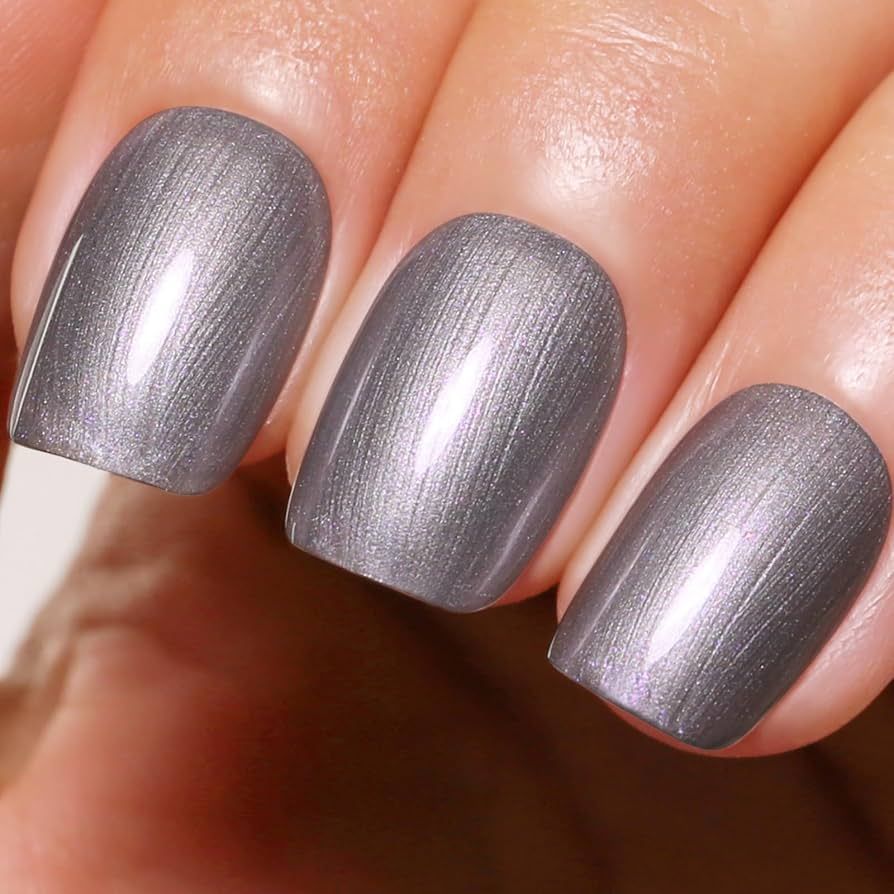
Best grey I have tried this season. Not flat, not dark, not that chalky grey that makes your hands look tired. This one has a pearlescent shimmer that lifts the whole thing. The technique matters. Tell your tech you want a sheer grey base, then a thin layer of pearl powder buffed in before the top coat. Skip the chrome step. The result is a soft glow, not a mirror. Ask for grey pearlescent nails with cool undertones. If your base leans warm, the grey reads muddy. Keep it cool. Keep it clean.
Pale Blue Mint Pink Iridescent Nails
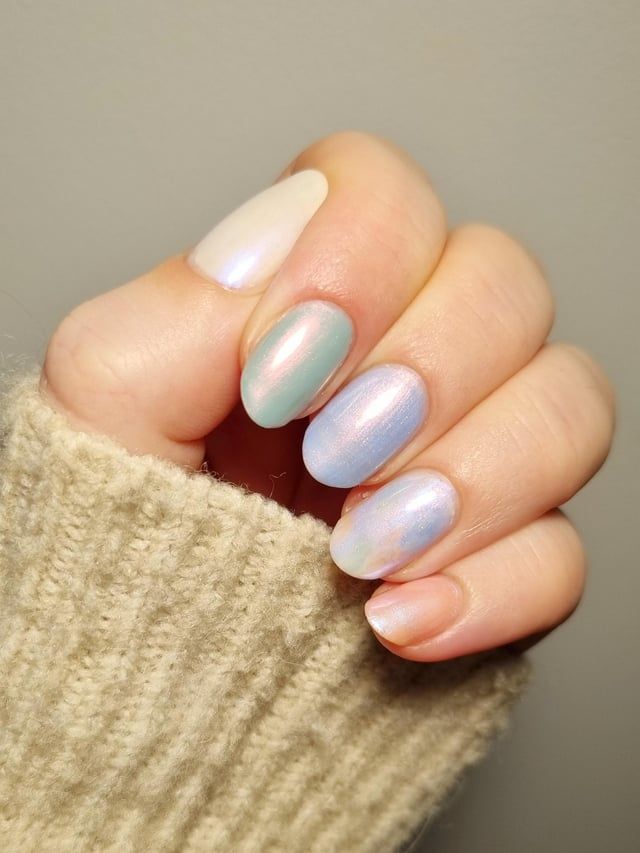
Who can wear these shifting pastels? Honestly, almost anyone. The pale iridescent nails with pastel iridescent shifts read soft on fair skin and bright on deeper tones. The trick is the base. If your undertones are warm, pick a mint that leans yellow, not blue. Cool undertones? Go for the pale blue. The pink sits in the middle and works for both. The iridescent overlay does the heavy lifting. It catches light and distracts from any mismatch. Short oval keeps it wearable. Long would be too much. Trust the short oval.
Pale Pink Marble Pearlescent Swirls
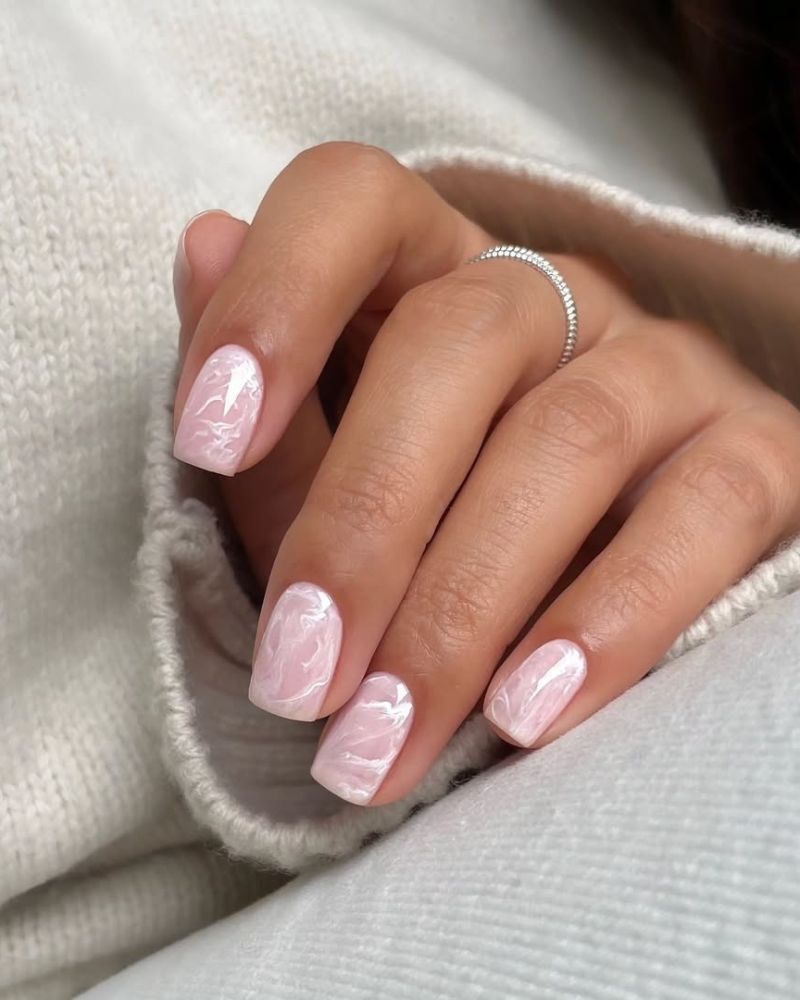
Marble at home is a gamble. This one is worth the risk. The marble pearlescent swirls on a pale pink base look complicated but the technique is simple. Paint the base, let it dry. Drop a tiny amount of white polish onto a silicone mat, dip a thin brush, and drag lines across the nail. Do not overwork it. Two passes, maybe three. The pearlescent finish hides the mistakes. I tried this on a Sunday afternoon. First nail was a mess. Second nail looked intentional. By the fifth, I was texting photos. Book the salon if you want perfection. Do it at home if you want to learn something.
Pale Pink Base Pearlized Accents
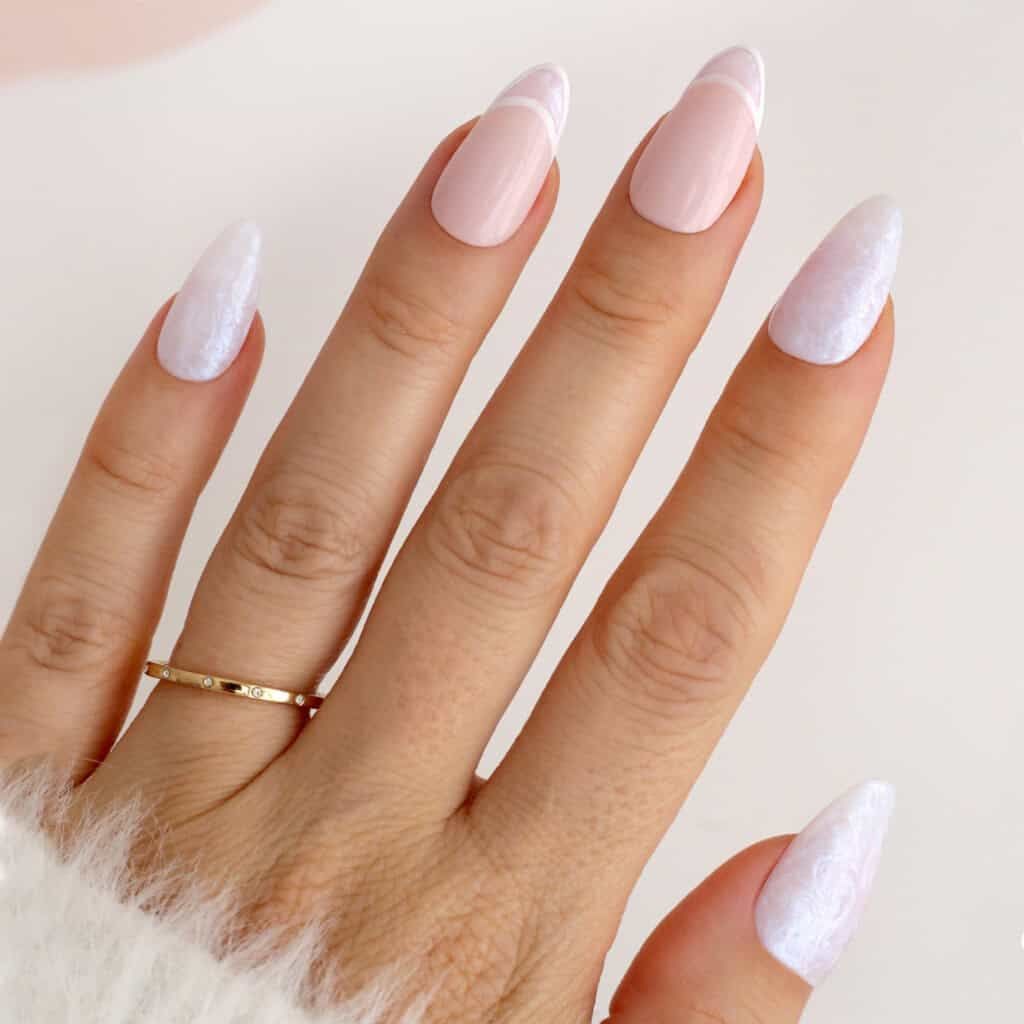
I didn’t expect to love the accent nails this much. The pale pink base is almost a whisper, then your ring finger and thumb switch to a white pearlized accent nails finish that catches every angle of light. It’s not loud, it’s deliberate. The pale pink base keeps the whole set from reading bridal, and the pearlized accents add just enough texture to stop it from being flat. Medium oval keeps it wearable for typing and contact lenses.
Shimmering Off-White Pearlescent Nails
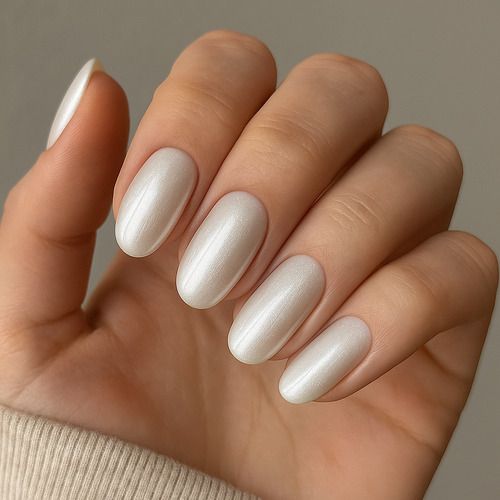
I’ll admit I rolled my eyes at another off-white. But this one has a soft glow that shifts in office lighting, and that changes everything. The off-white pearlescent nails read cream in warm light and icy white under fluorescents, which means you get two looks for one appointment. The shimmer does real work here: it hides the first day of tip wear, and by day 38 the color hasn’t yellowed, which is more than I can say for most white-adjacent shades.
Here’s the catch. Off-white shows every bit of dust and lint in the first hour, and if your top coat isn’t perfectly smooth, the shimmer catches on sweater snags. You’ll be filing a rough edge by day three. Worth it? For the week it’s pristine, yes.
Light Pearlescent White Stiletto Nails
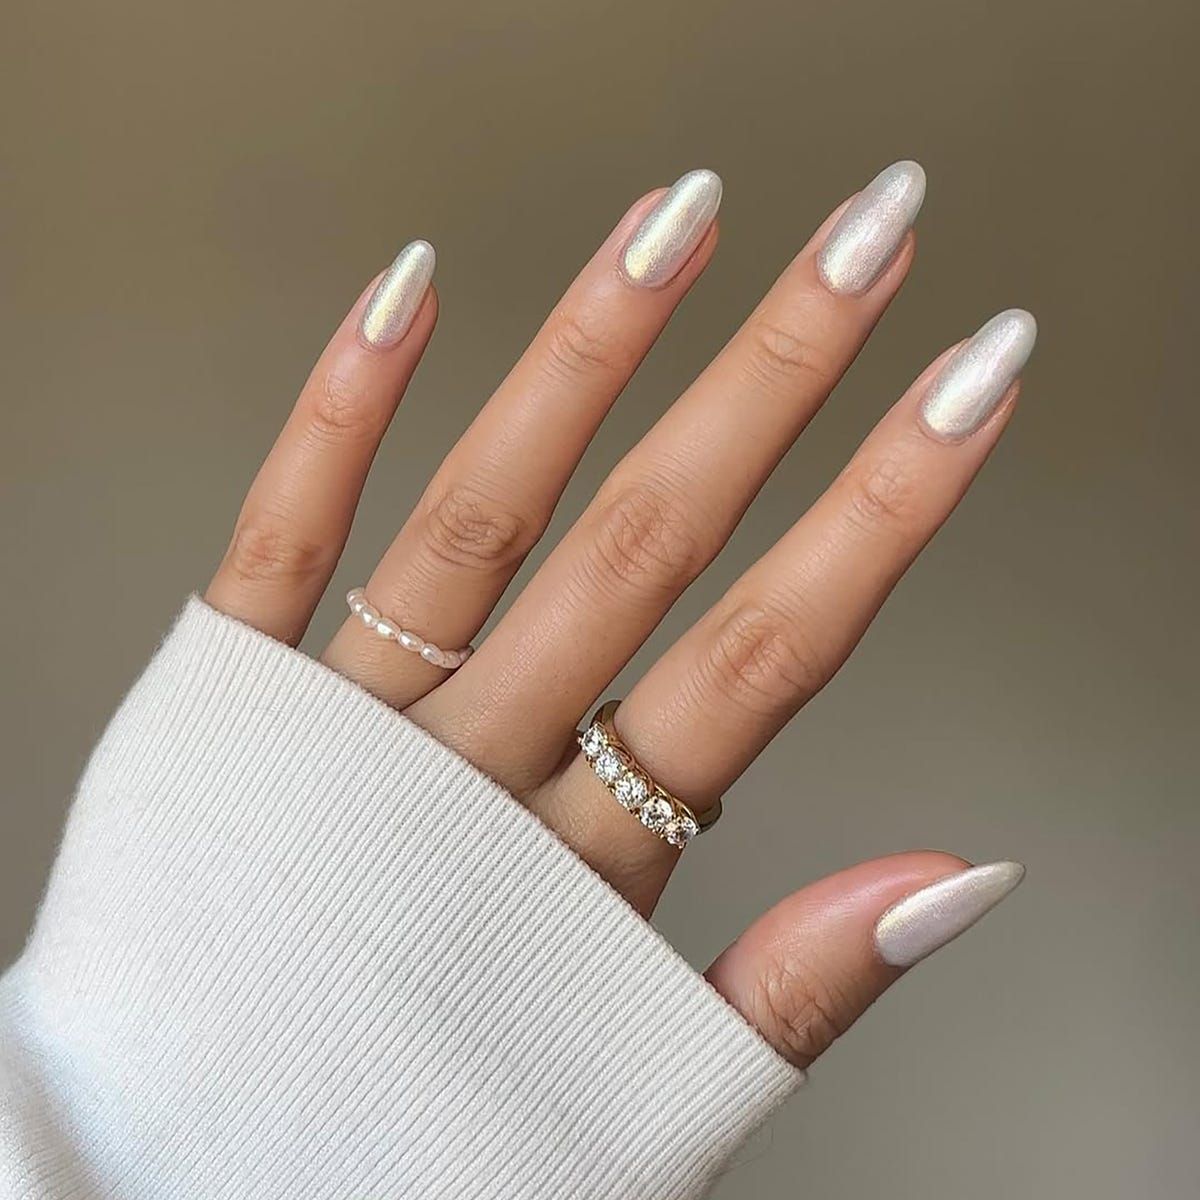
The difference between a basic white stiletto and pearlescent white stilettos is the difference between a photocopy and the original. Basic white goes flat and chalky, especially in winter light. This one has a subtle shimmer that throws pale blue and silver reflections, so the nail reads dimensional even at a distance. The stiletto shape needs that depth, otherwise it’s just a sharp white point. Medium length keeps it functional, and the shimmer means a small tip chip looks like a light reflection instead of a flaw.
Chrome Pearlescent Almond Nails
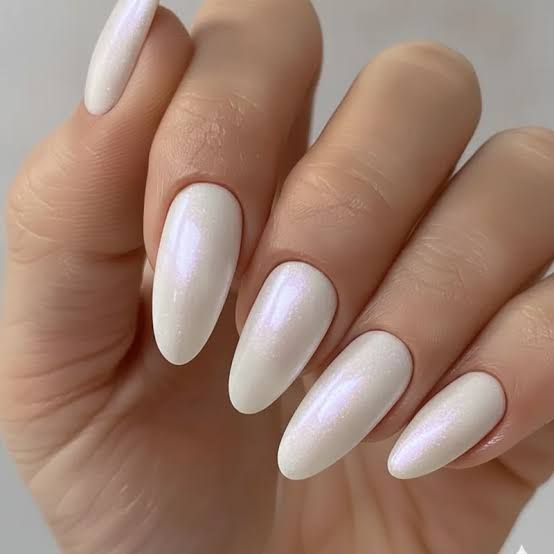
Can we talk about how chrome pearlescent almond nails actually behave? The intense shimmer reads silver in direct sun and warm pearl in shade, which is the whole point. But chrome is a diva. It shows every fingerprint by lunch, and if your nail tech doesn’t cap the free edge properly, it lifts by day six. Almond shape helps because there’s less sidewall to catch on pockets. The payoff is that shimmer that makes you look at your own hands mid-typing.
Shifting Chrome Almond Nails
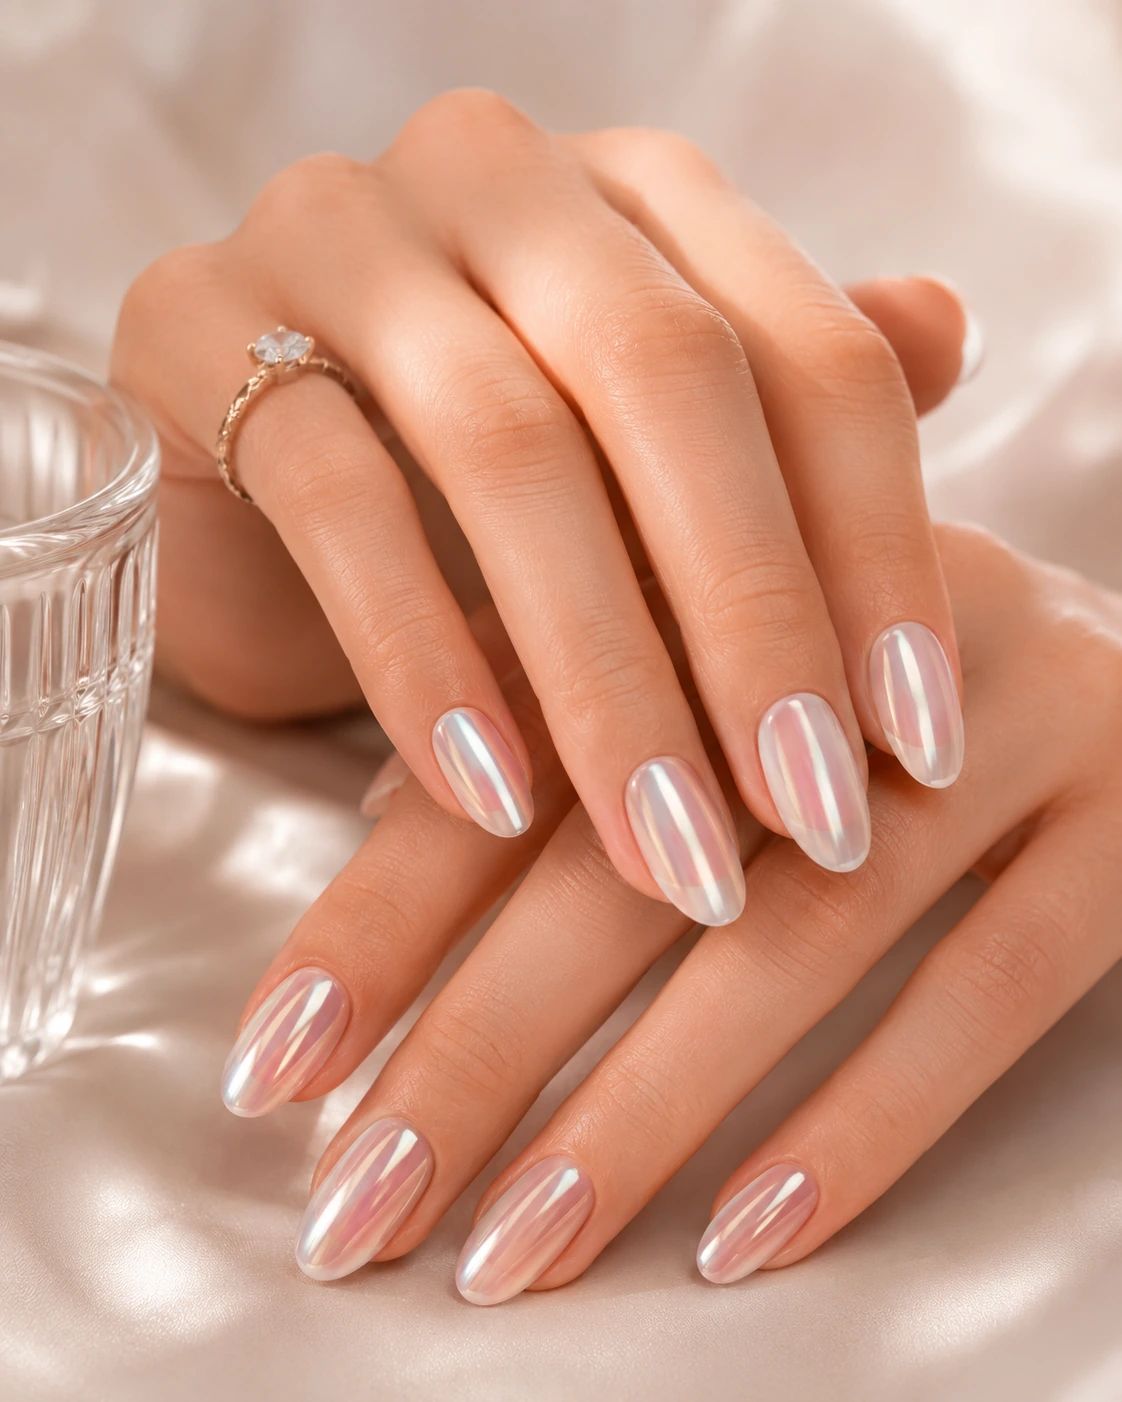
Okay, this one made me stop scrolling. The shifting chrome nails go from pale pink to icy blue to pearl white depending on the angle, and the color shifts are so smooth they look like liquid. Almond shape is the right call here because the curve catches the light from every direction, and the medium length keeps the effect readable without being overwhelming. This is the design that gets you compliments from strangers in the checkout line. It’s also the one that makes you late because you keep staring at your hands.
Long Pearled Stiletto Nails
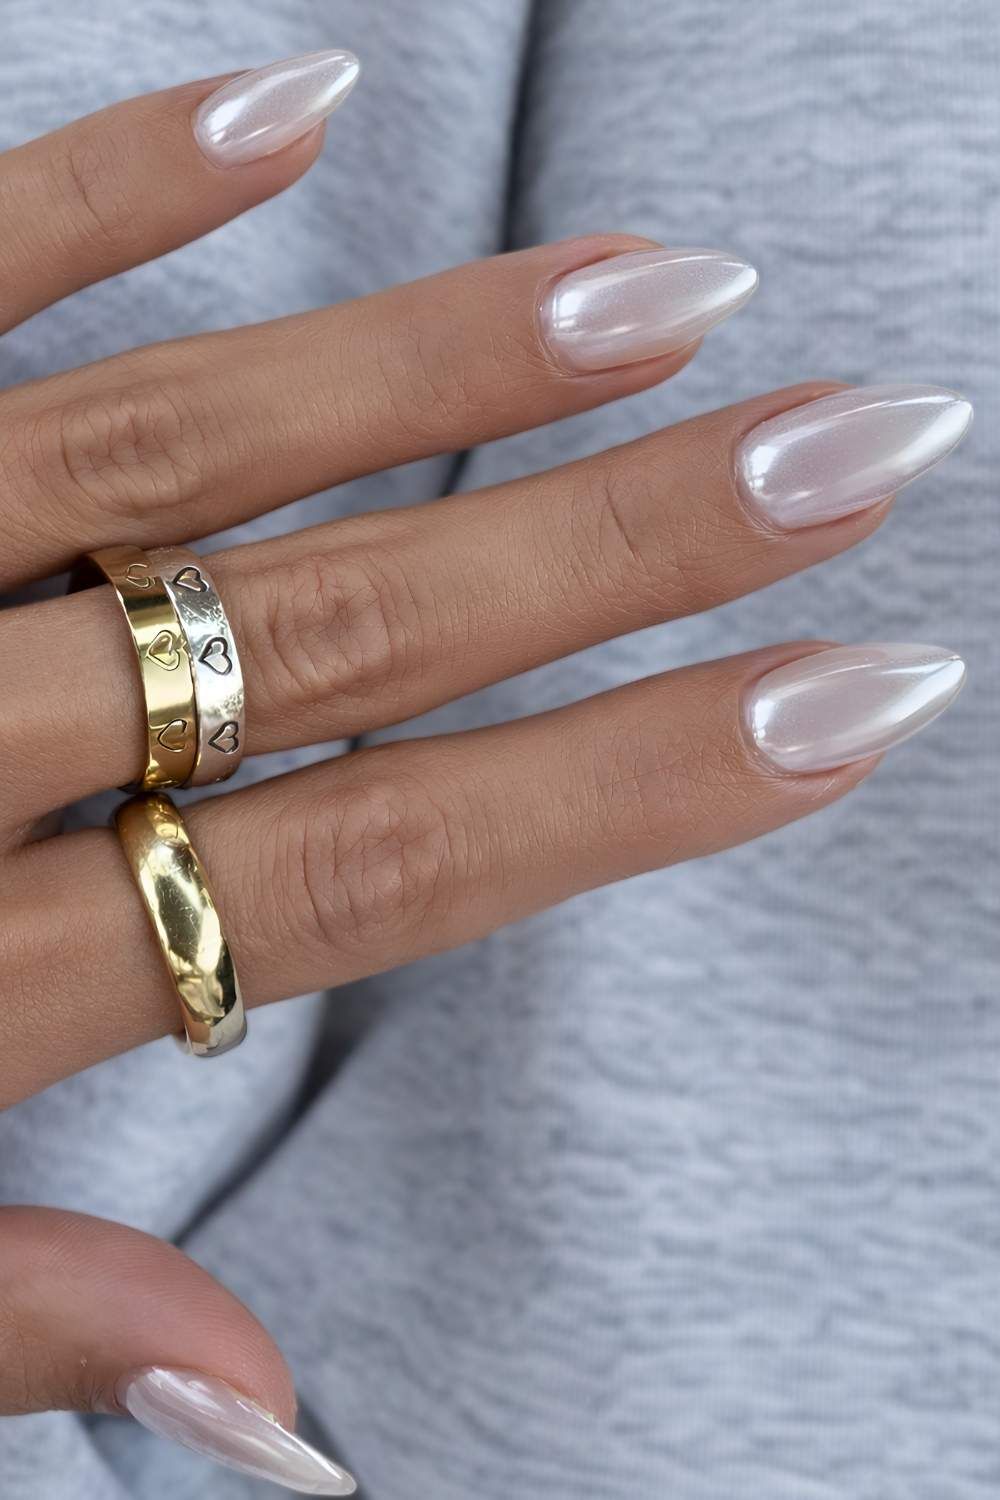
This is the definitive version of long pearled stilettos. The tech builds it in layers: a thin rubber base for structure, then a milky white gel, then a pearlized powder buffed in with a sponge applicator. The result is a classic pearl effect that shifts in light without looking like a chrome copy. The honest downside. At this length, the apex needs to be thick enough to support the tip, or you will break one off by day four. I had mine reinforced at the stress point, and they lasted the full two weeks. Removal is a soak-off ordeal, not a peel-and-go. Worth it for the way the sheen catches a winter sunbeam.
Translucent Pearlescent Stiletto Nails
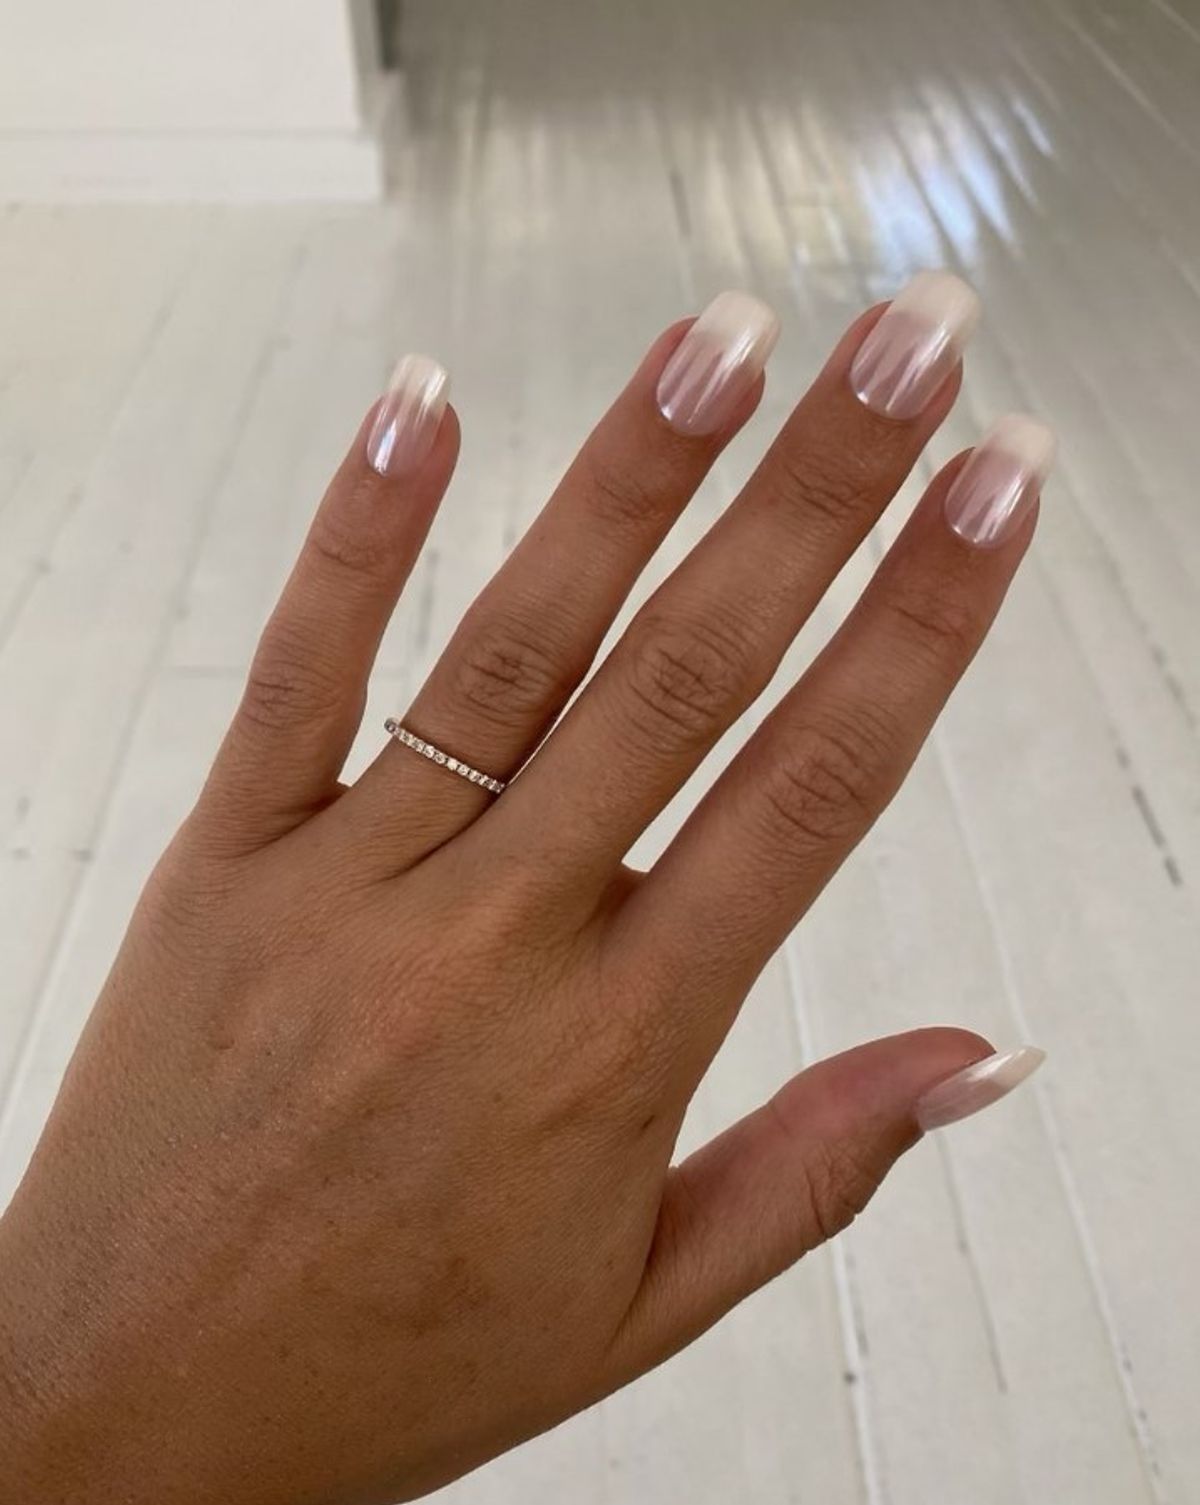
Translucent pearlescent nails are the winter equivalent of a foggy morning. The off-white base lets the natural nail line show through, and the pearlized top coat adds a subtle sheen that reads as frost, not glitter. It lands perfectly in December, especially against grey wool or a cream sweater. The translucent finish does show any imperfections in your nail bed, so prep is non-negotiable. But that milky glow against a dark coat sleeve. That is the whole point.
Pearl and Floral Applique Stilettos
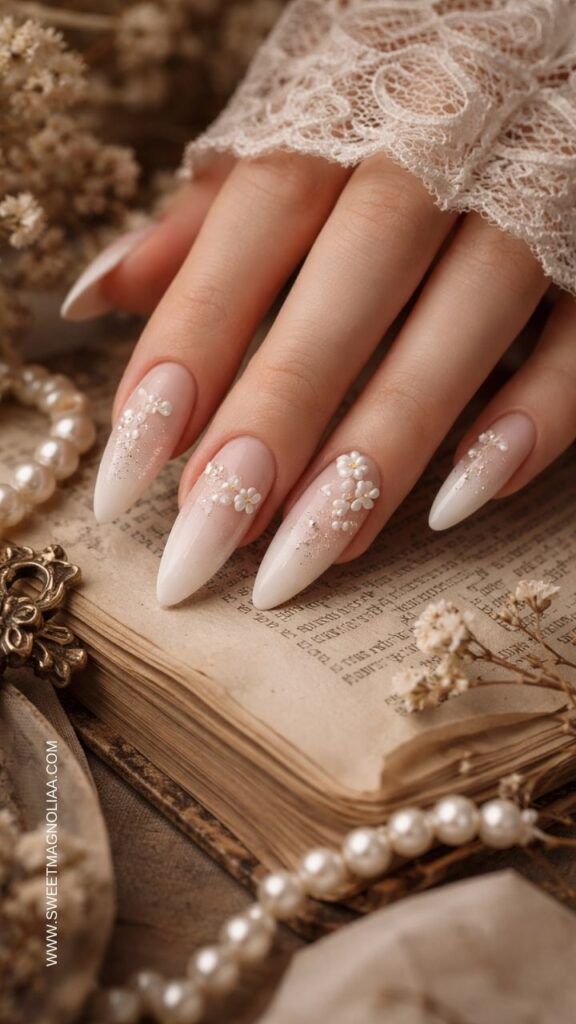
I looked at these and immediately thought, that is a wedding manicure. Pearl floral applique nails use tiny 3D floral pieces and small pearls applied to a sheer pink-to-white gradient. The flowers sit flat enough that they do not catch on every sweater thread, which surprised me. The glitter accents on the other nails tie the set together without competing. It is intricate, delicate, and absolutely not for a week of typing emails. But for a single day, or a weekend of being photographed, it is the most romantic thing I have seen on a stiletto.
Pearl and Rhinestone Gradient Almonds
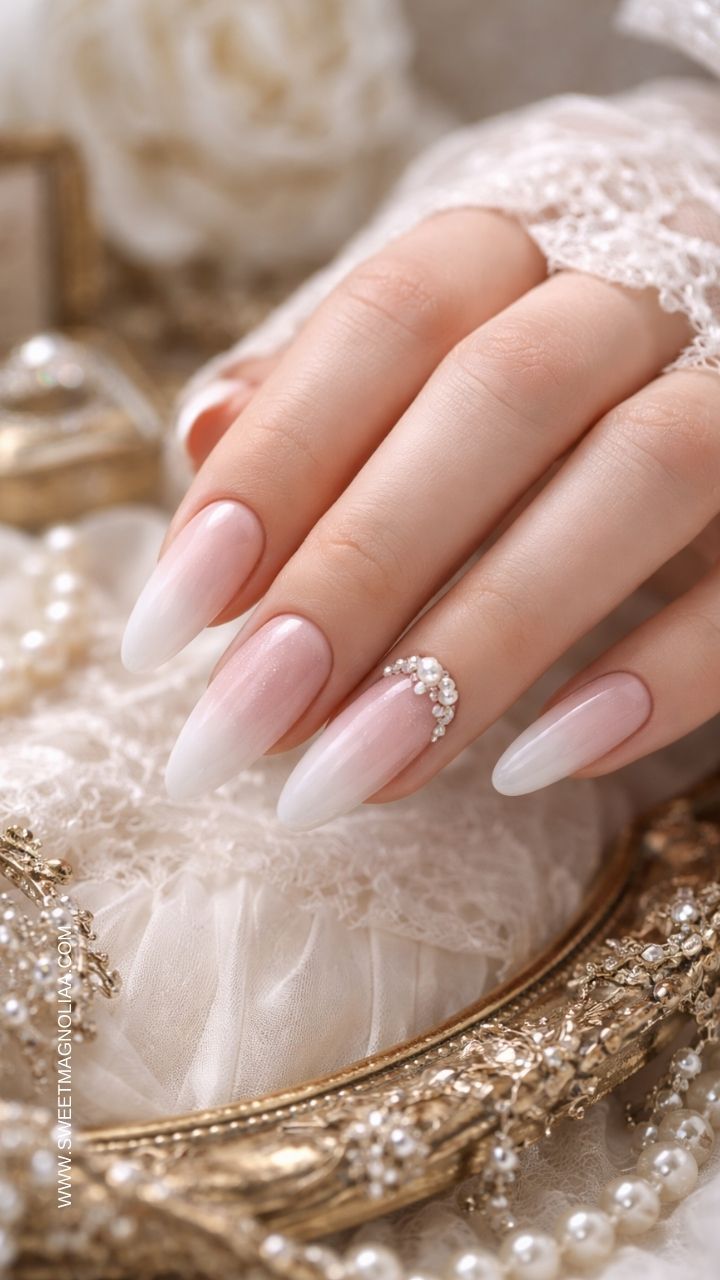
You can get close to this at home, but do not expect perfection on the first try. The pearl rhinestone gradient on the accent nail is built by placing the smallest pearls and rhinestones at the cuticle, then graduating to larger ones toward the tip. Use a dotting tool or a wax pencil, not your fingers. The base is a sheer pink-to-white gradient, and the rest of the nails stay clean. The trick is to let each layer of builder gel cure before adding the next stone, or they will slide into a clump. It took me two hours and a lot of patience. The result looked salon-grade, but I would still book it if you have an event.
Pearl and Rhinestone Stiletto Clusters
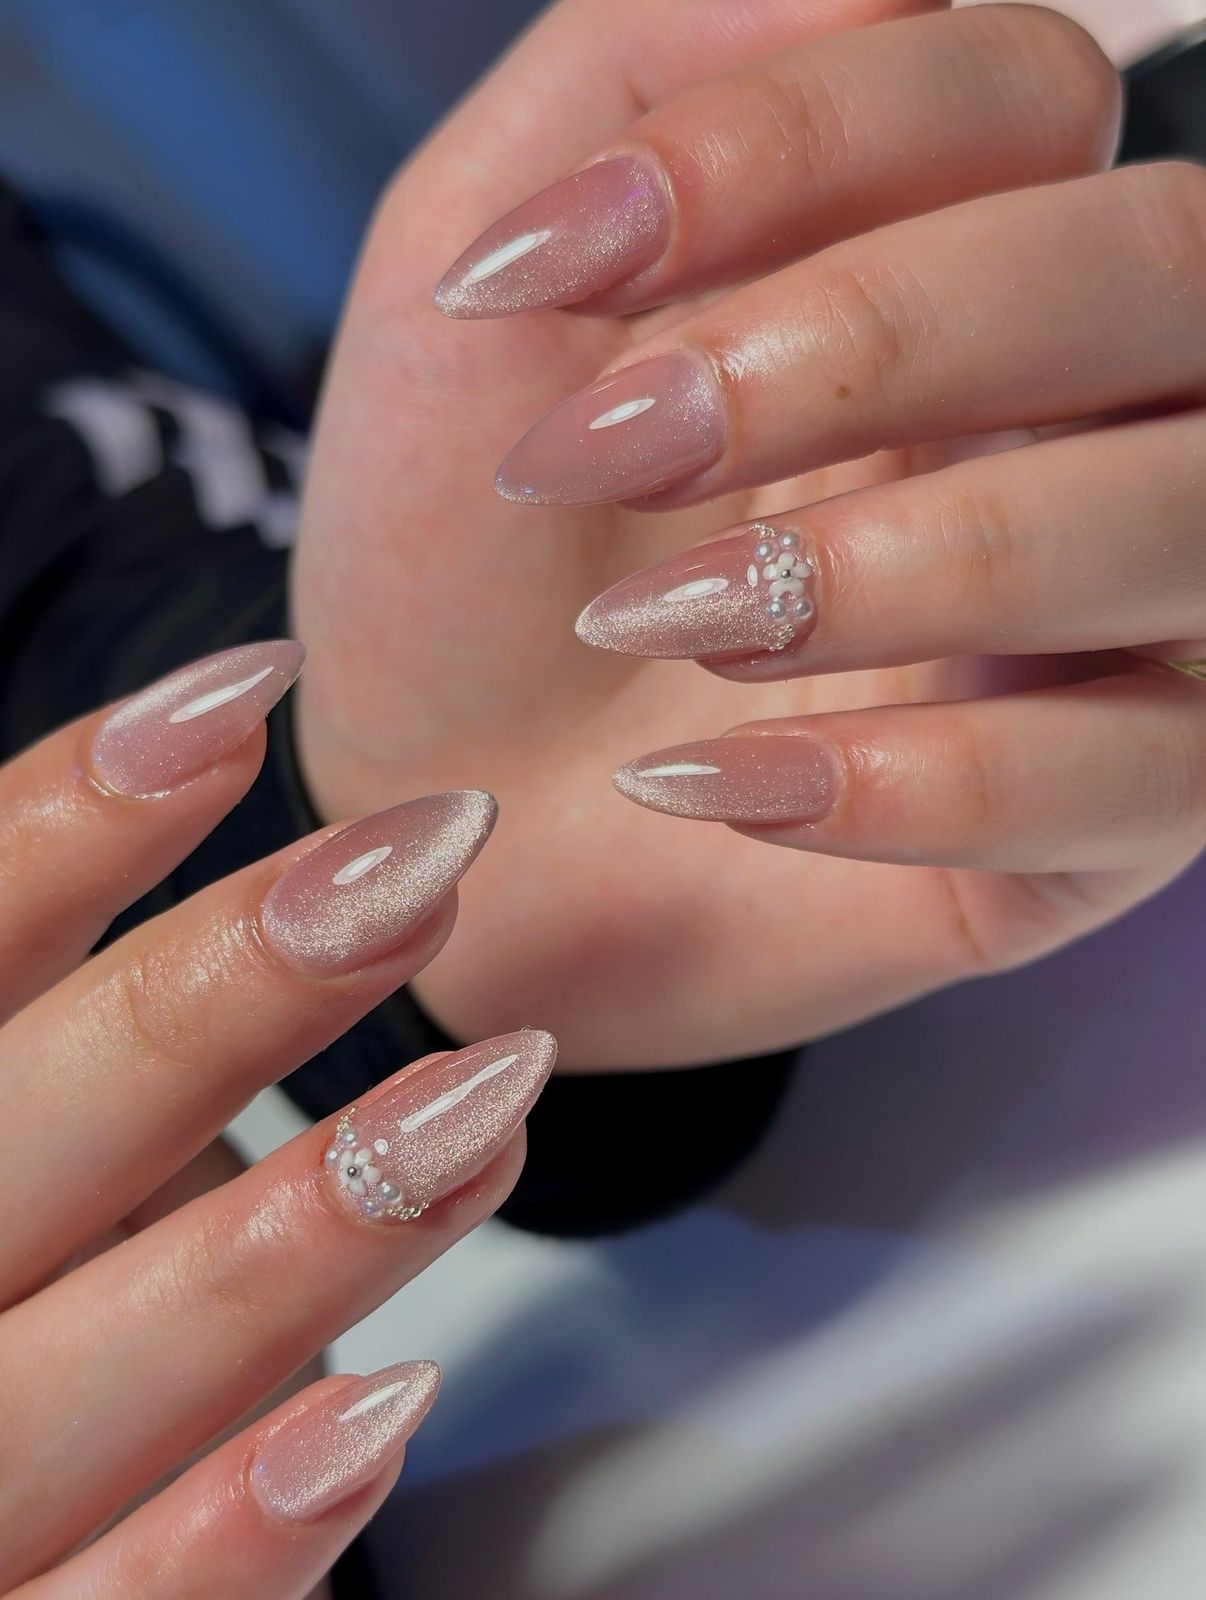
How do these pearl rhinestone stiletto clusters hold up when you actually live your life? The iridescent shimmer base hides the inevitable tip wear, which is smart. But the clusters themselves are a gamble. I lost one pearl by day three, and the rest needed a top coat re-seal by day five. They catch on hair, on knit cuffs, on the inside of pockets. If you are okay with a touch-up every few days, the effect is worth it. If you type for a living, skip this one.
Winter Art Stiletto with Pearls and Snowflakes
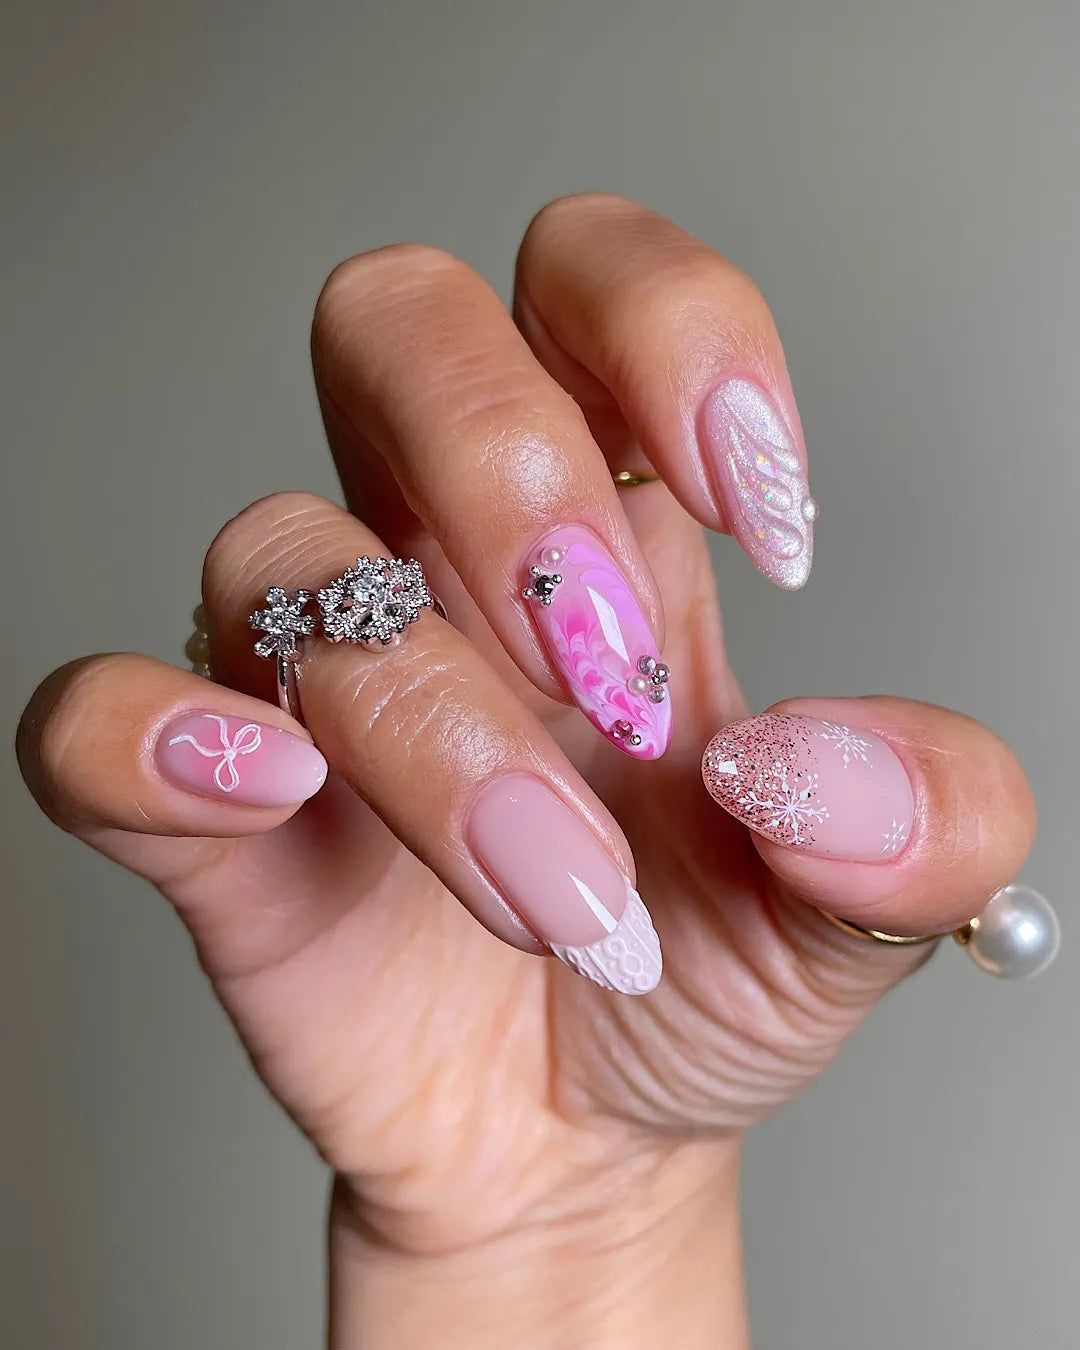
This is the one where the nail tech pulls out every tool in the kit. A medium stiletto carrying pearls, rhinestones, snowflake decals and a lace-like pattern all at once, and somehow it doesn’t read as chaos. The pink base keeps it soft, the silver and white motifs do the heavy lifting. The interplay between the snowflakes and the lace gives it that heirloom ornament feel, like something you’d hang on the tree if you weren’t wearing it. This is a winter art piece, not a daily driver. Book the consultation first, because not every tech has the patience for this level of detail. When it works, it works.
Cute Snowman Decal Nails
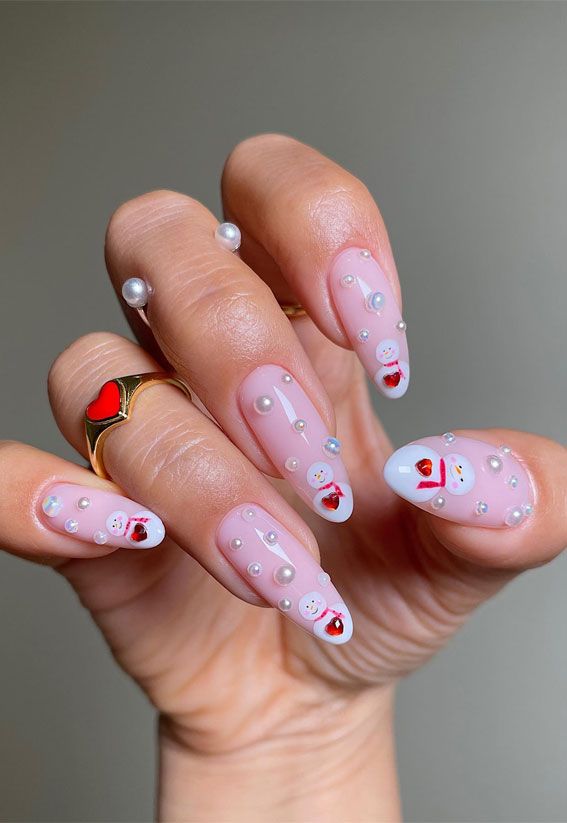
I did not expect to like snowman pearl nails this much. The sheer pink base keeps it from feeling like a child’s craft project, and the snowman decals are small enough that they read as charming instead of goofy. The red scarf detail is the smartest part, it gives the eye somewhere to land. These are festive without screaming about it.
Snowflake Crescent Moon Oval Nails
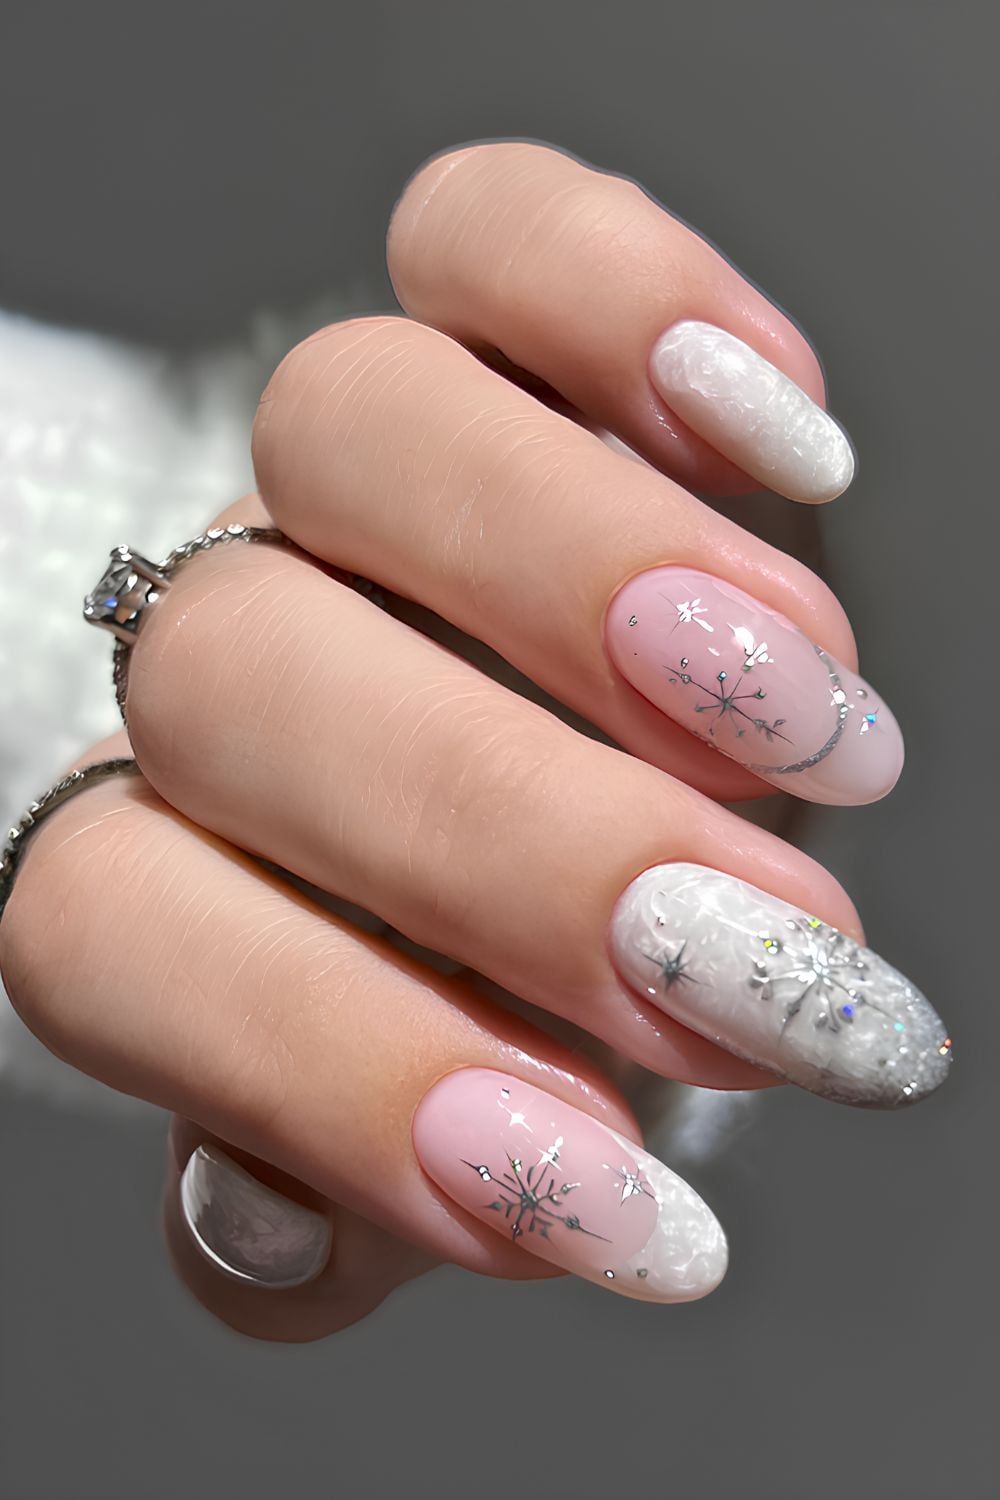
Can we talk about the precision this takes? A pale pink oval with a crescent moon cutout on one nail and a snowflake on the next, both outlined in tiny rhinestones. The negative space is doing the real work here, letting the winter theme breathe instead of crowding every nail. The honest downside: those rhinestones catch on everything. Knit sleeves, hair ties, the inside of a glove. Snowflake crescent moon nails look incredible for the first two days, then you start losing stones one by one. The remaining design still holds up, but the original vision gets a little quieter each week.
Shimmery White Snowflake Glitter Nails
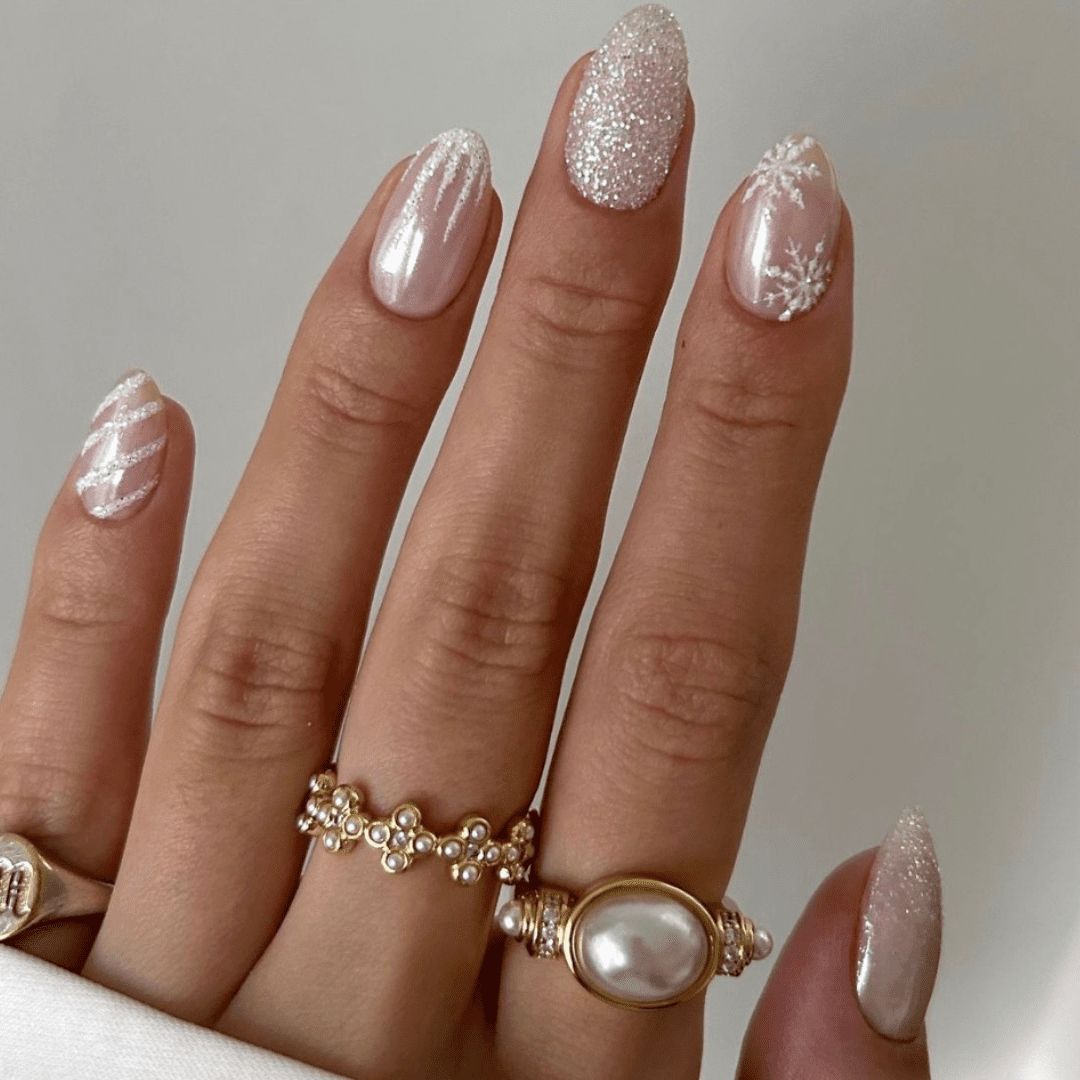
Every winter has that one snowflake design that tries too hard. This is not that one. The shimmery white base catches light like fresh powder, and the glitter is scattered, not caked on. The pearl accents are subtle enough that they don’t compete with the snowflake art. Compared to the full-coverage glitter sets that dominate December, snowflake glitter pearl nails feel like the quiet cousin who shows up and steals the whole party.
Pearl Snowflake Charm French Tips
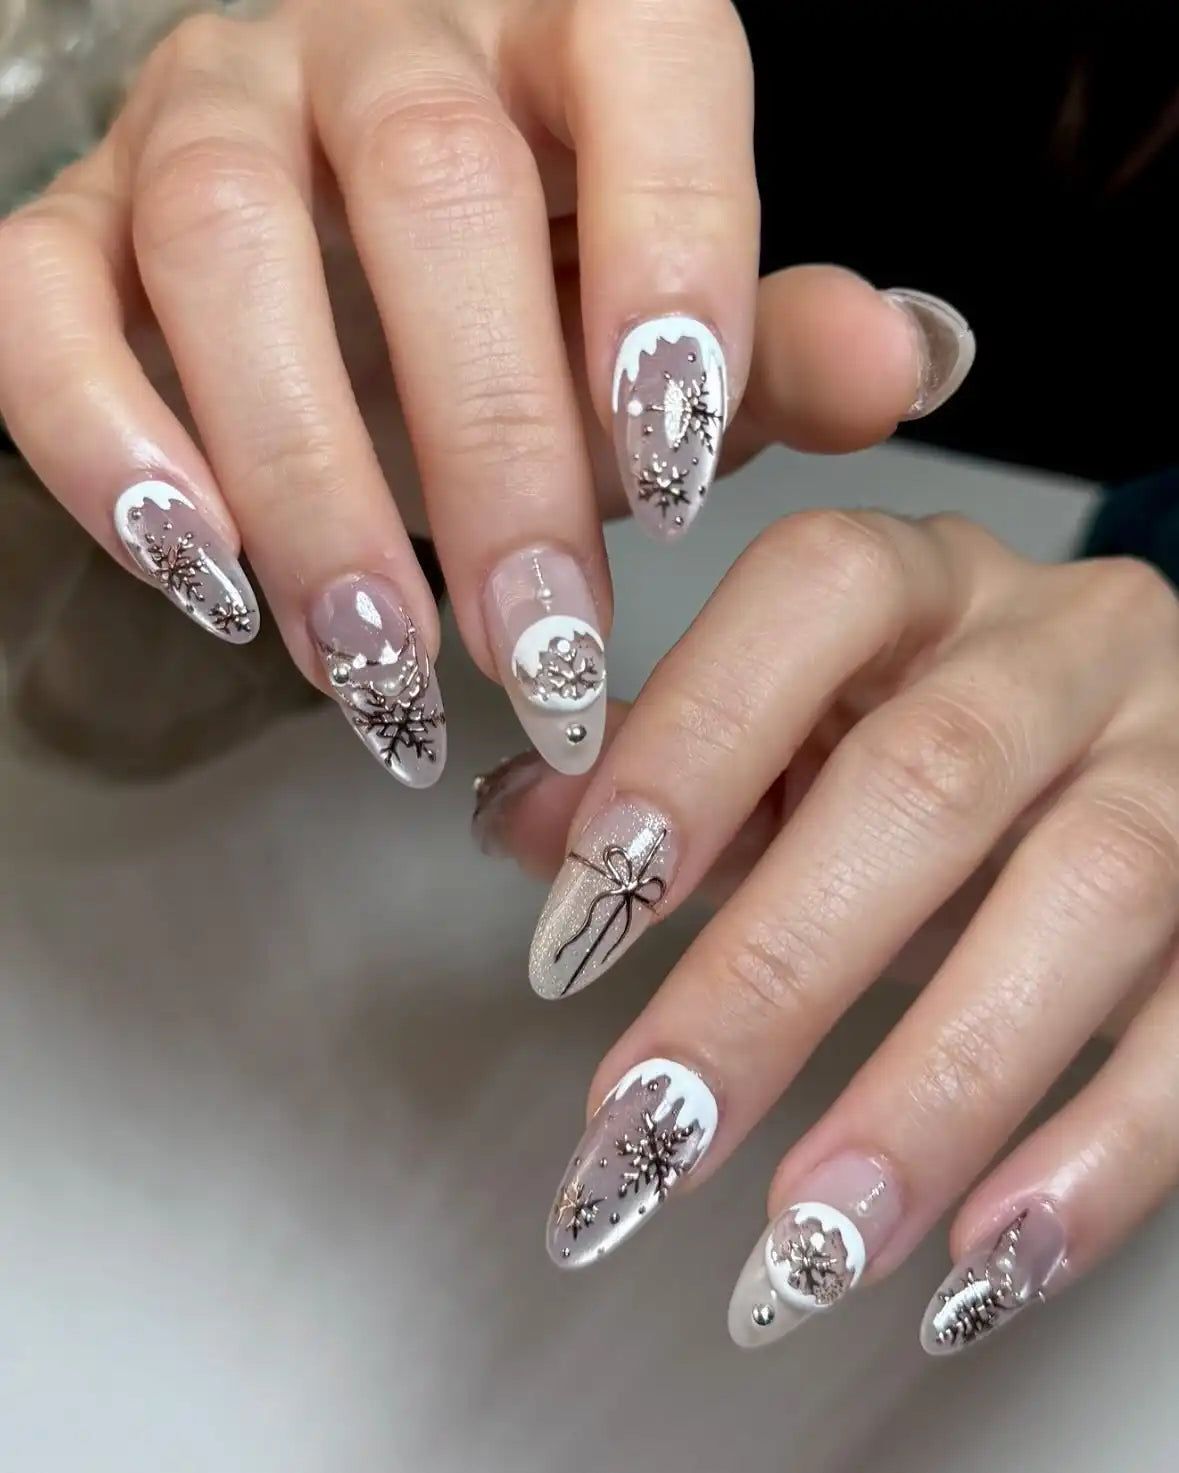
I saw the photo and immediately thought, that is going to snag on something before dinner. But I keep coming back to it. A sheer nude base with a white French tip, then a snowflake charm and a cluster of pearls on the accent nail. The combination of the clean French line and the dimensional charms is what makes it work, it’s structured enough to feel intentional, playful enough to feel festive. Pearl snowflake charm nails are the kind of design you wear to the holiday party where you know photos will be taken. Just keep your hands out of your pockets.
Visual Idea
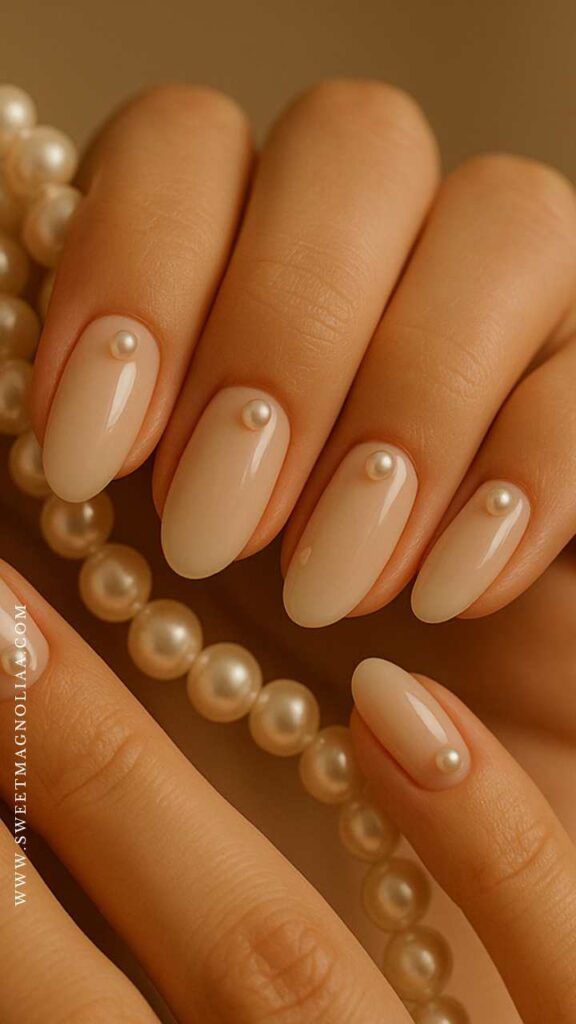
How long does a nude pearl accent actually last on your nails? Through a week of typing and washing dishes, the small pearls stayed put on my medium ovals. The glossy finish hid the regrowth at the cuticle for a full ten days. By day twelve, one pearl had snagged on a sweater, but the rest held. Not bad for a look that reads as delicate.
Glossy Visual Idea
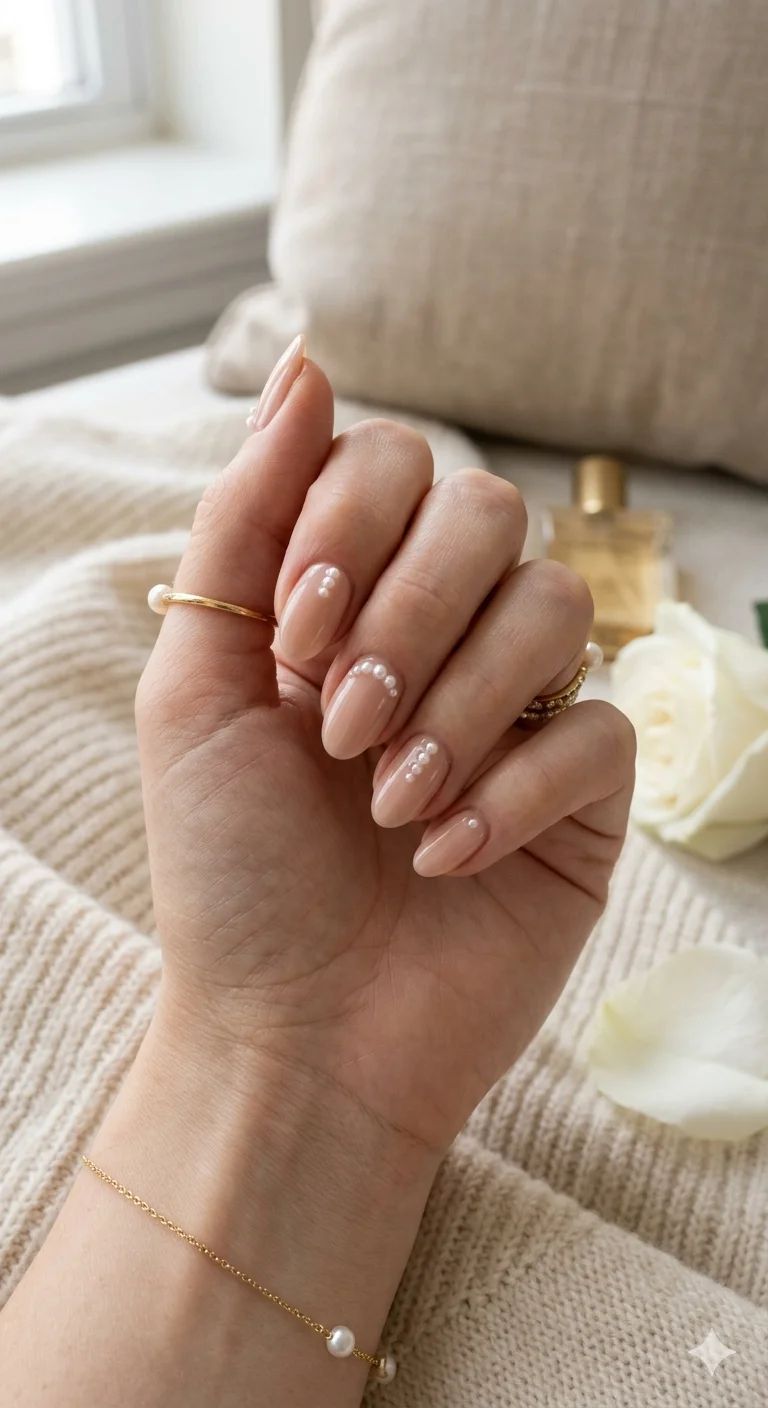
I will admit I was skeptical about pearl embellishments on short ovals. They look like they will pop off the second you grab a door handle. And yes, the first one did, on day three, when I opened a jar of pickles.
But here is the thing about the glossy nude base underneath. Once the pearl is gone, you are left with a perfectly acceptable neutral manicure. No bare spot, no glue residue. The downside is the constant awareness of where your hands are. You will baby these. If that bothers you, skip the 3D and stick to a pearl finish instead.
Glossy With A Pearlescent Sheen Visual Idea
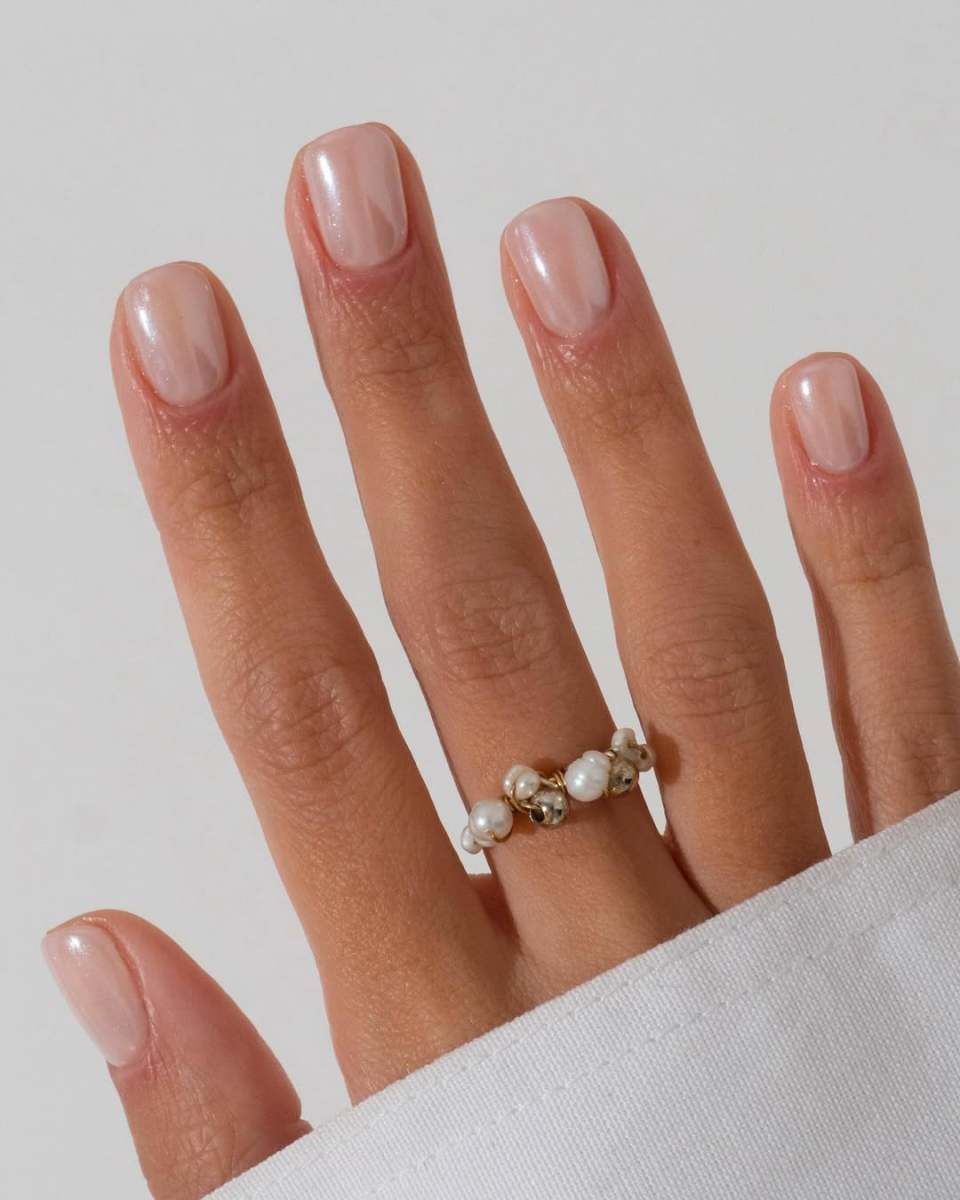
The light catches the scattered pearls on these short ovals before it hits the base. That is the trick. The translucent pinkish-nude underneath is almost invisible, so the iridescent accents do the work. For a winter wedding or a festive dinner, this is the right level of effort. It says you tried without screaming for attention. The sheen on the base keeps it from looking like a last-minute glue job.
Small Pearls And Gold Foil Accents Visual Idea
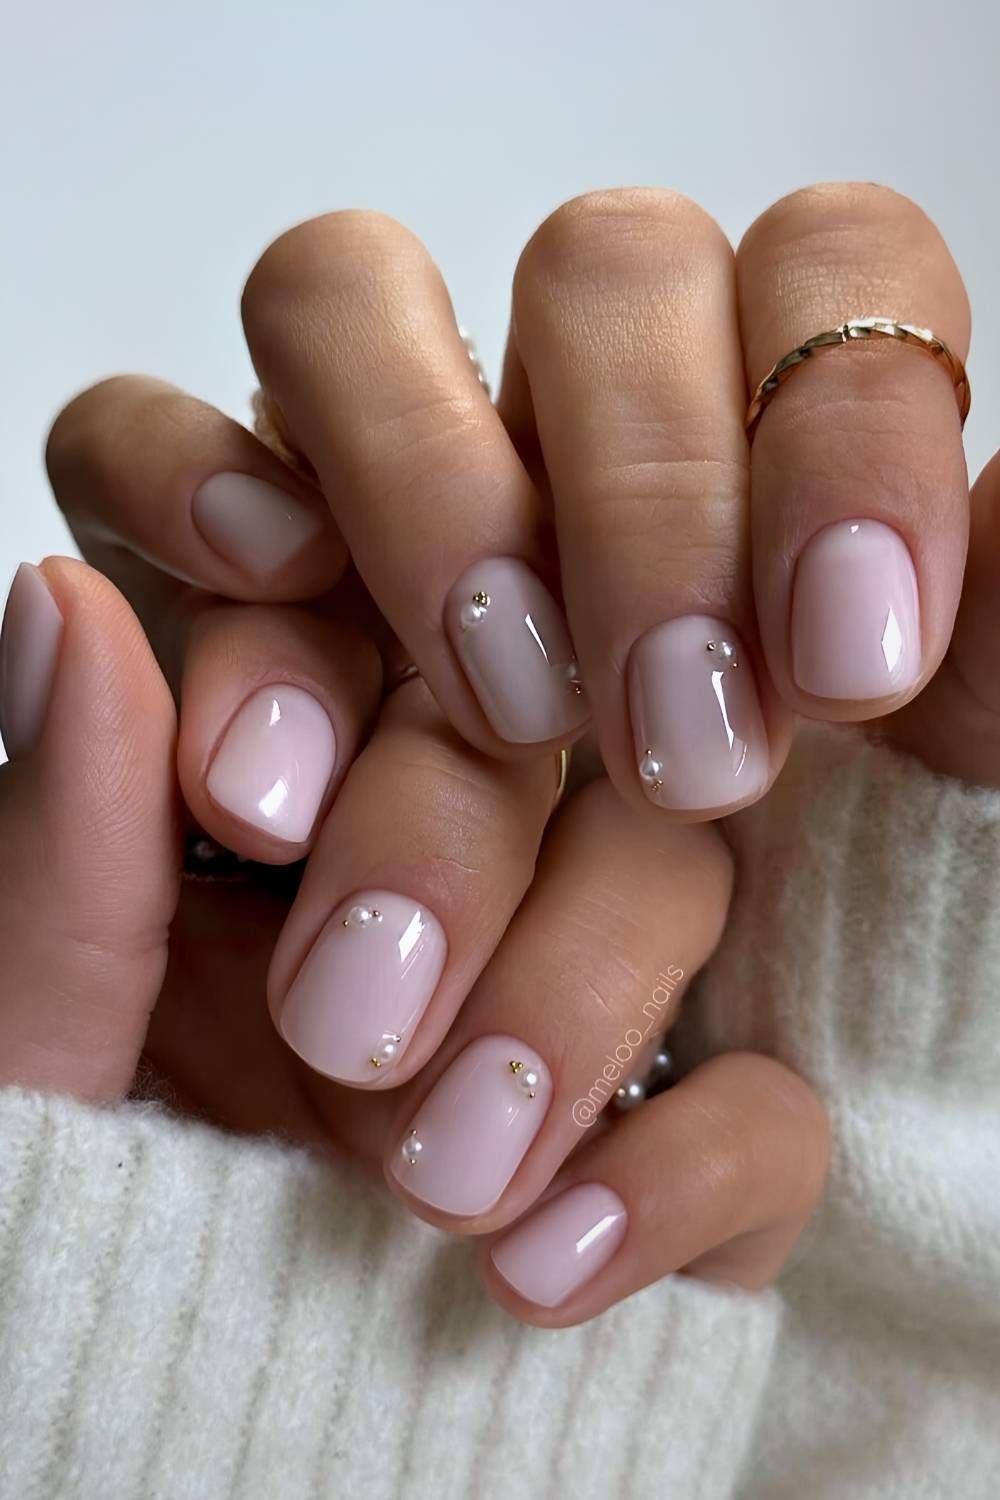
This one got me. The combination of small pearls and gold foil on a light pink base is not trying to be subtle, and I respect that. On short square nails, the gold reads warm against the white pearls, and the glossy finish ties them together. The foil is pressed in irregular patches, not painted, which gives it texture. No two nails are identical, and that is the point. It looks like someone spent time on it, not like a stamp. For winter, this is the design that gets the most double-takes.
Winter Festive Visual Idea
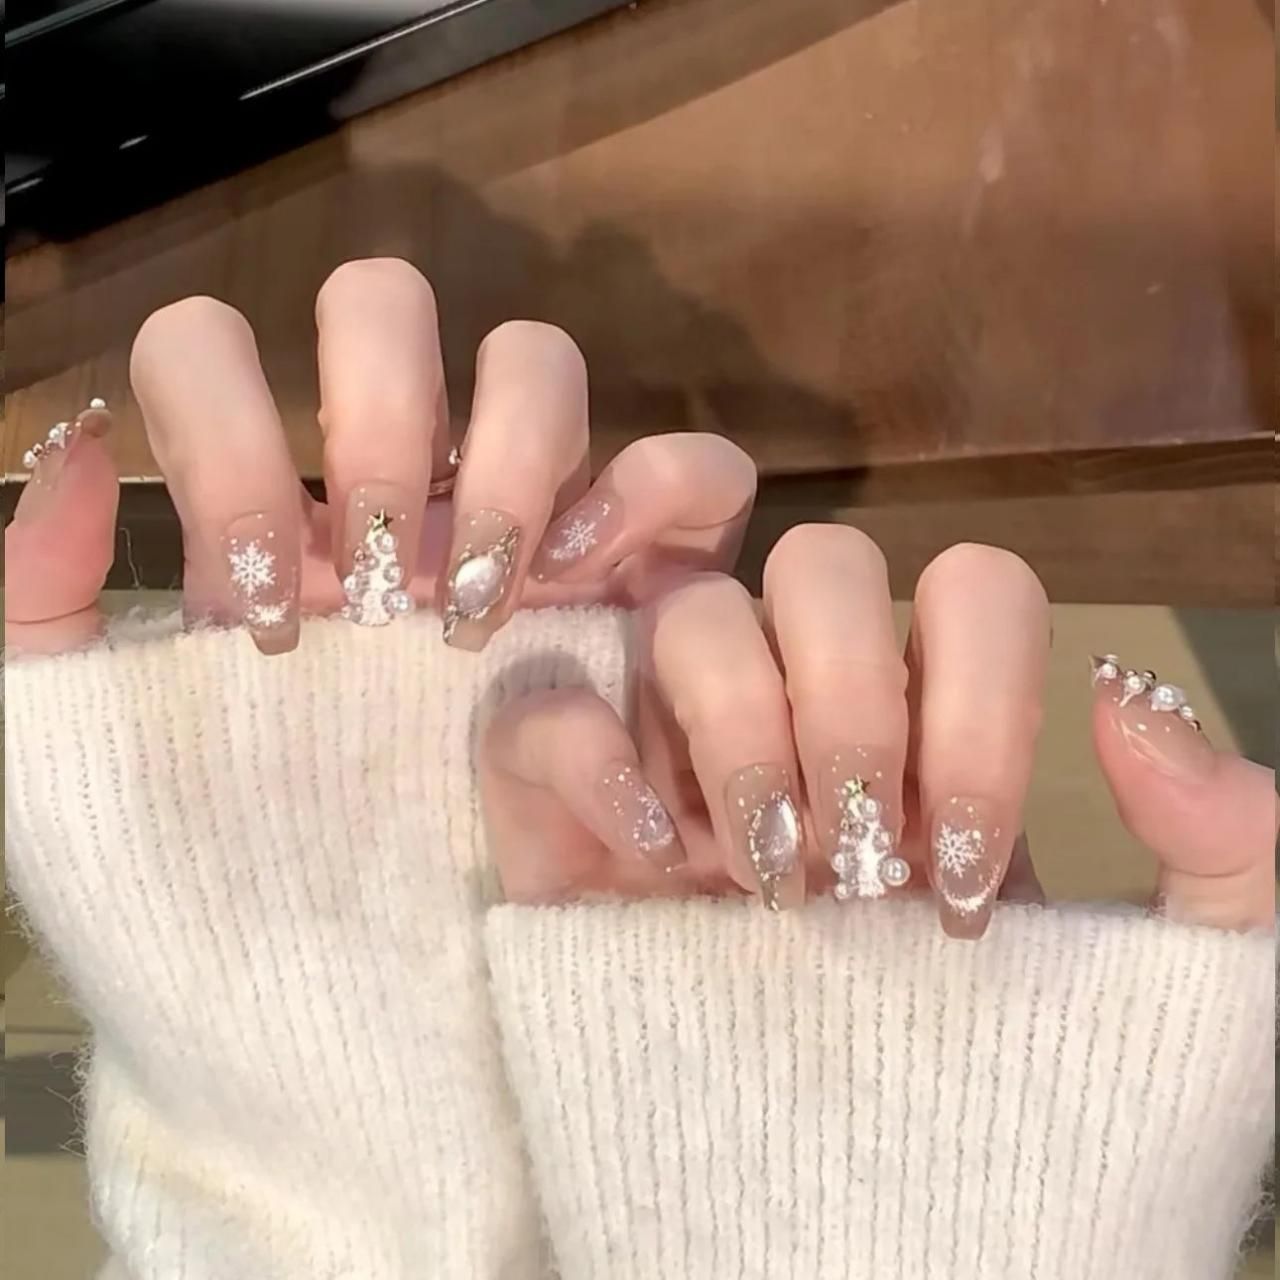
This is a salon-only design. The 3D snowflakes, rhinestones, and tiny charms on long coffin nails require a steady hand and a lot of patience. The sheer nude base keeps it from looking heavy, while the clear glitter tips catch the light.
The technique here is layered. Each snowflake is built with a bead of clear gel, then placed with tweezers before curing. The charms are embedded in a second layer of top coat to keep them flush. For a holiday party or New Year’s Eve, this is the look that stops conversation. But book the appointment a week ahead. This one takes time.
Small Pearls And Subtle Shimmer Visual Idea
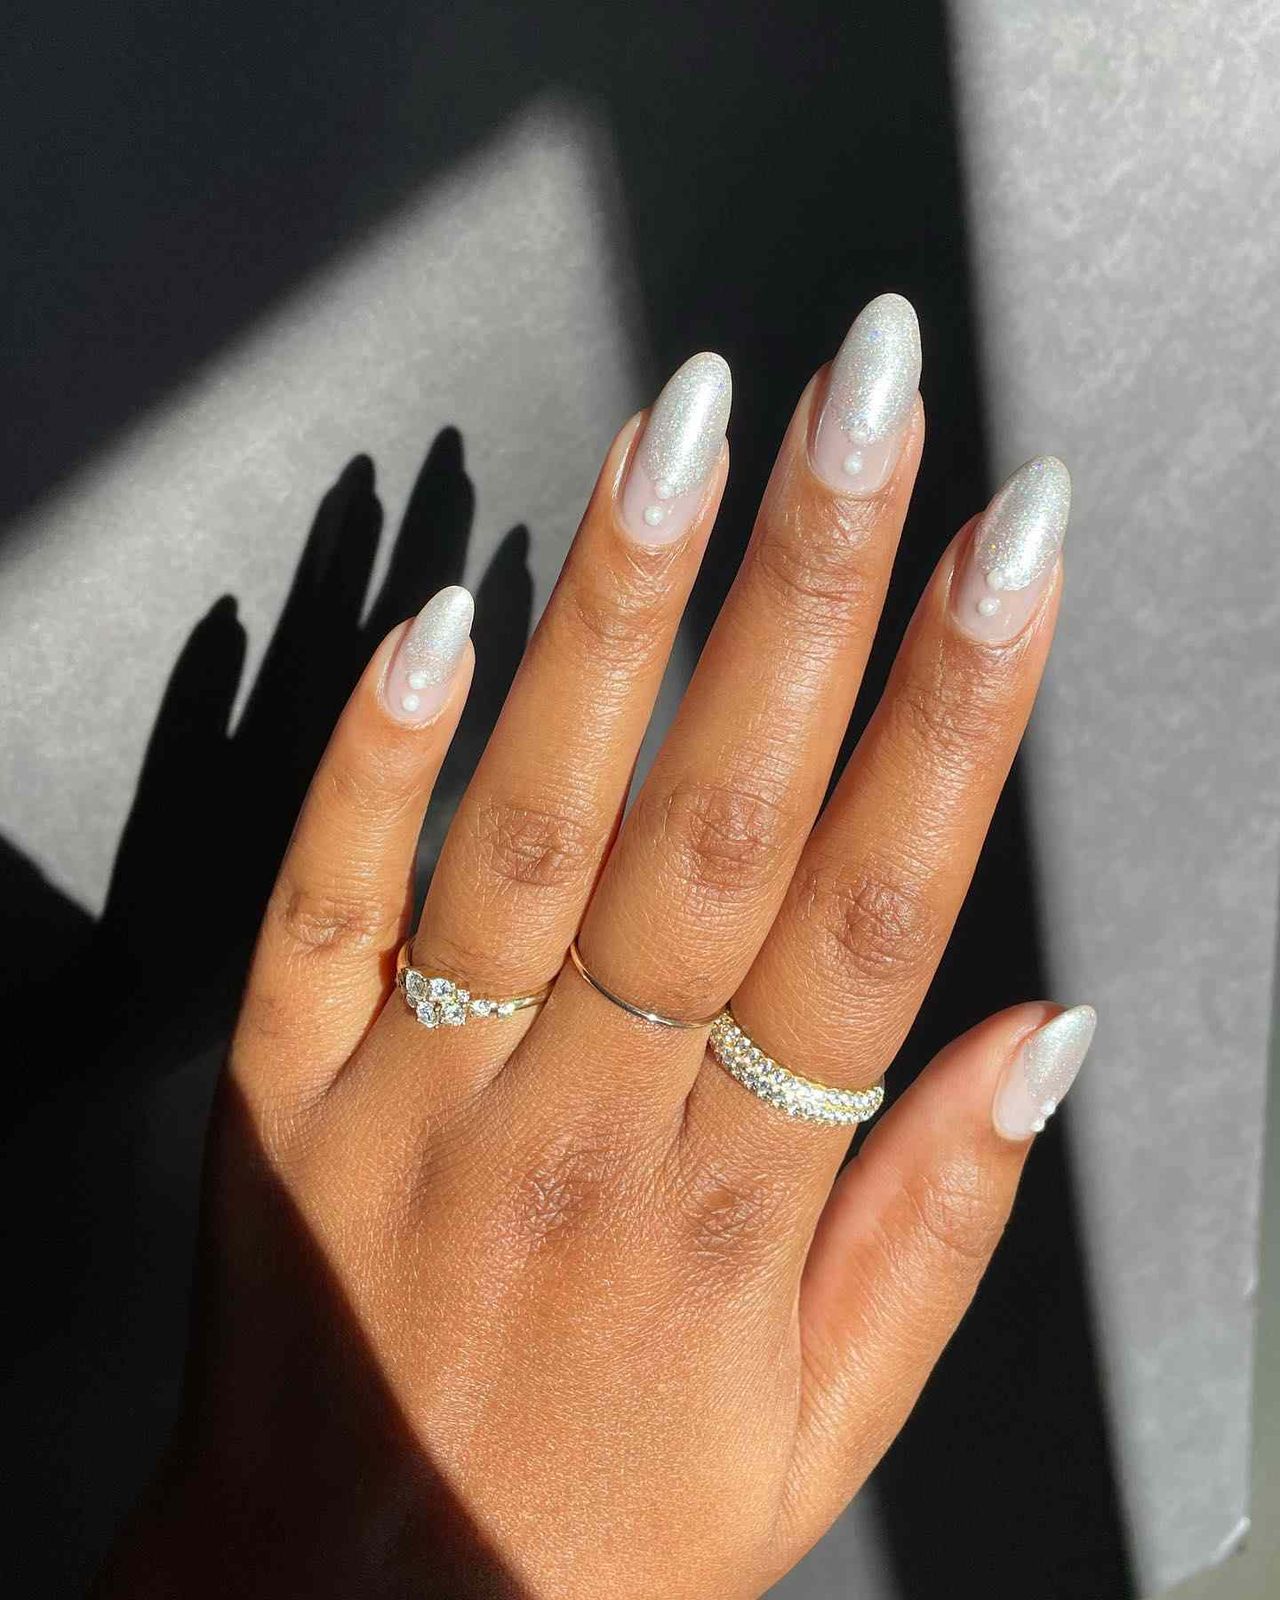
That shimmer isn’t a chrome powder, it’s a fine iridescent pigment suspended in a clear top coat. You can buy the pigment separately and mix it into a no-wipe top coat yourself, though the pearl placement is what separates a good DIY from a salon finish. A dotting tool and a tacky uncured layer to set each pearl in place, that’s the trick. Cure between every two or three pearls or they’ll drift. It’s doable at home but budget a full afternoon, not an hour.
Pearls Applied As Dots On The Nail Plate Visual Idea
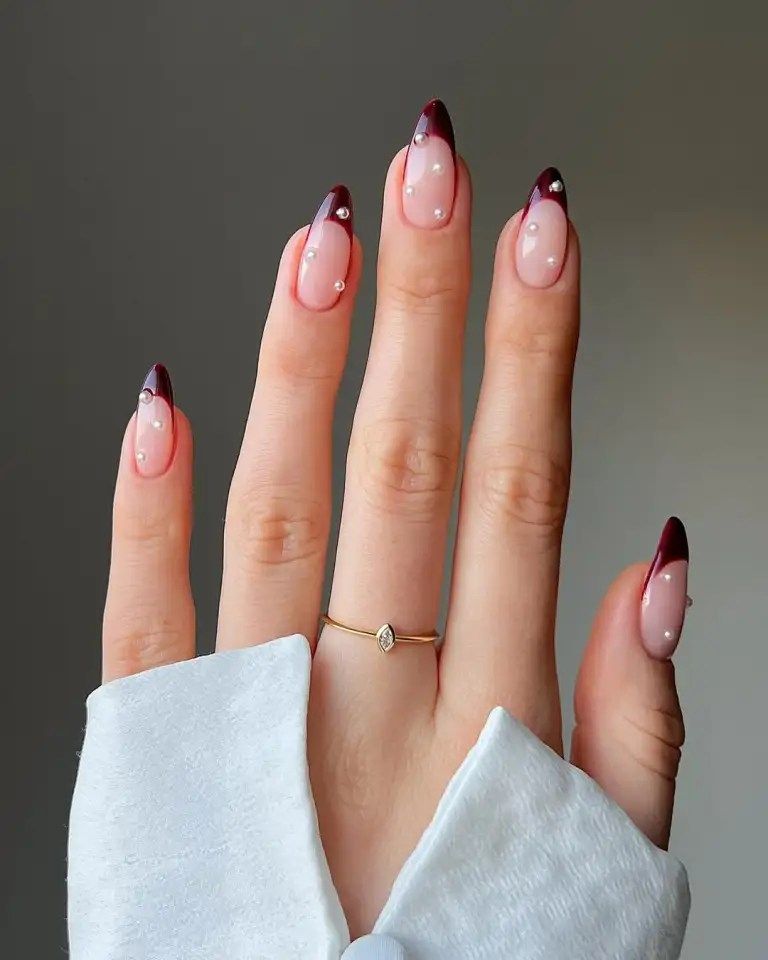
Why does a classic French tip sometimes feel like a default, not a choice? This one answers that. The sheer pink base stays clean and grown-out friendly, then the deep burgundy tip lands somewhere between wine and black cherry, and the pearls are placed like dots across the nail plate, not just lined along the smile line. It reads intentional without trying too hard. A classic French tip whispers “maintenance” by week two; this one hides regrowth behind the dark tip and the scattered pearls. You get the structure of a French without the constant fill anxiety.
Winter Visual Idea
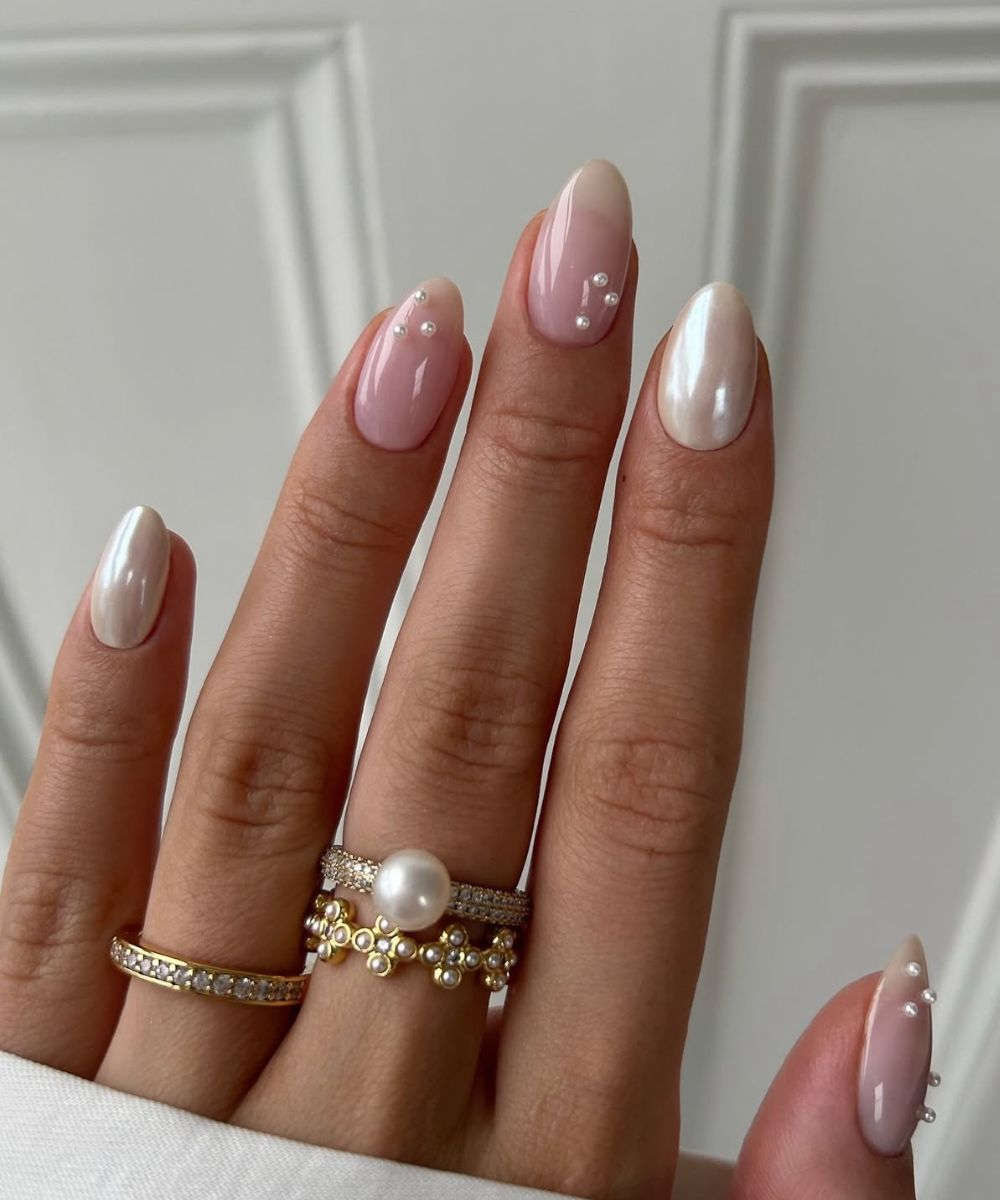
I’ll admit it, I lost a pearl on day three. Snagged on a sweater, gone before I noticed. The rhinestones held better, but the small round pearls have a lower surface area for the glue to grip, and if your top coat doesn’t fully encapsulate them, they’re vulnerable. A thick final layer of clear gel that pools around each pearl helps, but it also changes the texture. You’ll feel them under gloves and while typing. The trade-off is real: they look delicate but they’re not indestructible.
Shimmer Visual Idea
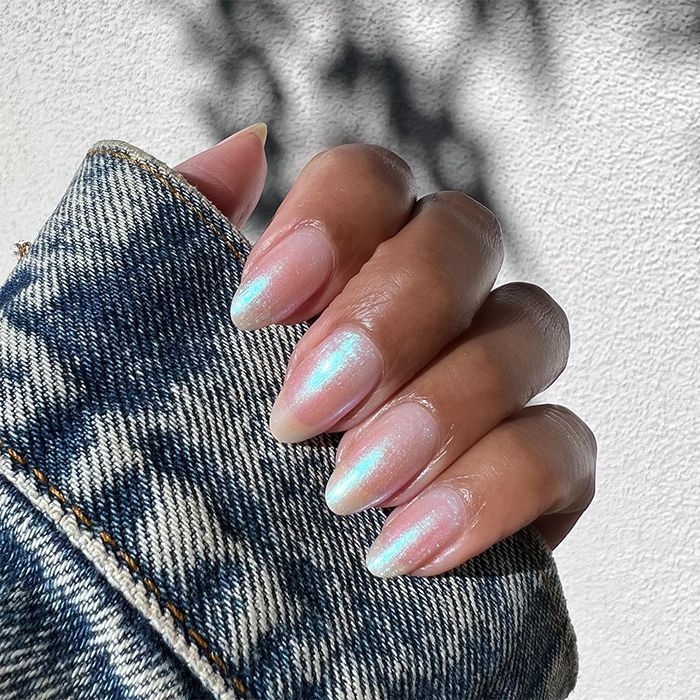
This one stopped me mid-scroll. The iridescent shimmer shifts from pale pink to a faint blue-green depending on the light, and it does it without the heavy metallic look of a chrome. The trick is a sheer milky base, then a very thin layer of iridescent pigment buffed in, then a glossy top coat. It catches the light like a soap bubble, not like a disco ball. That’s the difference between shimmer that reads cheap and shimmer that reads intentional. On medium almond length, it elongates without screaming for attention.
Glossy Metallic Visual Idea
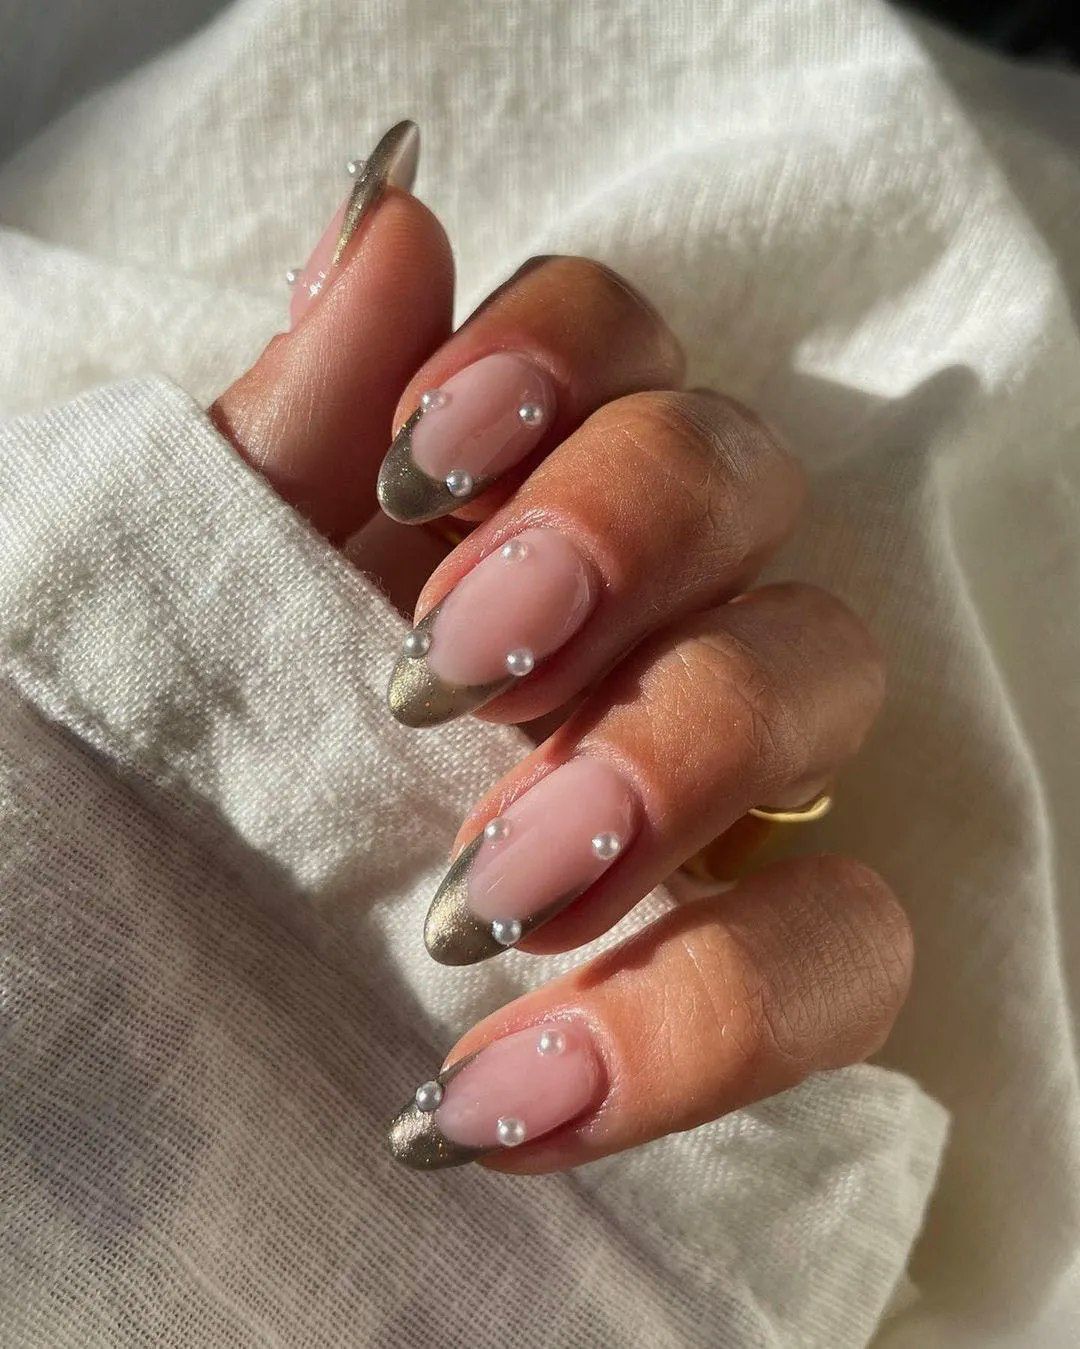
The precision here is the whole story. Small pearls placed along the cuticle line, not scattered randomly, and a few more on the nail surface in a loose triangle pattern. The metallic gold tip is crisp, no bleeding into the sheer pink base. This is not a design you rush. Each pearl needs its own tiny dab of thick gel glue, and you cure between each placement or they slide. The payoff is a structured, almost architectural look that reads as deliberate, not accidental.
Sheer Pink Base With White French Tips Visual Idea
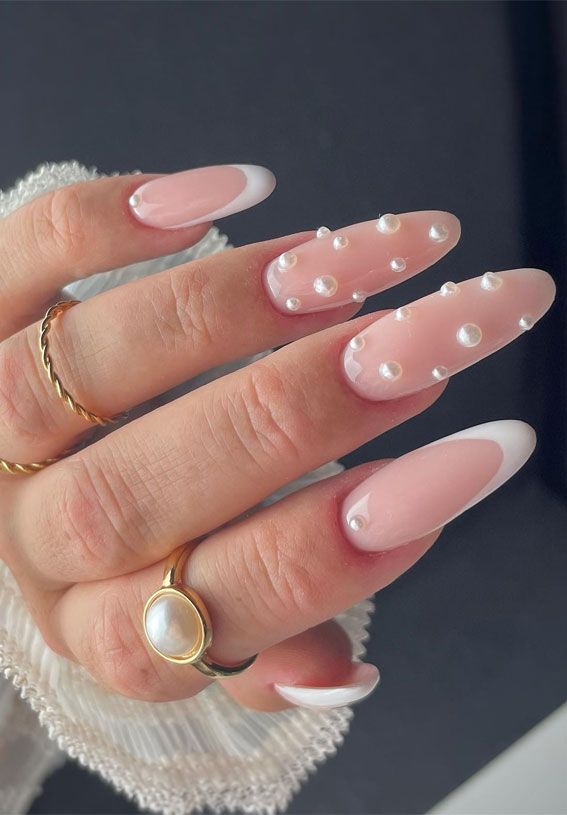
Full pearl coverage is a commitment, and I mean that in the way you commit to a gym membership in January. Every single nail gets a layer of tiny pearls, some sitting flat, others stacked along the white French tip edge, all sealed under a glossy top coat. The sheer pink base keeps it from looking like a craft project, which is the line this design walks carefully.
Upkeep is the real story. Those stacked pearls catch on sweater cuffs and snag on hair ties, and one missing pearl leaves a noticeable gap in the pattern. You will check your nails before every meeting, I promise. The cuticle line needs attention too, because the pearls emphasize any regrowth within days. Book the salon for this one, it is not a Sunday DIY. The result is stunning in winter light, but you are signing up for a maintenance schedule.
Sheer Nude Base With Subtle Glitter Visual Idea
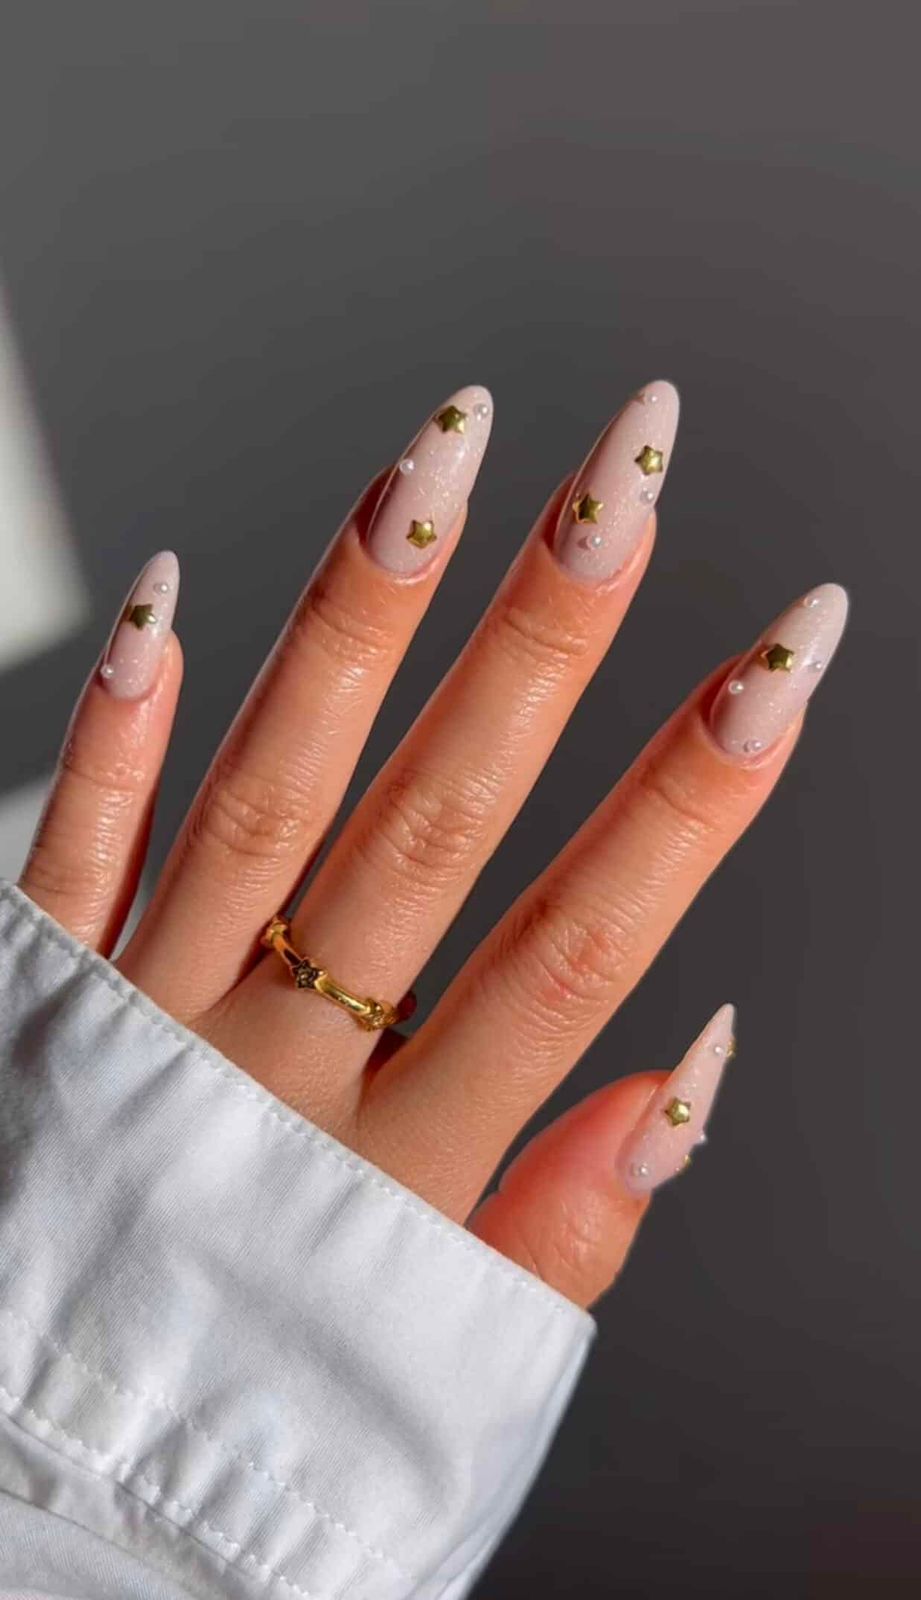
What is the appeal of gold star charms on long stiletto nails, exactly? I asked myself the same thing until I saw them placed with actual restraint, scattered across a sheer nude base with subtle glitter, not dumped on like confetti. The stars sit flat against the nail, which matters more than you think, because a charm that sticks up will catch on everything. The glitter is fine enough to read as shimmer rather than disco ball, and the nude base lets the gold do the work. Precise placement is the whole game here, one charm slightly off-center, another near the tip, never crowded. That is salon territory, not because the technique is hard, but because your non-dominant hand will betray you halfway through.
Pearlescent Visual Idea
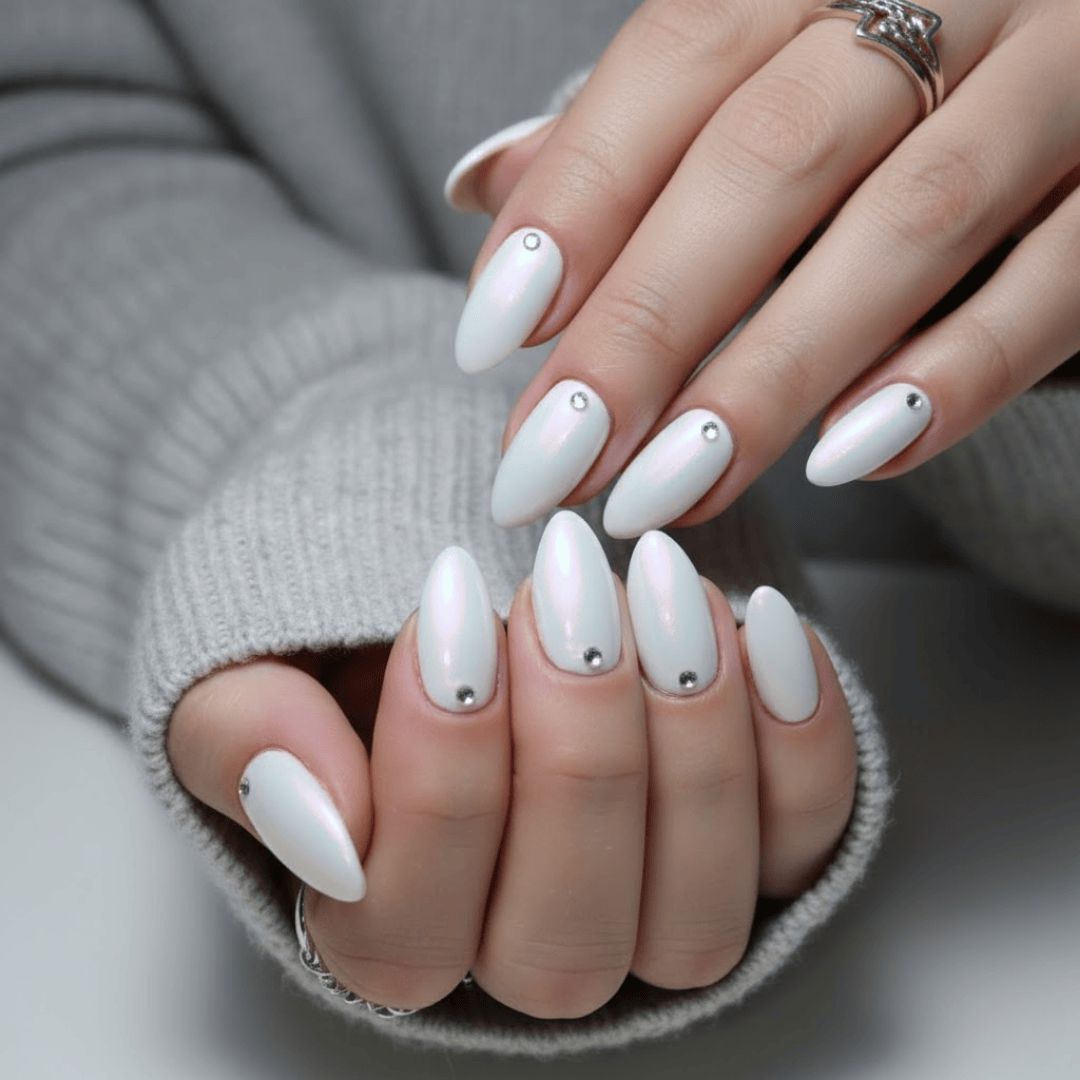
This one is for people who think white nails are boring but find chrome too loud. The pearlescent finish sits somewhere in between, catching light like the inside of a seashell rather than a mirror. Small rhinestones add texture without turning it into a costume. It suits medium almond length best, because the shape lets the finish shift as you move your hand. Skip it if you want a solid color, this is a finish that demands attention to the light. And skip it if your nails are short, the effect needs surface area to read properly. On olive skin the white undertone reads clean rather than chalky, which is a fine line.
Metallic Red Tips Sheer Nude Base Visual Idea
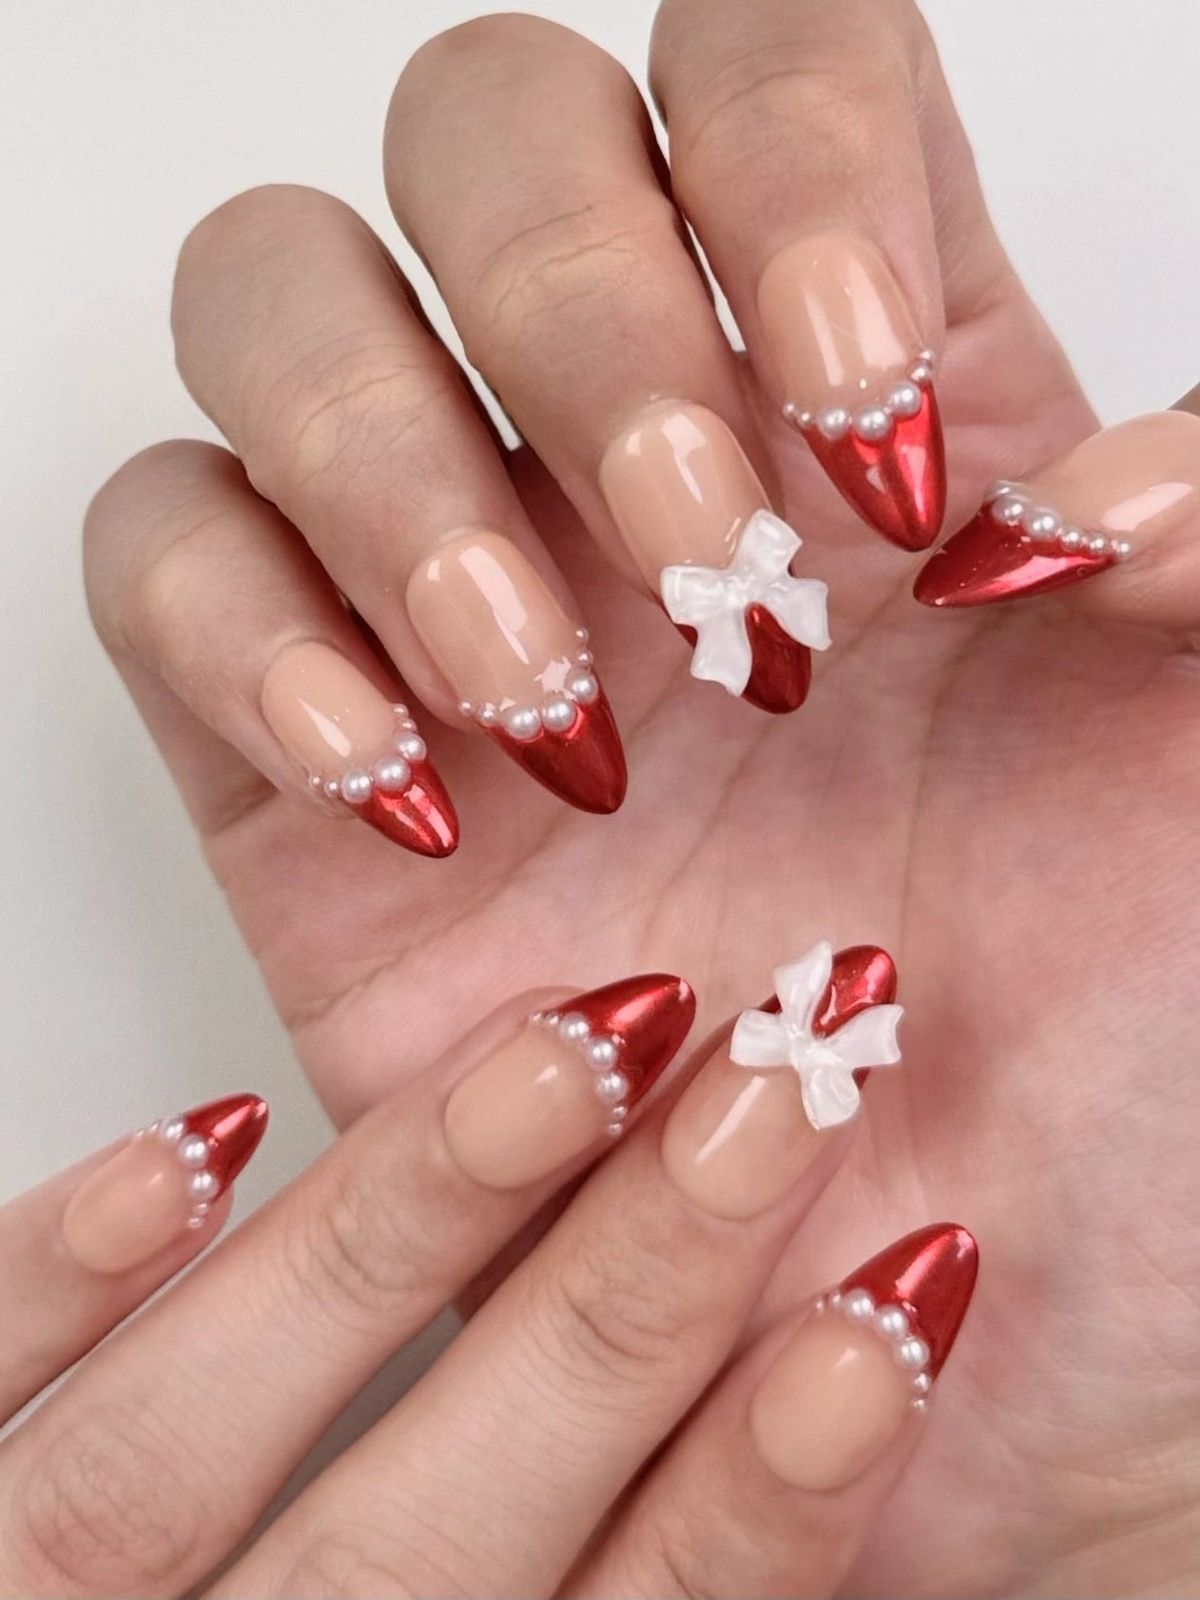
Metallic red French tips are not subtle, and that is exactly the point for holiday parties. The sheer nude base keeps the look wearable while the red tip does the festive work. Small white bows and pearls along the cuticle line add detail without crowding the tip. Getting close at home means starting with a clean sheer base, letting it cure fully, then painting the tip with a thin metallic red layer. Two thin layers beat one thick one, because thick metallic polish pools at the edges. The bows are the challenge, they need tweezers and patience, and they will lift if the base is not completely dry. This is a two-hour project at home, so plan for it. The result reads as deliberate, not accidental.
Glossy With Glitter Visual Idea
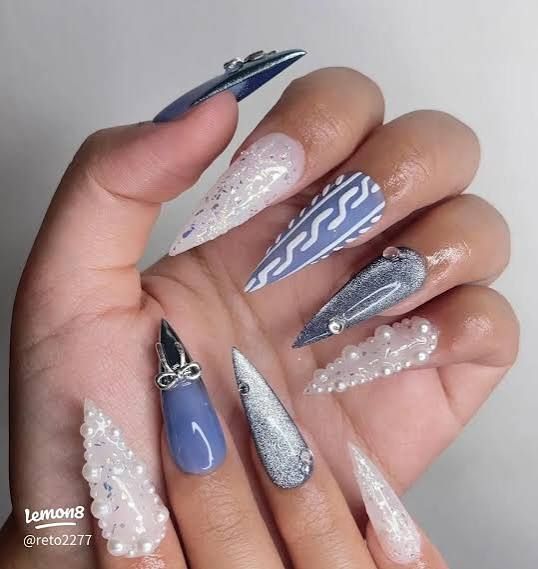
I will confess, I wanted to hate the cable knit texture. It sounds like a gimmick, a sweater pattern stamped onto a nail. But on long stiletto tips with icy blue glitter, it actually works, the raised lines catch the light differently than the glossy finish around them. The problem is real life. That texture is a snag magnet, it catches on knit gloves, on hair, on the edge of your laptop keyboard. You will baby that accent nail all week, I did. The glitter on the other nails wears fine, but the textured one shows wear at the edges first, and there is no fixing it without a full redo. The glossy top coat over the whole thing helps, but it does not save you from the physics of raised lines catching on things.
Glossy With Subtle Shimmer Visual Idea
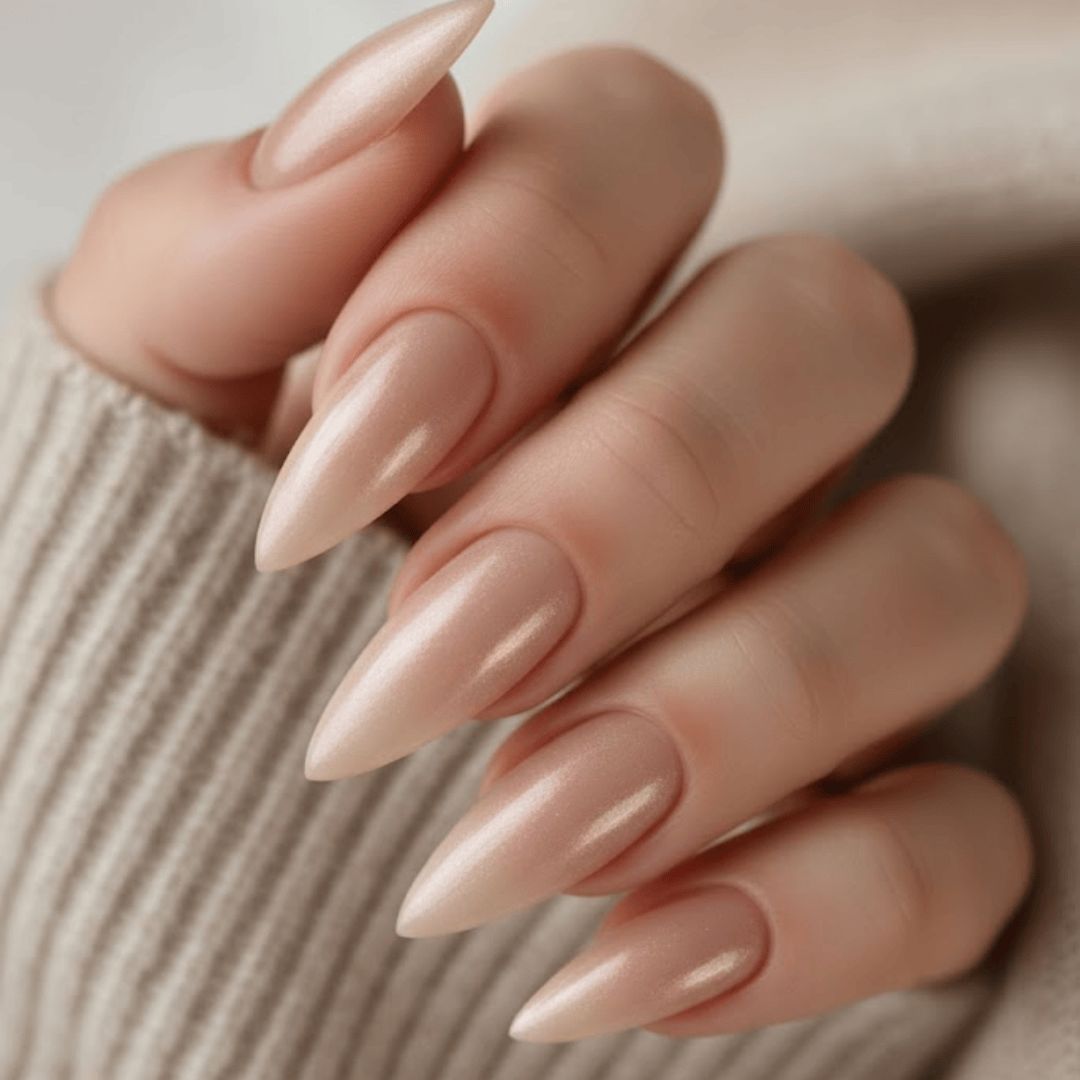
When did delicate start looking more expensive than elaborate? These medium almond nails use a neutral pearlescent base and then place small pearls along the cuticle line and as scattered accents, not a full cluster. The glossy finish keeps the shimmer subtle, so it reads as texture rather than sparkle. Compared to the heavily embellished sets, this one lets the shape and the clean line work do the heavy lifting. The pearls feel intentional, not like they fell out of a craft drawer.
Small Scattered Pearls On Accent Nails Visual Idea
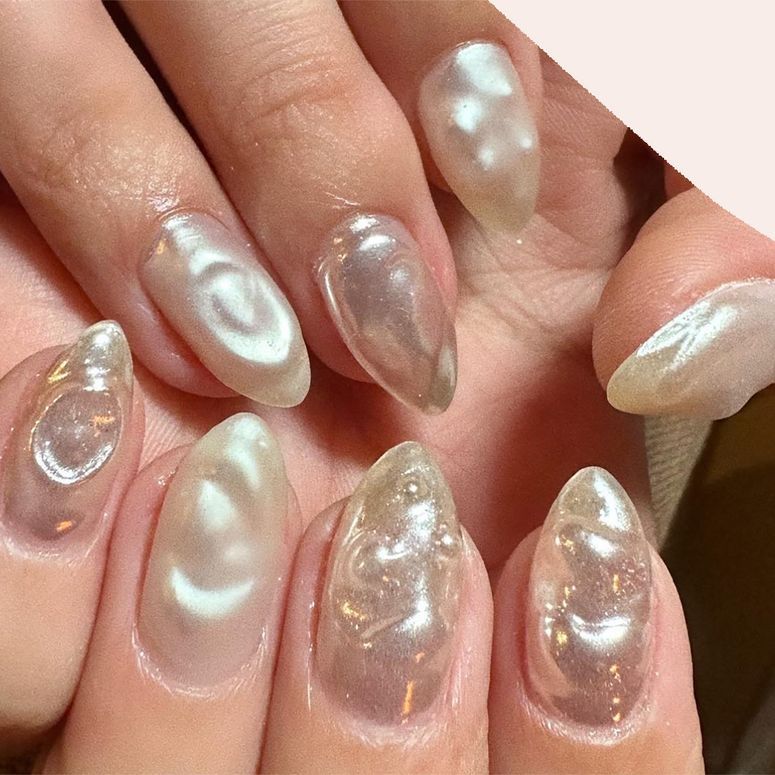
I am a sucker for a pearl accent that knows when to stop. These medium stilettos start with a sheer pink base and white French tips, then scatter small pearls on just the accent nails. It is charming without tipping into costume jewelry territory. This genuinely flatters shorter nail beds because the pearls draw the eye outward, not upward. If your nail beds are long and narrow, the scattered placement can feel sparse, so ask for a few extra pearls per nail. Winter wedding season is where this lives, but it also works for a holiday dinner where you want something festive without the three-dimensional snowman.
Clean Visual Idea
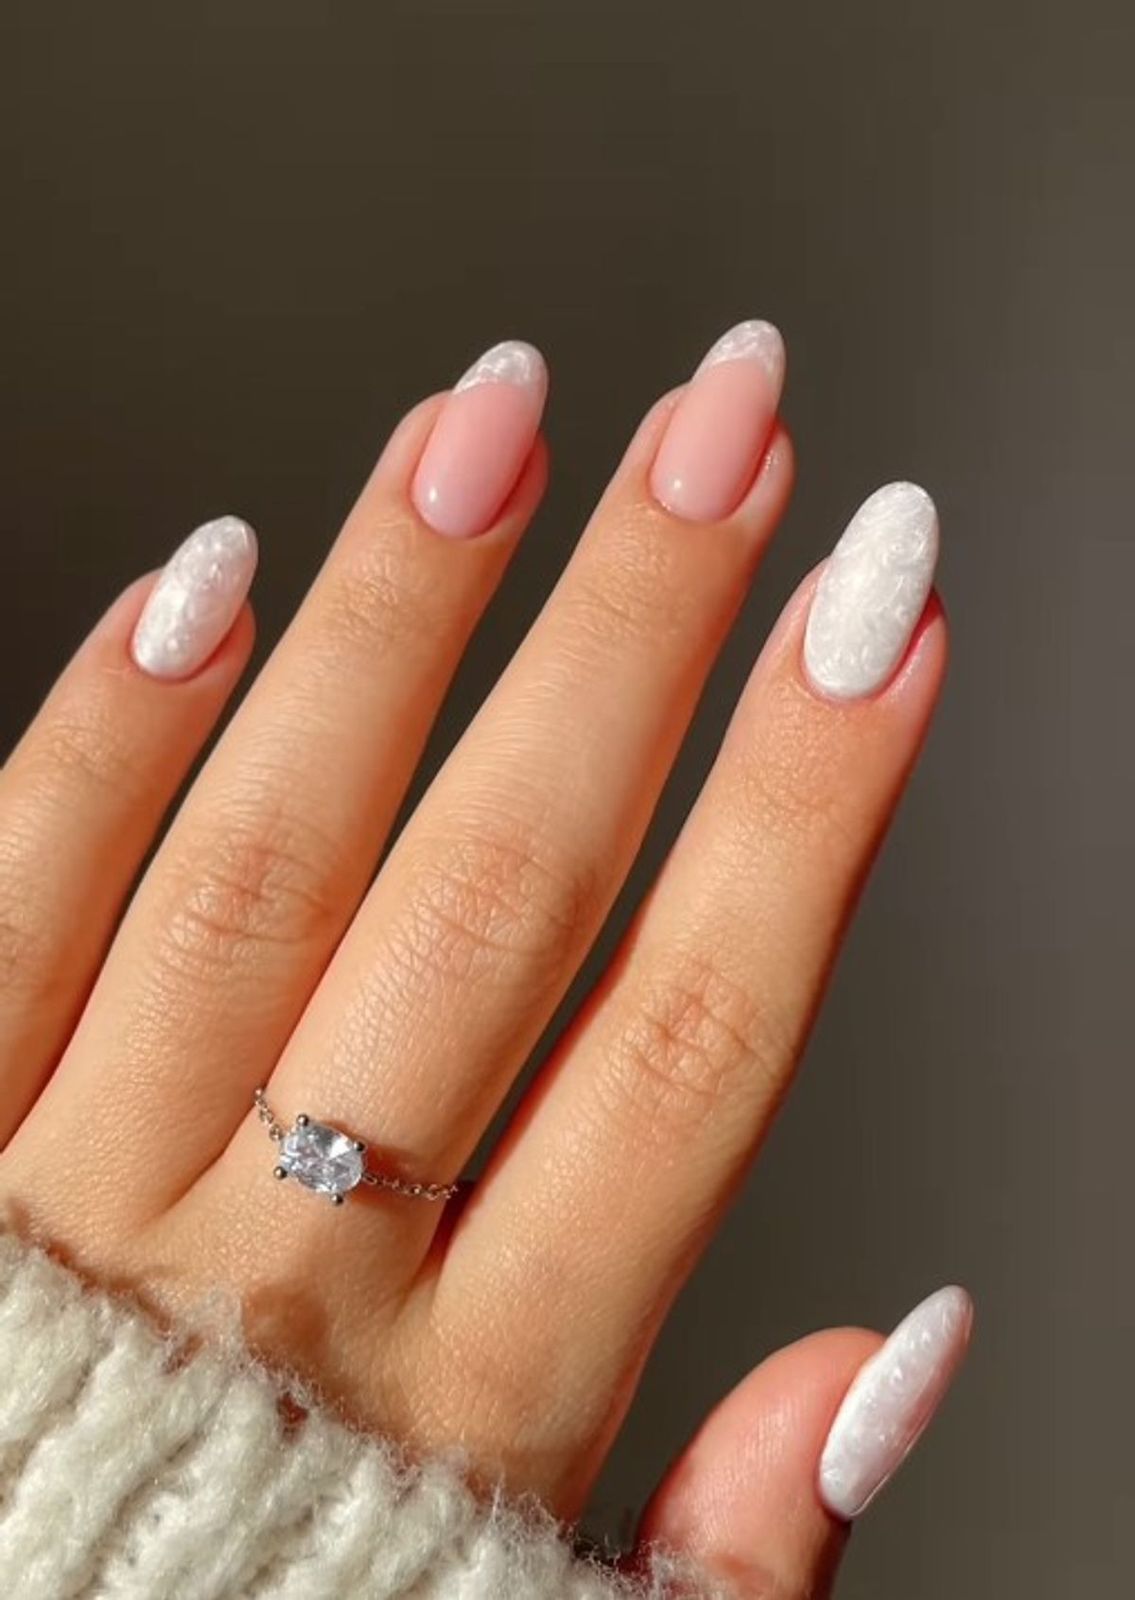
Best pearlescent French tip I have seen in a minute. The precision here is the whole story: a soft pink base, a white pearlescent tip that lands exactly at the smile line, and a subtle pearlescent texture on the accent nails that mirrors the tip without repeating it. No bleeding, no uneven thickness, no chalky finish. The medium oval shape helps the tip look elongated rather than squared off. This is what you show a tech when you say clean but not boring, because the pearlescent shift catches light differently at every angle.
Final Thoughts
After writing all of these, I’m still not over the chrome almond. It’s the one I keep coming back to, the one that feels like winter without trying too hard. I’m booking that for my next appointment.
- Cuticle oil twice a day, every day.
- Top coat refresh on day 7.
- Wear gloves for dishes and cleaning.
- Book fills at week 3, not week 4.
Pearl nails are here to stay, at least until spring.