

Birthday Nails 2027: 30 Festive Designs Made for Your Big Day
Save these 30 birthday nails 2027 ideas: soft ombrés, glossy chrome, sprinkle tips and sparkly French designs with easy how-to tips for your big day.
What do you want your nails to say about you on your birthday this year? Something polished and quiet, or a full celebration of sparkle and charm? Birthday nails for 2027 are about more than trends. They are about your mood, your time and your manicure, and your birthday is the perfect excuse to have fun with your look.
This season blends intentional style with relaxed glamour. Soft blush shades, glossy finishes and a few vintage touches each tell a different story. I gathered looks that feel timeless and easy to wear, whether you are dancing until late or hosting a casual brunch with friends. Let’s dive in.
Sharp & Sleek Black Almond
Long, sharp nails in pure black polish carry a certain kind of power. The look is bold and unapologetic, without any effort to seem stylish. It makes you feel like the ruler of your own little universe, which is the right mindset for a birthday.
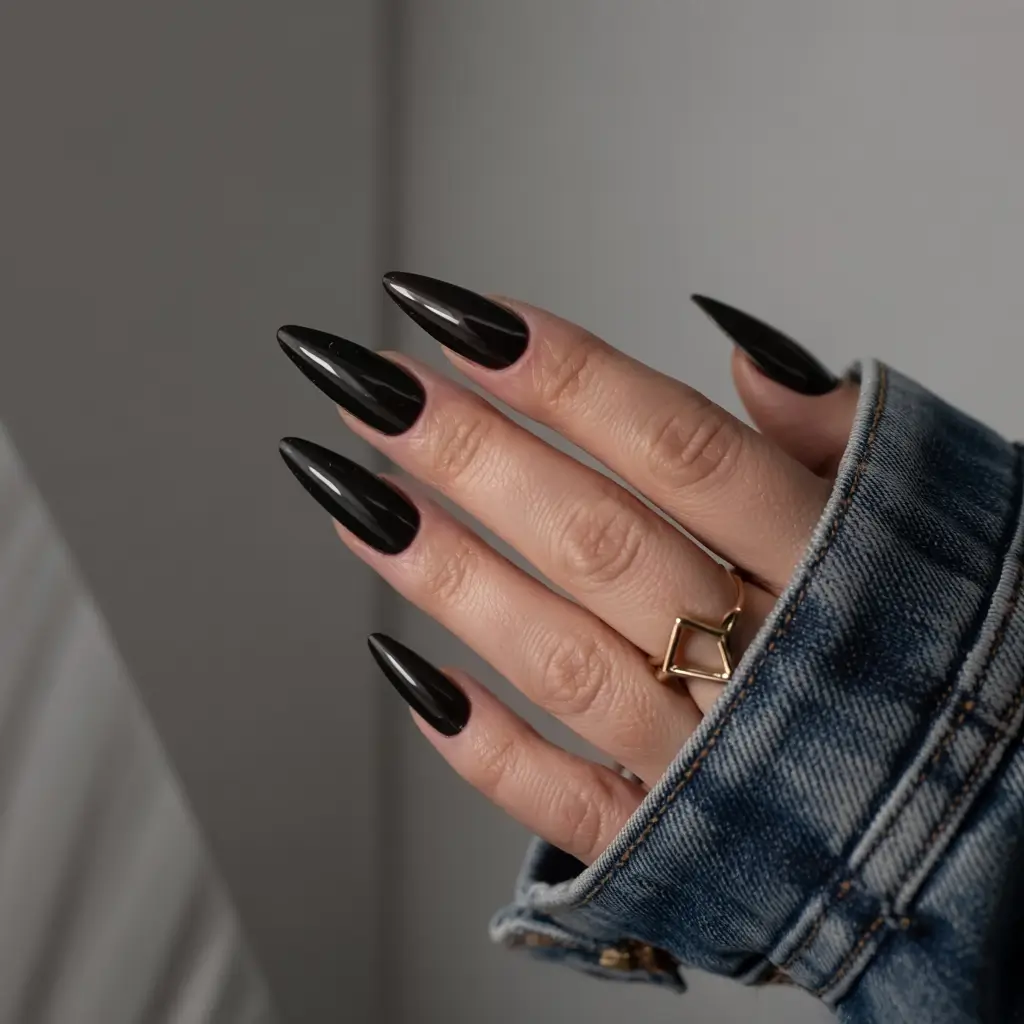
You can’t go wrong with a good black polish. Try Essie’s Licorice or OPI’s Never Have Too Many Friends. Choose an almond tip and finish with a top coat that is super glossy, like Gel Couture’s.
Honestly, I keep black polish on rotation all year. But on a birthday, it hits differently. Add gold rings or a denim jacket, and it looks sharp, bold and seriously iconic.
Silver Mirror Queen
These silver chrome nails don’t whisper, they shout. The finish looks like real metal and has a mirror effect you can’t ignore. Pair them with a shimmery or sequined outfit, or with a showy minimalist look, and the set completes everything.
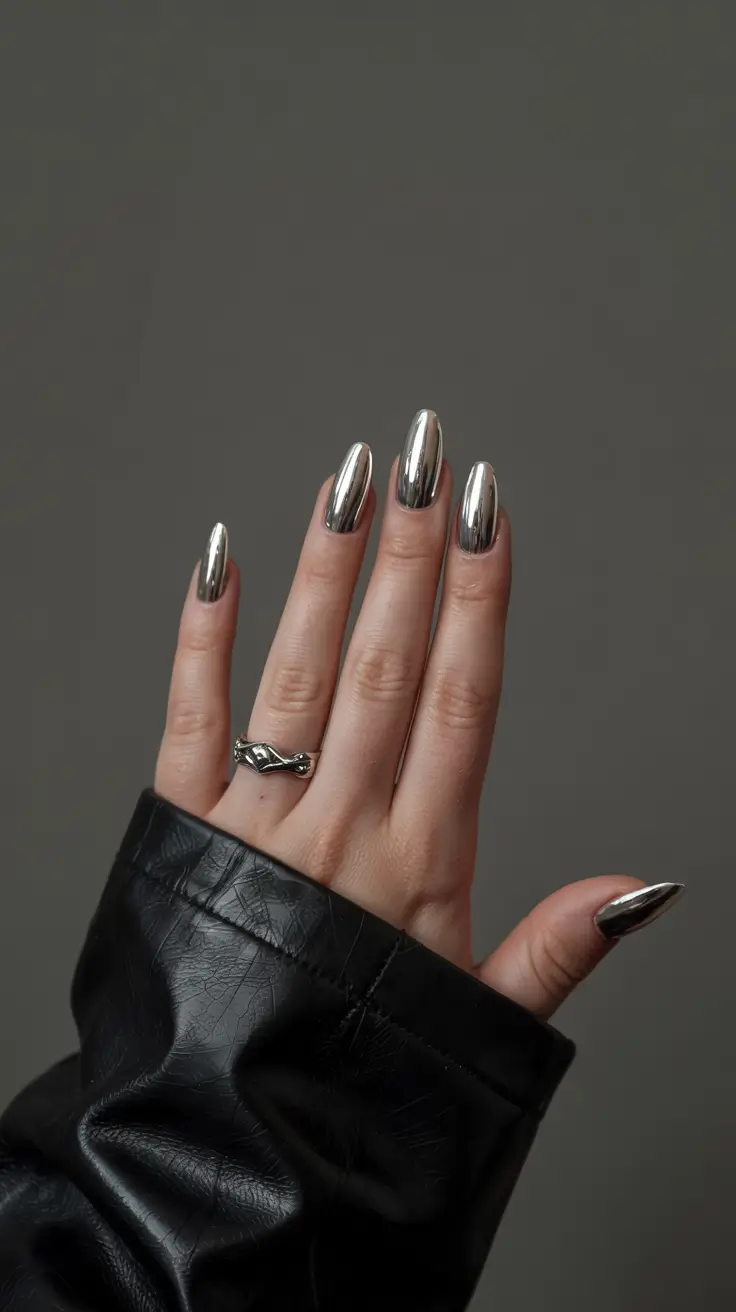
Start with a black or dark gray gel base, then polish with a high-grade silver chrome like Daily Charme’s Mirror Chrome. Finish with a no-wipe gel top coat to lock it in and keep that glassy shine.
The trick is to cure every layer before you add the chrome, then press it in with a silicone roller. Don’t forget to tidy the cuticle area too, because chrome looks sharpest with a clean outline.
I wore this once to a birthday dinner, and I got more compliments on my nails than on my outfit. They shine in the dark and look incredible in photos, which is exactly what I want on my birthday.
Diamonds Around the Cuticle
Nails edged with rhinestones feel luxurious. Each stone has a job here, outlining the almond-shaped nude base like jewelry along the fingertips. The vibe is elegant, with a capital E. This manicure fits a rooftop birthday dinner with string lights and a glass of champagne.
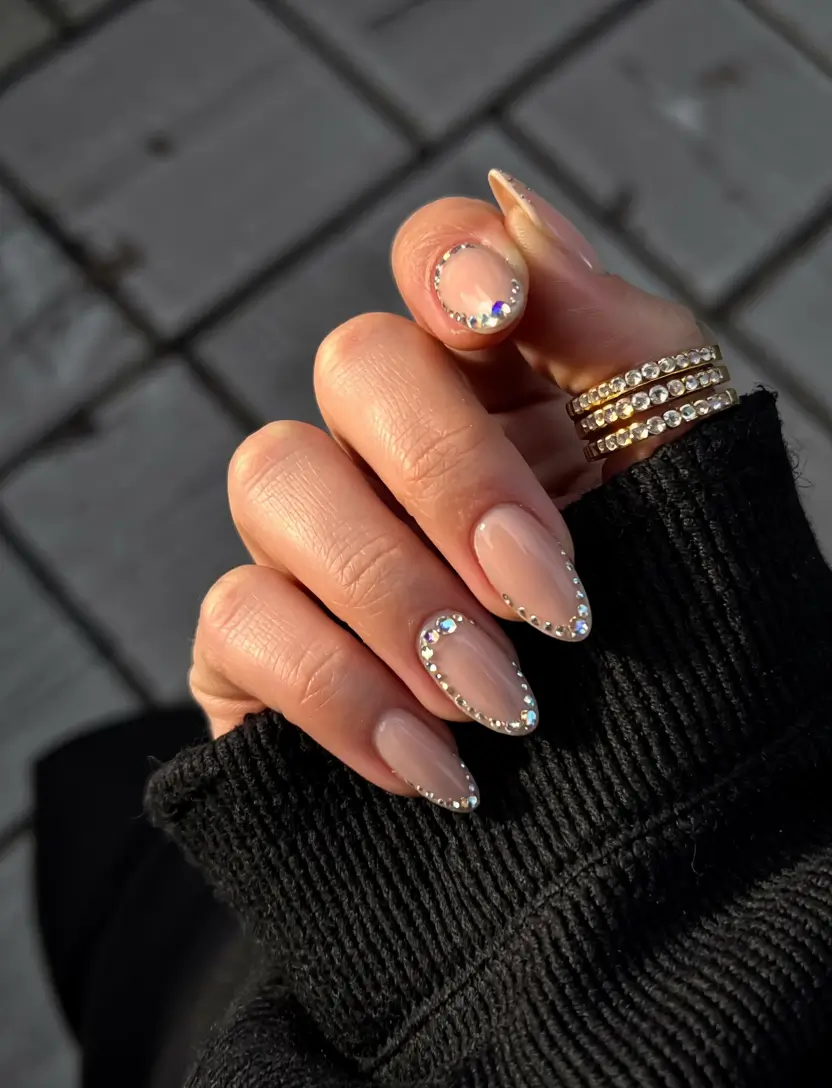
To get this effect, I would reach for a sheer beige polish such as Essie’s Fairy Tailor or OPI’s Topless and Barefoot. For the stones, Swarovski crystals work well (they are easy to find at Daily Charme or in Amazon pro nail kits), plus a precise gem adhesive like Makartt Nail Rhinestone Glue.
A steady hand is everything. Once the base color has cured, I use a wax pencil or a crystal picker to place each gem. Set one stone at a time, then seal the nail tip with a thick layer of gel to hold it in place. Bonus tip: cure the glue under a low-intensity LED light so the stones stay put and look their best.
I wore this style once on a milestone birthday, and I honestly turned heads all day. The structure is simple, but the sparkle where the light hits is so satisfying. You keep catching glimpses of your own nails as you move, and that feels great.
Golden Starburst Tips
Take your favorite French manicure and sprinkle it with gold stardust. This look combines an almond-shaped French tip with gold starbursts and tiny dots. It is dainty, dreamy and totally magical-girl.
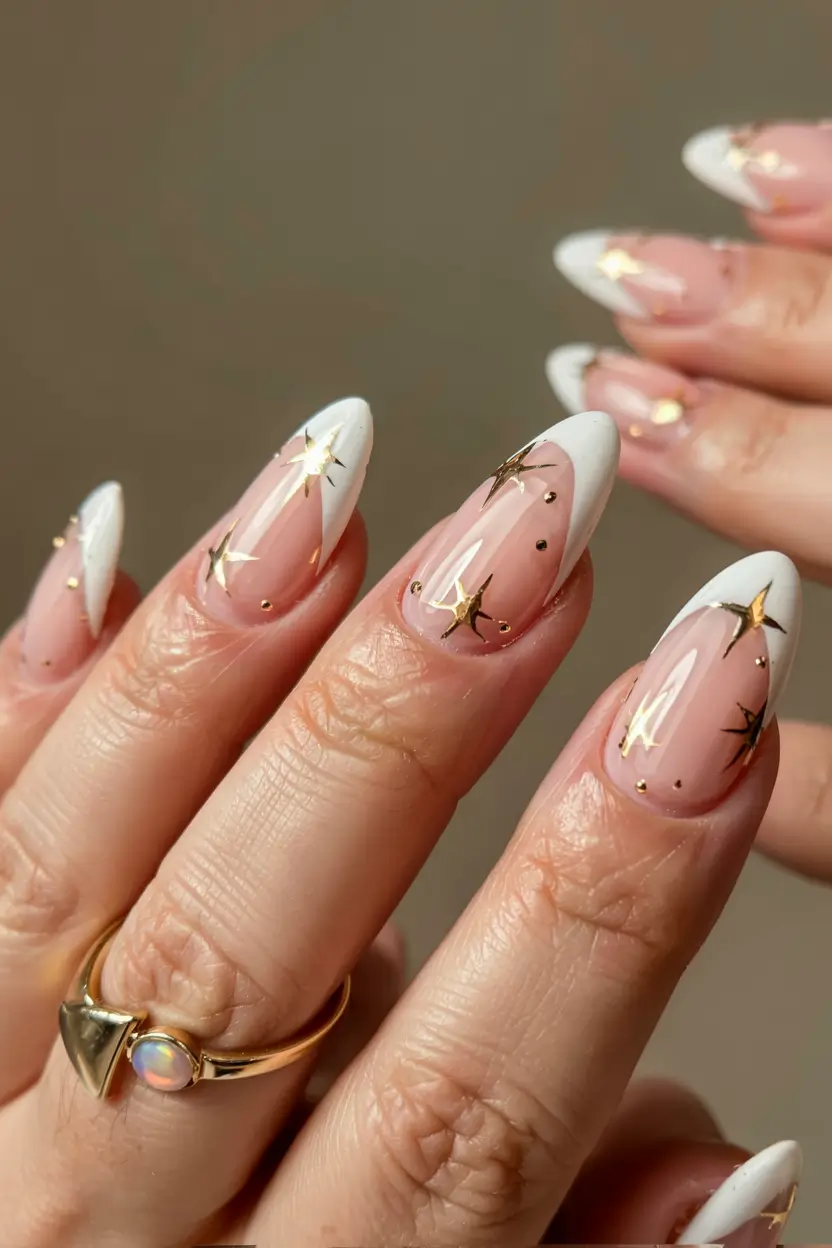
Start with a bare pink such as OPI’s Bubble Bath, then add clean white tips with guides or a fine nail brush. For the gold accents, nail foil stickers or stamping plates (like MoYou London’s) work well. Place micro dots with a toothpick and metallic polish.
Space is the secret to keeping this mani soft and dreamy, so don’t overload the stars. The shimmer should feel light, like a gentle touch of magic. If you are in a hurry, look for press-ons with star details.
This is what I would wear for a birthday under the stars, or for a candlelit dinner with gold tableware. It is graceful, romantic and a little bit enchanting.
Crisscrossed Contrast
This is what happens when minimalism meets graphic design. A white and black base is crossed with thin, neat lines that add just enough detail to keep you curious without overwhelming the look. It feels fashionable, organized and completely wearable.
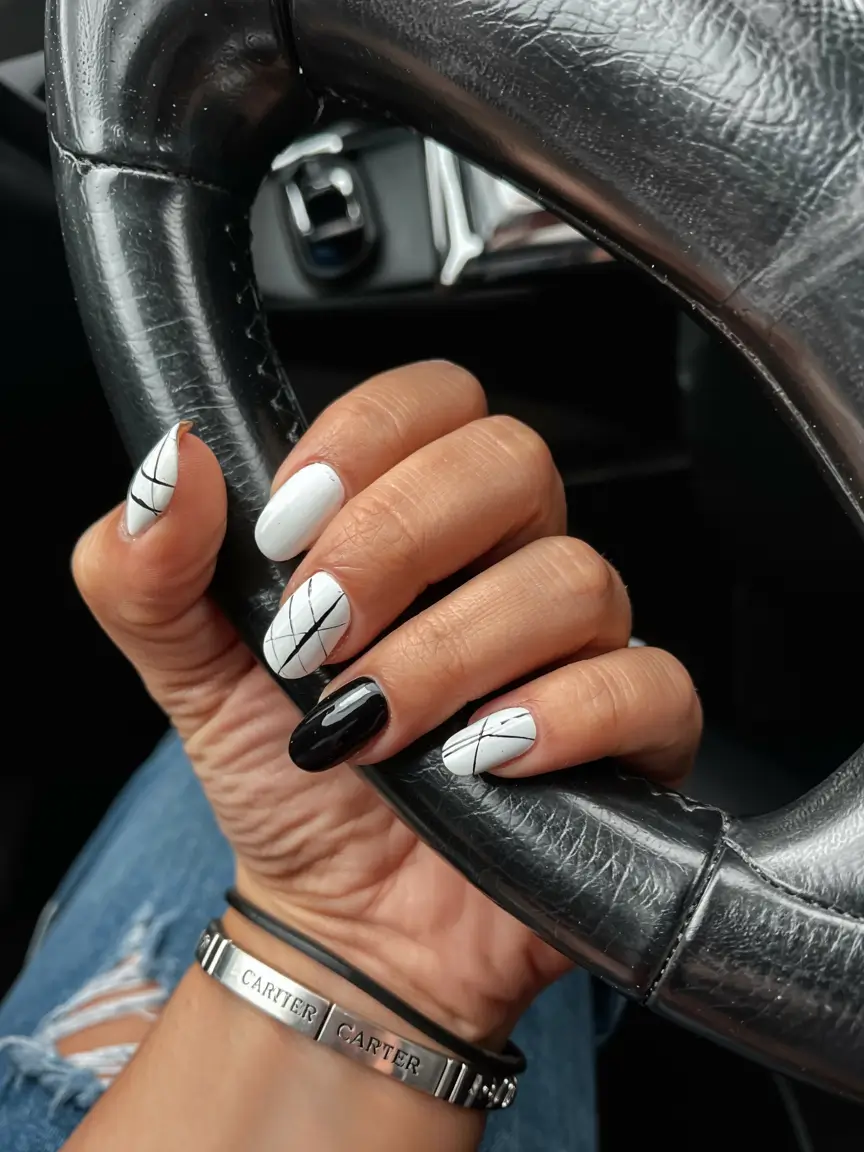
For the clean white base, I like Sinful Colors’ Snow Me White or DND’s White Tips. Draw the lines with black nail art tape or a super fine striping brush and a gel like Black Velvet or LeChat. If you want an edgier finish, seal it with a matte top coat.
I always use dry polish with a guide to keep those lines clean, and PinOK Floyd works in a pinch. Two coats of top coat give everything a smooth, even surface.
I think this one suits minimalists with a twist, people who want to look fashionable without looking overly trendy. You know who you are.
Classic Bubblegum Energy
This pink is proudly pink. It is bold, sweet and iconic. The bubblegum shade radiates youthful, flirty energy, and the sharp almond shape adds a hint of edge. It is a daring twist on a classic.
For this one, the polish does most of the work. Try Orly Cupcake or Lights Lacquer’s Cherry Jelly. Aim for opaque, full coverage in two thin layers. Don’t skip a ridge-filling base coat, which gives the surface that glass-smooth finish.
I find painting pink nails genuinely relaxing. Filing, shaping and building the nails up feels almost meditative, you know? Finish with a thick, glossy top coat like Seche Vite or Essie Gel Couture to get that plump, almost press-on look.
This is the time to take a little risk, especially if you usually stick to neutrals. It is joyful, feminine and totally birthday-worthy.
Candy Bows & Polka Dots
This one is a little sassy, and that is why it works. Dark cherry red meets milky nude, white dots and tiny bow accents. It is like bringing cupcakes to a birthday in Paris: sweet and sophisticated.
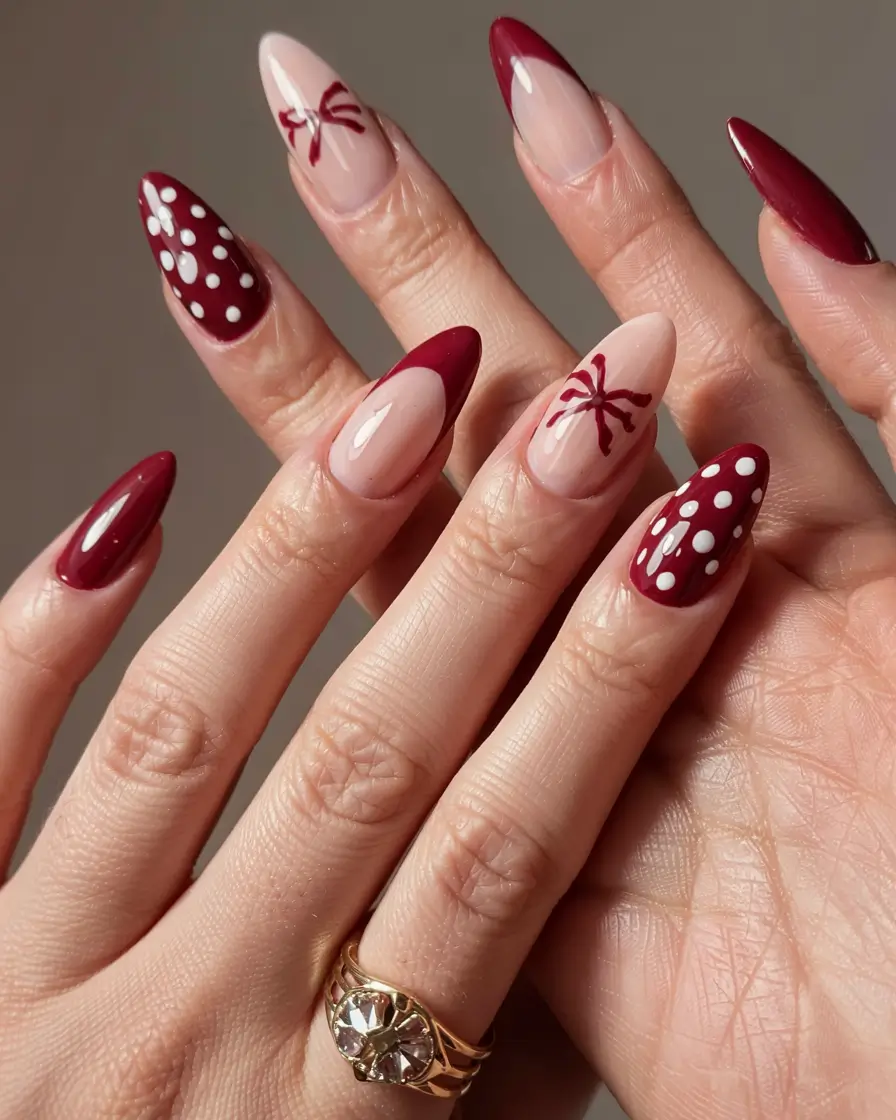
You will need a true cherry red such as Essie’s Fishnet Stockings, and a neutral base like Mademoiselle. For the white details, any opaque white works, applied with a dotting tool and a nail art brush. If you don’t like painting, pre-made bow decals are a good option.
The order is simple: polish, base, then add the dots and bows. I put a matte top coat on the bow nails and gloss on the rest. That slight contrast makes the design feel purposeful.
This look belongs at birthday parties with candy tables, confetti poppers and plenty of frosting. It is playful, lighthearted and not too serious, which is exactly how birthdays should feel.
Minimalist Valentine Energy
Sharp white nails with small red hearts feel innocent and sweet. The look is warm, playful and a little flirty, without tipping into kitsch. It is ideal for a winter birthday, or for anyone who simply loves a heart motif.
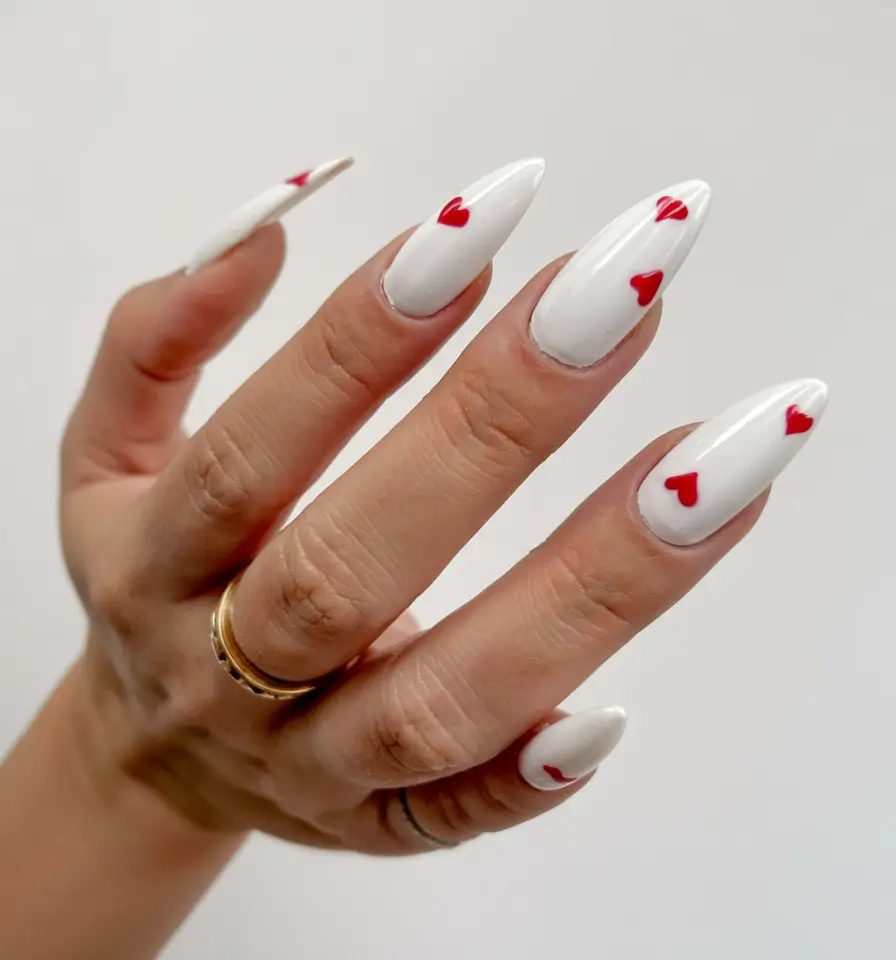
Use a solid white gel base, such as The GelBottle Inc.’s White Gel Paint, plus red nail art paint or decals. I like making the hearts with a dotting tool: two dots, a V underneath, then connect them and clean up the edges with a thin brush.
This mani always gets reactions. It is easy, but the little red hearts feel like a secret love note to yourself. Your heart should be full on your birthday, right?
Lavender Metal Moon
This gloss puts the future right at your fingertips: lavender with a chrome shift that makes your nails look lit from within. The light holographic finish changes like a mood ring, reflecting differently as the light moves.
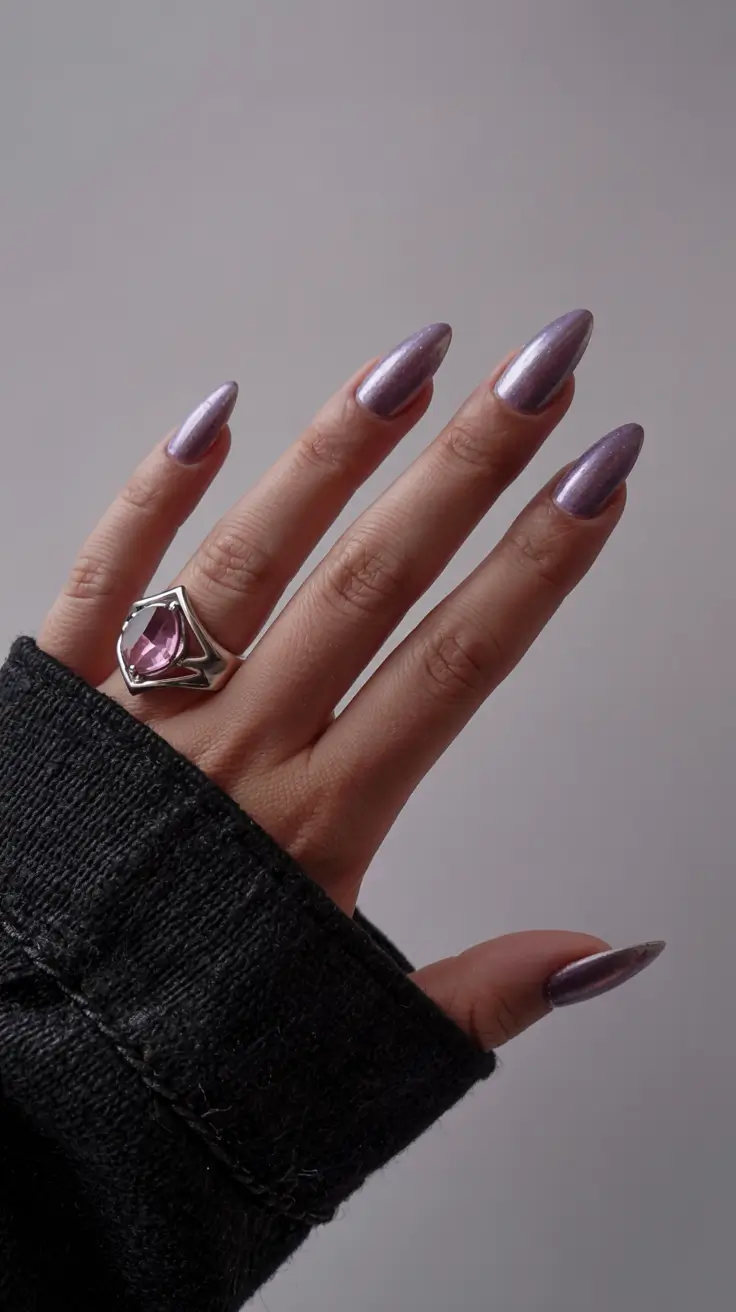
Begin with a soft pastel purple such as Essie’s Lilacism or Cirque Colors’ Lavender Lust. Then add chrome or unicorn powder on top; The Nail Hub has an amazing selection of chrome. Seal it with a no-wipe gel top coat.
Use the silicone applicator to press the powder in, then cure. You can keep it subtle or go fully metallic, depending on how much powder you use. I always add a second clear top coat to even everything out.
If you want a dreamy, futuristic mani for your birthday, this is it. It looks like something a celestial princess would wear, and it is perfect when you want your look to feel soft and unforgettable.
Retro Chic in Monochrome
This look brings together daring black polish, white polka dots and a twisted take on the French tip. The style makes a bold statement. Dots and clean lines pair playfulness with a modern edge, and the whole thing feels like vintage beauty updated.
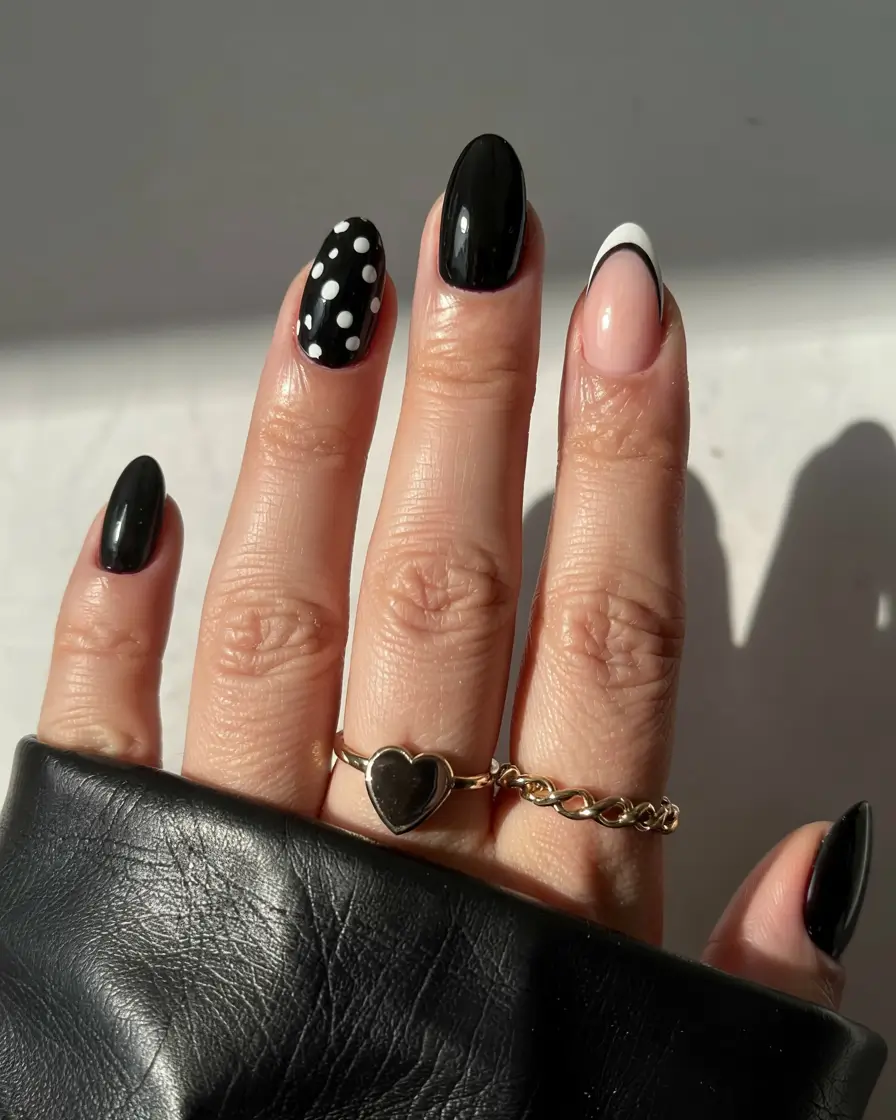
Begin with a deep, pigmented black such as OPI Black Onyx. For the dots, use a dotting tool or the end of a bobby pin dipped in a thick white like Essie Blanc. For the reverse French, a fine detailing brush and a steady hand are everything.
I wore this style to a birthday brunch with a black satin dress and red lipstick. Compliments came in fast. Black and white has a timeless magnetism to it, and it never looks dull.
Sage and Serene
Sage green is the new trend, and this manicure shows why. The smooth, polished finish of this earthy, calming color feels cool and elevated. It does not shout, but it holds your attention. It is my favorite because it brings wellness-retreat energy.
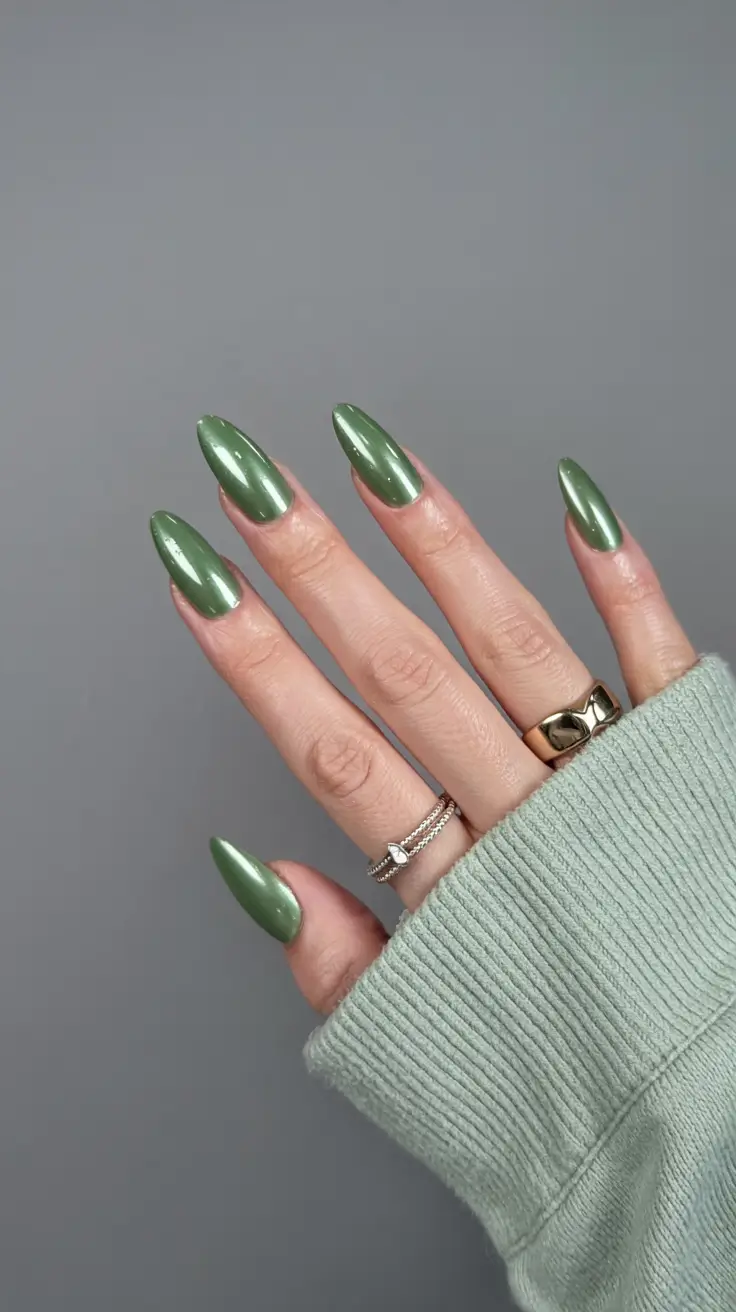
For that dreamy green, try Olive & June’s WKF or Essie’s Win Me Over. Make sure your top coat is very shiny, since the high-gloss look depends on shine. Shape the nails into soft almonds or stilettos for a contemporary feel.
I start with a smoothing base coat, then a couple of thin layers of color, then a top coat as mirror-shiny as possible, like Seche Vite or Lights Lacquer’s top gloss. Don’t forget hand cream afterward, because it makes the whole look ten times better.
I would wear this on a birthday weekend at a warm cabin or on a spa day. It feels raw and luxurious, like fresh eucalyptus and white robes. Even if you are not a green-nails person, this could be the color that wins you over.
Refined Glamour with a Touch of Gold
This is what minimalist French nails do when they dress up for a birthday. The classic white tip is traced with fine gold glitter swirls, which makes the whole look feel couture. I love that it is subtle and still makes a statement.
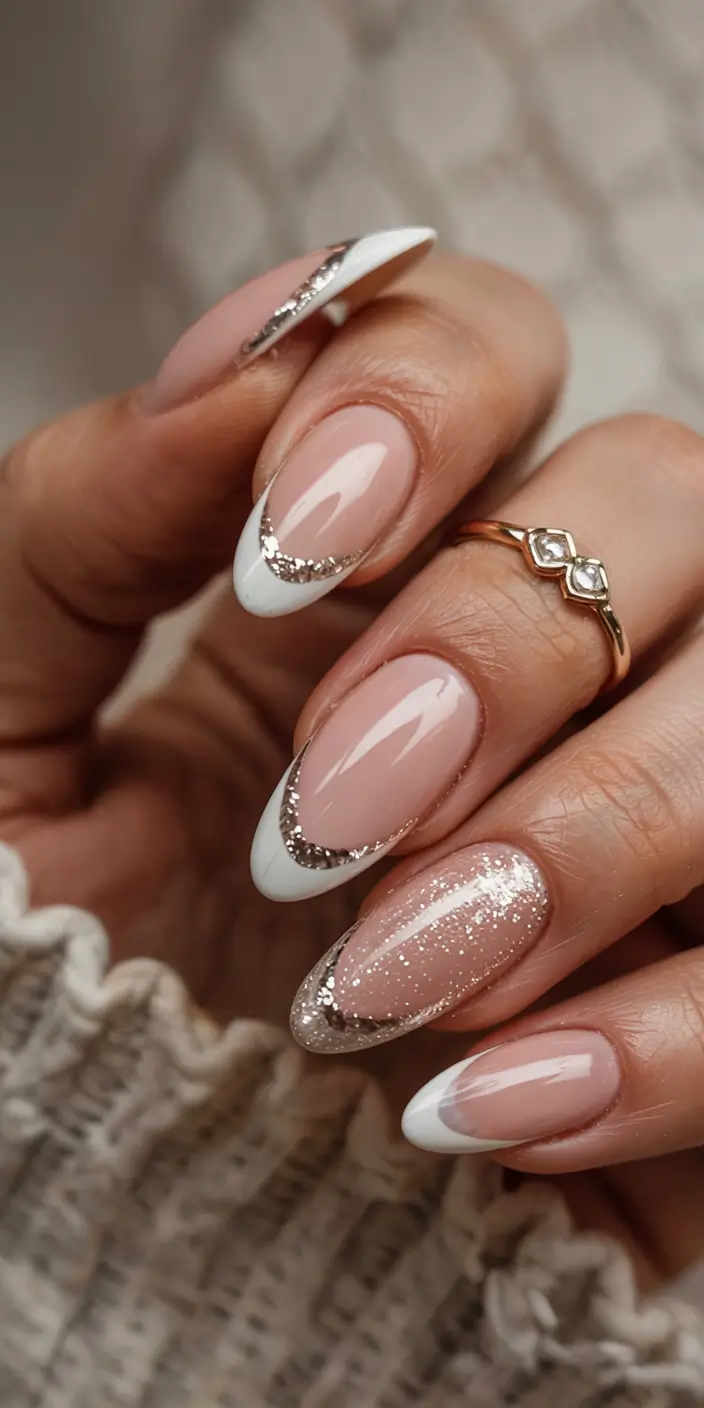
For this look, I would start with a creamy neutral base such as OPI Put It In Neutral. Apply the gold with a fine detailing brush and a glitter gel like Le Mini Macaron’s gold glitter gel, or another highly concentrated formula. If you don’t trust your hand with swirls, nail decals are a great shortcut.
The balance of this manicure is beautiful. The glitter is not hiding anything; it is placed deliberately as part of the design. Sharp details like these take patience, and with a gel base and top coat combo it does take time, but the result is worth every minute.
This is the mani I would choose for a weekend outing on my birthday, to a place with candles, wine and live music. It is classy, has just enough extra detail, and feels festive without being loud.
Glossy Playfulness with a Touch of Sparkle
These nails hit differently. A crisp white base carries playful pink and teal balloon patterns on three fingers, while the other two are finished with light rose-gold glitter. The look is cheerful but mature, the kind of mani that whispers birthday girl instead of shouting it.
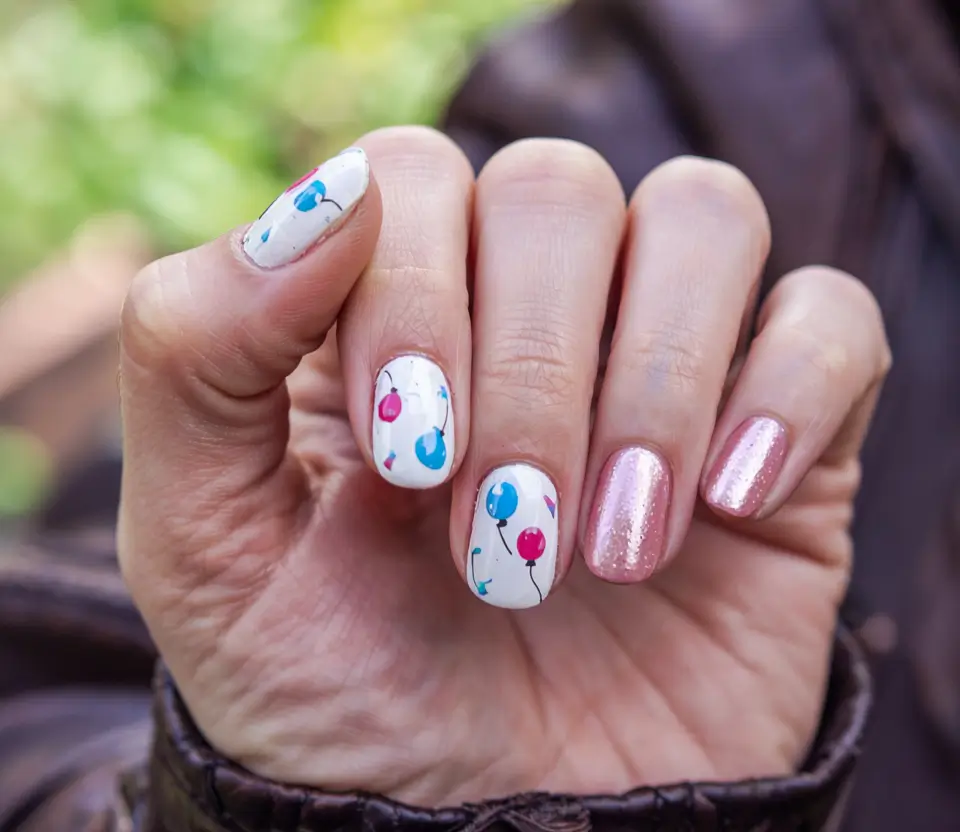
To recreate it, I would start with OPI Alpine Snow as the white base because it has just the right amount of brightness. Then pair it with a jelly pink glitter polish from Essie. For the balloons, use a dotting tool to draw them by hand, or try balloon nail art stickers, which save a lot of time when you are short on patience.
My routine goes like this: a base coat (Olive & June is a favorite), then two layers of white. Once that dries, I paint the balloons with a nail pen or striping tool, add glitter to the pinky accents and finish with a top coat for shine. If you want extra insurance against smudges, a quick-dry drop works well.
What I love most is that this look feels like a little party on your fingertips. The balloon details make you feel like a kid again, and the glossy shimmer keeps it sophisticated. It would be just as cute for a birthday picnic or any daytime celebration.
Matte Noir & Rose Champagne
If this set were a song, it would have deep bass and a low-key synth, with bold matte black and blinding rose gold glitter. It is moody but party-ready, and it works for anyone who loves a contrast that really works.
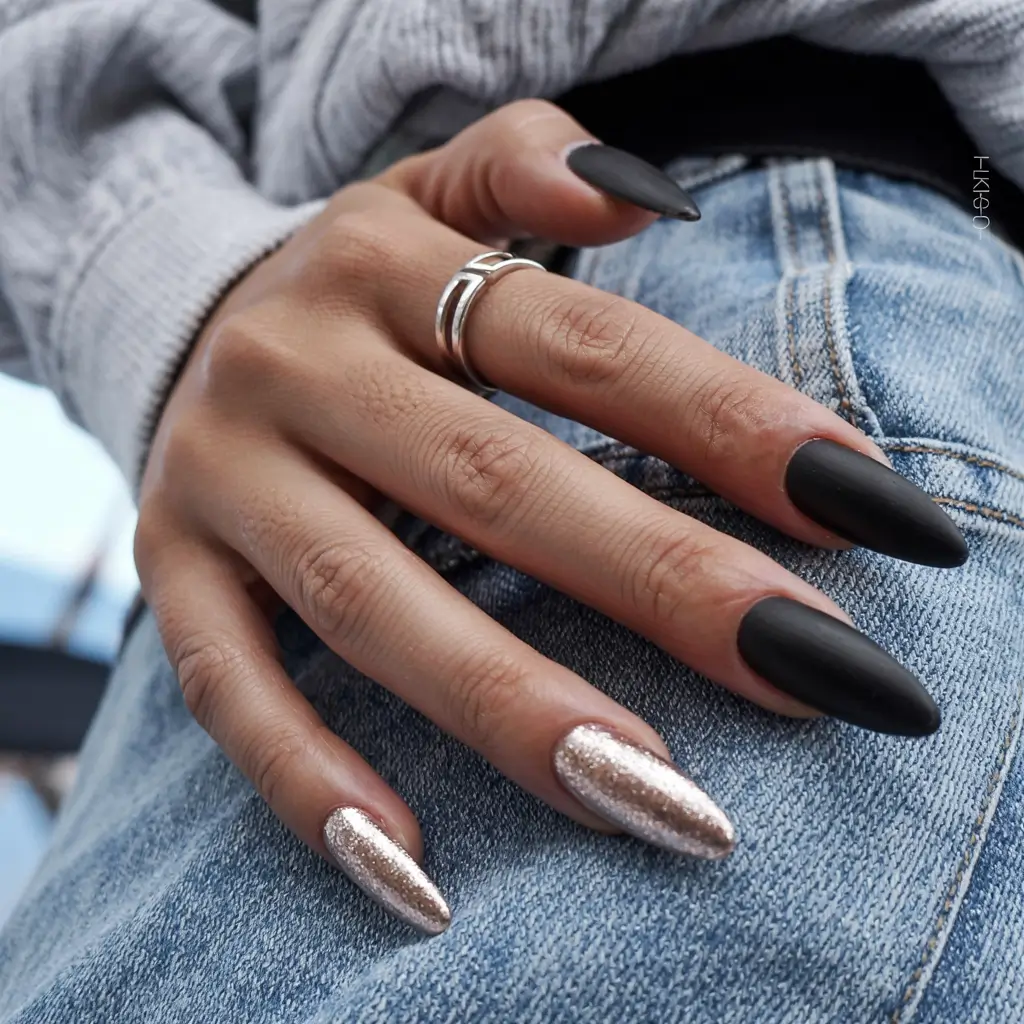
I would use CND’s matte black for the velvet nails and Kiara Sky’s Champagne Toast for the glitter. You need a good matte top coat, such as one from Zoya. For the glitter nails, I always dab a sticky layer underneath so the sparkle stays thick.
Once the black is dry, add the matte top coat. Dab glitter polish onto the glitter nails with a small sponge to get full coverage. Then apply a clear gloss only on those nails to make the texture stand out.
This is the mani I would pick for a rooftop birthday party. It is a bit fierce and a lot of fun, like running leather and sequins through your fingers.
Pink Pop French
Meet classic French with hot pink drama. This French tip works in reverse: the nude base stays clean while bold color cuts in at the edges. It turns the traditional birthday nail into something fresh and feminine. It is the kind of look that says you are here to eat cake and cause a little havoc.
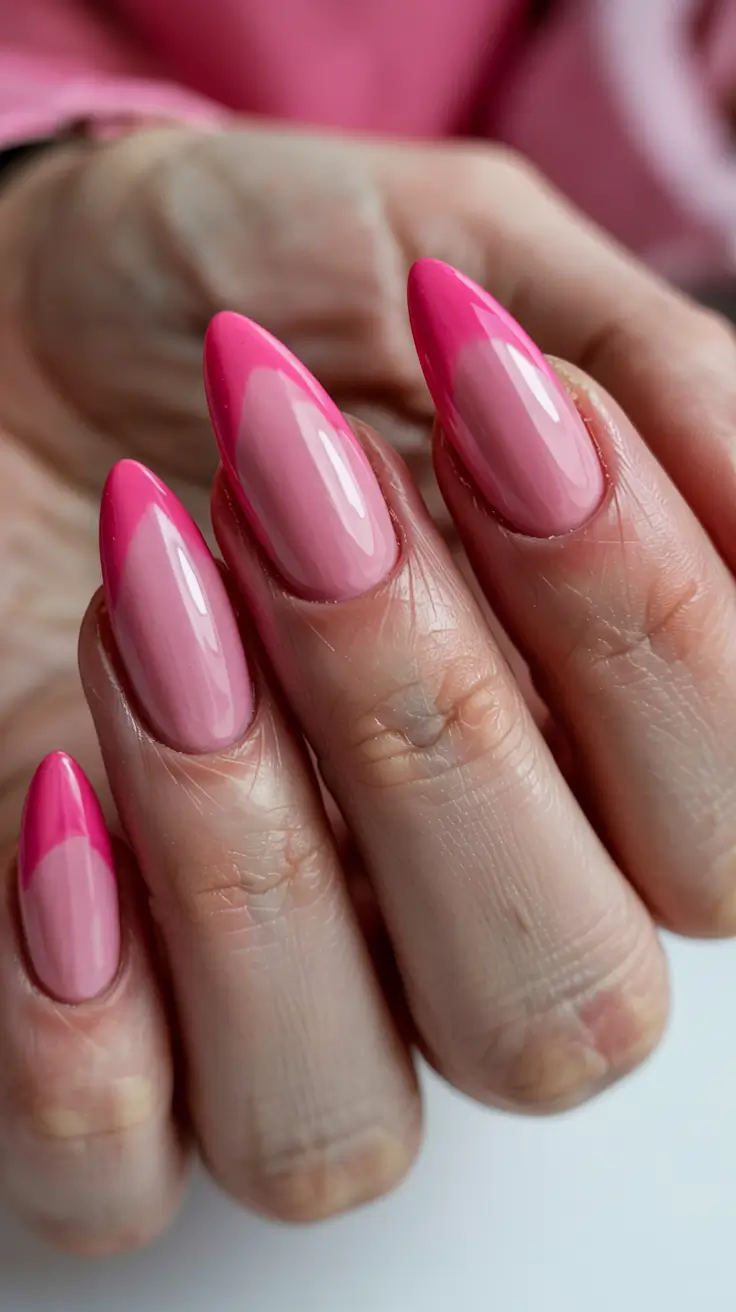
To recreate it, start with a light blush base, such as OPI’s Bubble Bath. Then paint the tips in a pink like Strawberry Margarita or Mod About You. At home, French nail stickers help you get that V-shape. Don’t skip a high-gloss top coat, since this look needs a glassy finish.
I save bold tricks like this for days when I know I won’t be caught off guard. The pink adds electricity, and the shape keeps the fingers looking long. Nail artist Betina Goldstein once said a French manicure is like a little black dress: you can wear it again and again in different ways. This remix? She is going dancing.
Cosmic Confetti Nails
Glitter turns this one into a little zodiac chart. Heavenly black and silver glitter are layered over dark and nude bases, so the look feels moody and celebratory at once. The shimmer falls over the fingertips like a meteor shower.
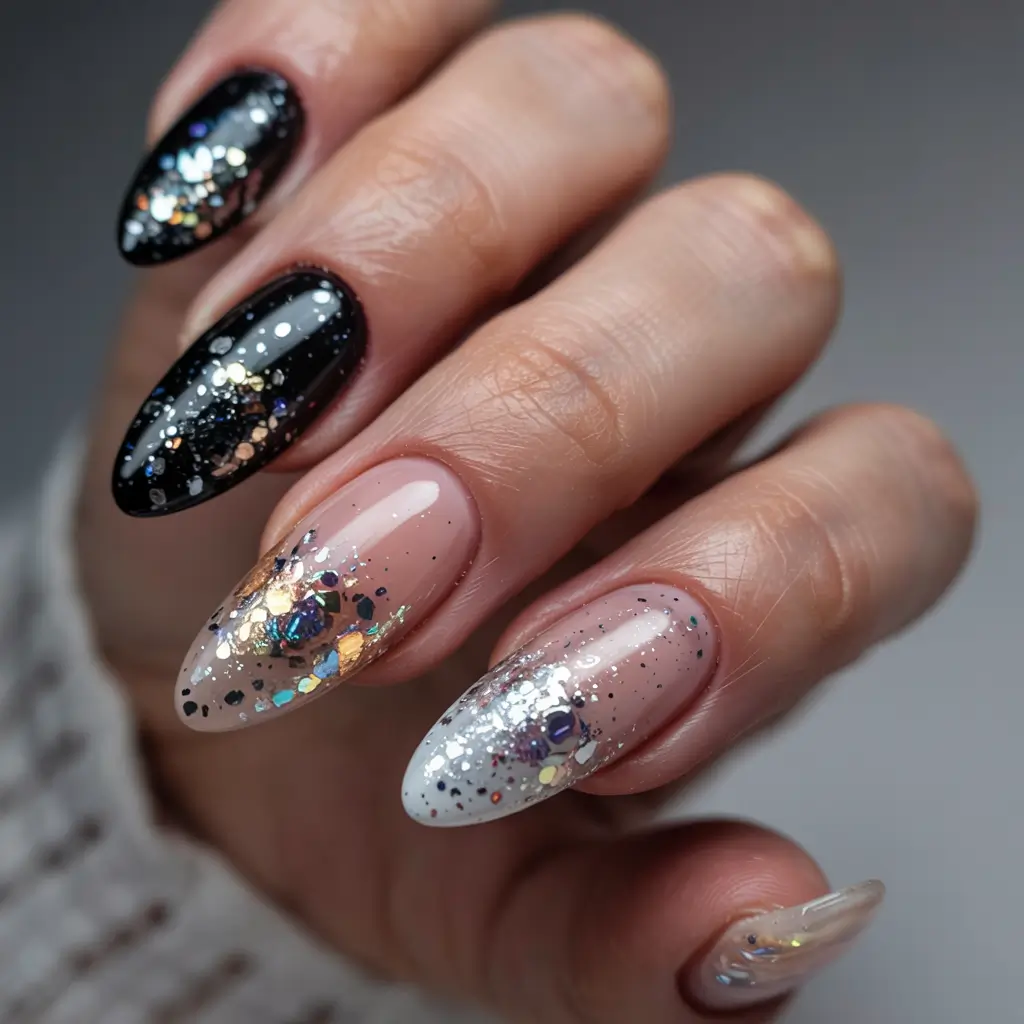
You will need a jet black polish, such as one from Sally Hansen, and a clean milky white like Essie’s Marshmallow. For the glitter, combine thick three-dimensional pieces like ILNP’s Star Cluster with loose holographic ferro-glitter from Kiara Sky. Use a sponge to dab the glitter from the tips toward the middle for a gradient effect.
I usually paint the base color, let it dry, then dot the glitter on with a makeup sponge or my fingertip. Seal it with a gel top coat to smooth out the texture. For longevity, use a gel base and top product such as Gelish.
This is a sparkler-and-candles kind of design: simple, pretty and a little wild. It is perfect for nights out that run well past midnight, when nobody is counting the hours.
Vibrant Lilac Pop
Sometimes color is all you need. These high-gloss lilac nails make a big splash with minimal effort. There is no glitter or design, just saturated lavender. It is the kind of color that lifts your mood the moment you look at your hands.
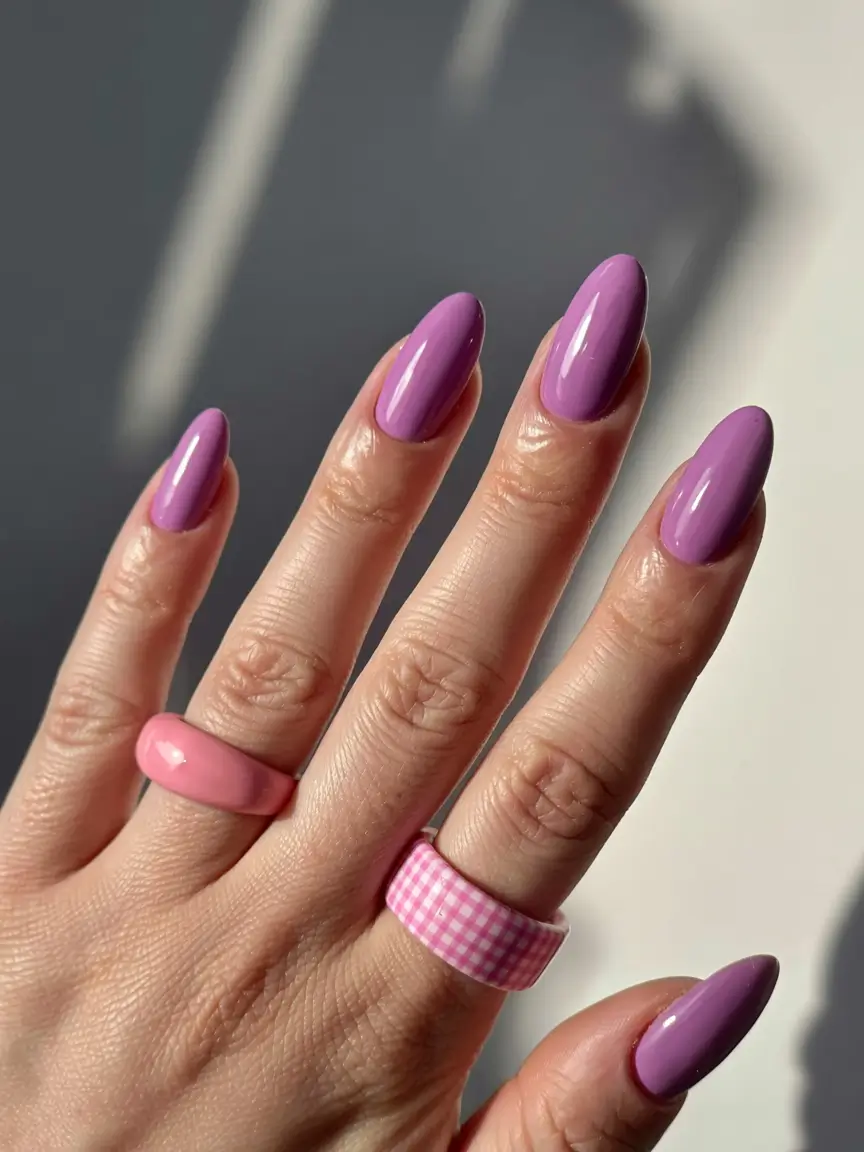
To get this shade, look for Lights Lacquer’s Lilac Wine or OPI’s Do You Lilac It? Make sure your top coat is fresh and shiny. I like slightly shorter almond or squoval nails with this one, because they are easy to maintain.
This mani is all about prep. Start with well-buffed nails, add a ridge filler, then two coats of color and a seal. On day three, reapply top coat so the color stays fresh and doesn’t dull.
Lilac makes me feel like spring is on its way, even in the middle of winter. The color is fresh and confident, and it feels timeless. It is not just stylish; it is personal.
Fairy-Tale Gradient
There is something otherworldly about this cool fade from lilac to baby blue. It is like the end of a cotton candy sky at dusk, soft, mystical and a little magical. It suits anyone who wants an easygoing yet playful birthday mood.
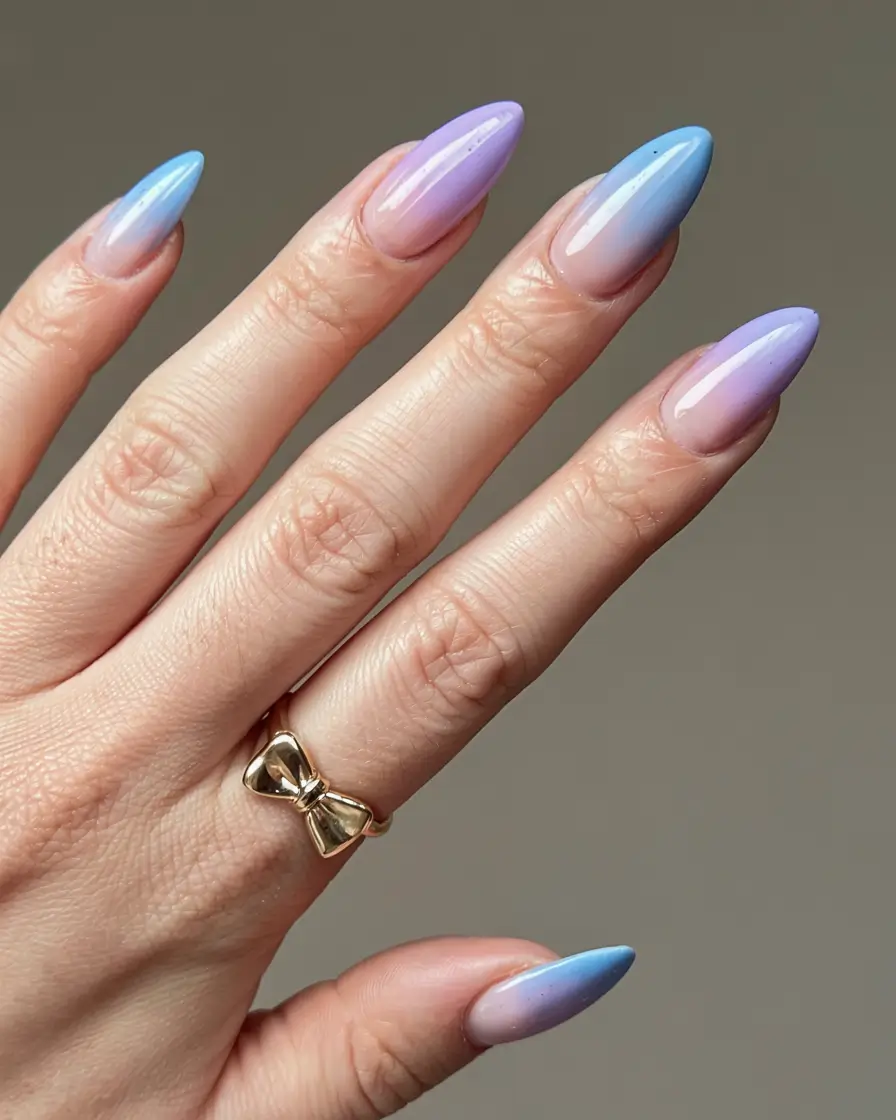
To recreate this gentle combination, try gel polishes like Periwinkle by The GelBottle and Do You Lilac It? by OPI. You will also need a quality ombré sponge or brush, and some patience. A pink base can help tie everything together more seamlessly.
I load the two colors in thin layers, alternating and blending until I get that soft fade, curing between each layer when I use gel. Finish with a glossy top coat to bring out the gradient and the glowy, glassy look.
I would wear this on a lazy birthday with tea, a book and soft music. It is harmless and charming at the same time. It is the nail version of saying, today I am celebrating me.
Red Glamour with a Twist
There is birthday red, and then there is this red. It blends a glossy red with French tips on two nails, and the whole look is decorated with jewel-like accents that make it ready for a party.
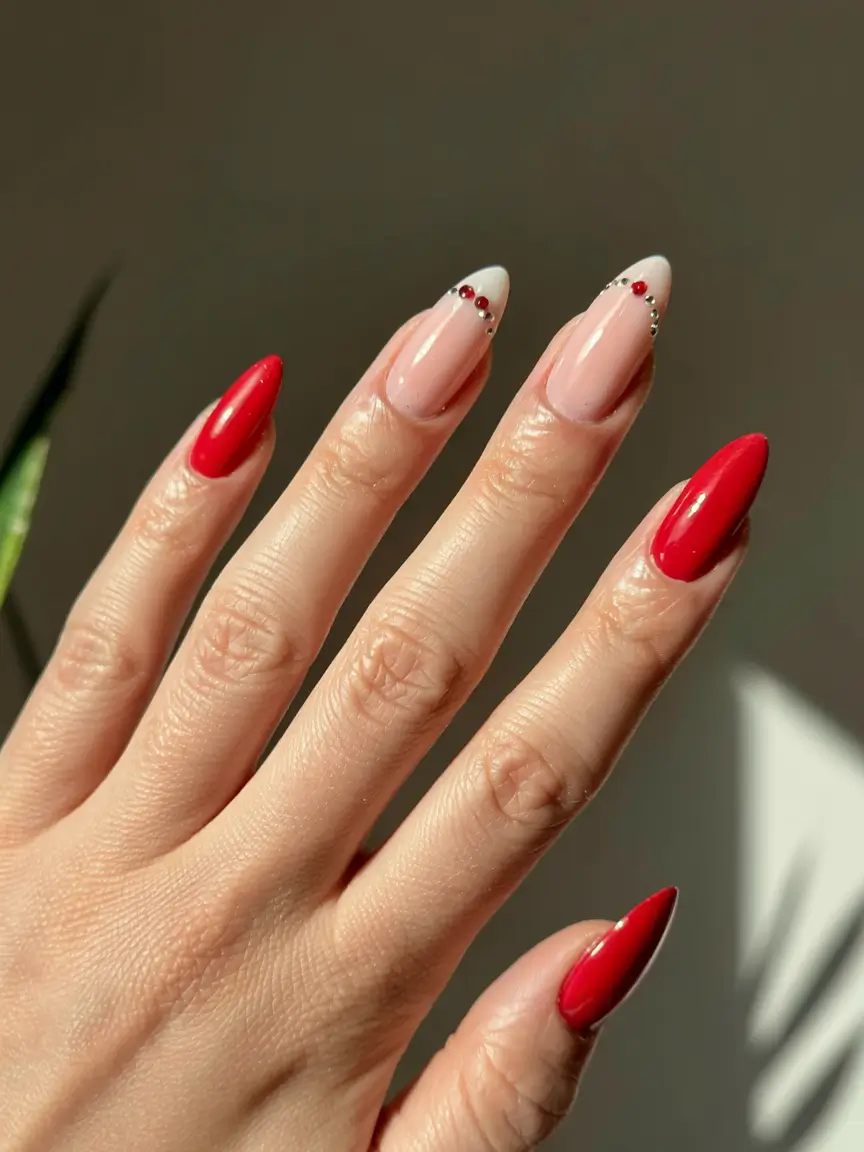
For the red, use OPI’s Big Apple Red on one hand or Lights Lacquer’s Ruby on the other. Essie’s Bare It All works well as the nude base for the French tips. Rhinestones are easy to find in Daily Charme or Amazon nail art kits.
Here’s the method: apply the base, let it dry, fill in the tips with a guide or a steady hand, add nail glue and press the gems in with a neat twist. To finish, I always add a thick layer of gel on top to hold the sparkle.
This design suits an evening birthday dinner, with champagne and a dress you feel great in. It is playful and a little theatrical, yet still highly polished. It brings main-character energy.
Red Wine and Almond Tips
Nothing says confidence like a deep wine-red almond manicure. It pairs two finishes across the nails: soft nude bases and a sharp, vampy red tip. It is dramatic but not over the top. Picture a romantic dinner, red lipstick and a silk slip dress.
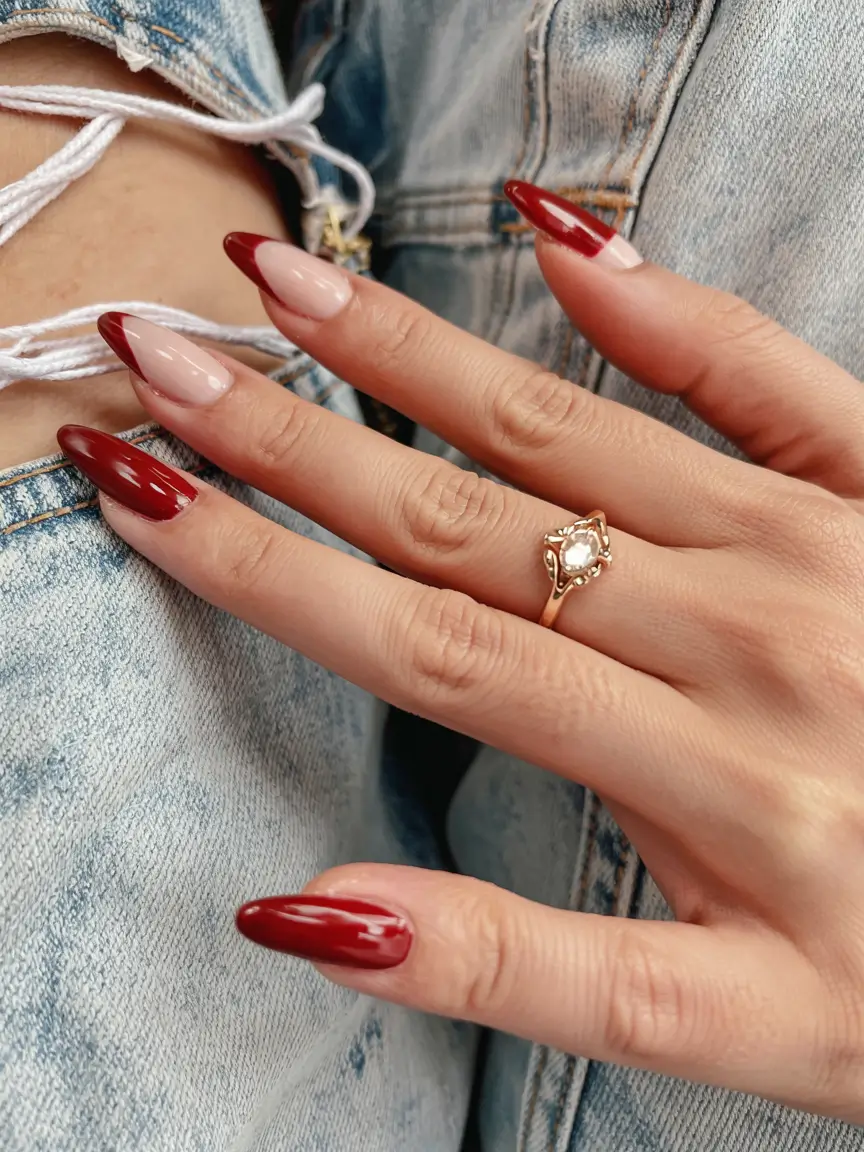
For the red, I would choose OPI’s Got the Blues for Red or Zoya’s Vanessa, a tempting sultry shade. Pair it with a sheer nude like Essie’s Sheer Luck or Orly’s Kiss Me, I Am Kind. A fine tip brush or French guide stickers will help you get that clean V-cut tip, and that makes all the difference.
This manicure takes some practice and a shaping tool. File the nails into the almond shape, apply the nude base, then carefully paint the red ends. There is no need to rush the cleanup; a sharp line is what makes it look polished rather than casual.
I had a similar look once at a December birthday dinner. The mix of bare and bold made an impression. It has grown-up energy: sexy, clever and completely intentional.
Lavender Chrome with an Edge
Otherworldly and pure, this lavender chrome look is smooth, shiny and very contemporary. The color sits between icy lilac and low-key violet and shifts with the light. It is ideal if you want a cool, birthday-baddie vibe.
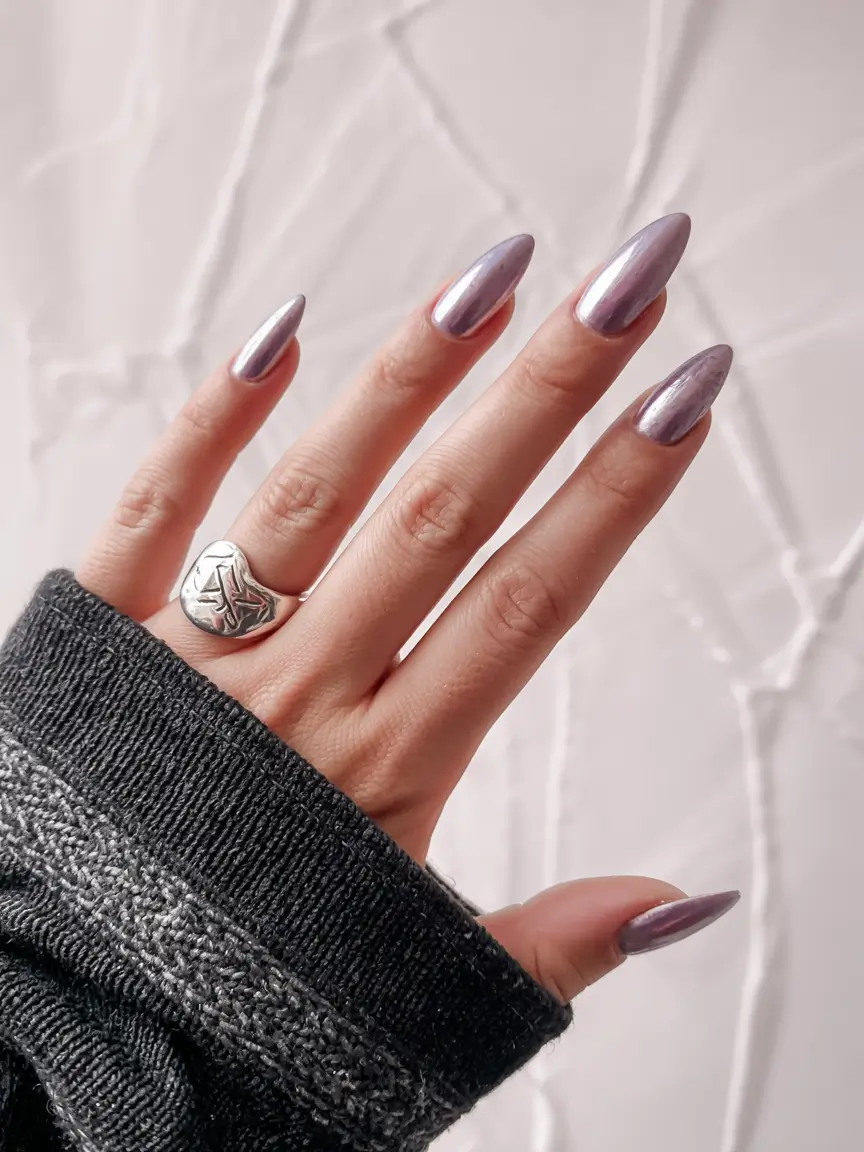
This look is easier to recreate at home than it seems. Start with a good lavender base like Essie’s Lilacism or Feathers of a Phoenix, then, while the base is still wet, apply chrome powder in silver or a unicorn shade. I love the chrome sets from Born Pretty; they are very easy to work with.
Don’t skip the sealing step. Apply a no-wipe top coat, cure it, then burnish the chrome into it with a sponge applicator. Once you are happy with the mirror finish, add one more glossy gel top coat. It takes time and precision, but it is worth it.
This look reminds me of the spa day I booked for myself on my birthday, when I walked in with nails that made me feel like the best version of myself. That kind of energy is absolutely birthday-worthy.
Birthday Cake Sprinkle Tips
This mani is a direct interpretation of birthday happiness. A soft almond-shaped nude base holds colorful sprinkle accents shaped like frosting decorations. It is cute, quirky and irresistible. It is fun without being childish, so you can wear it to brunch without raising eyebrows.
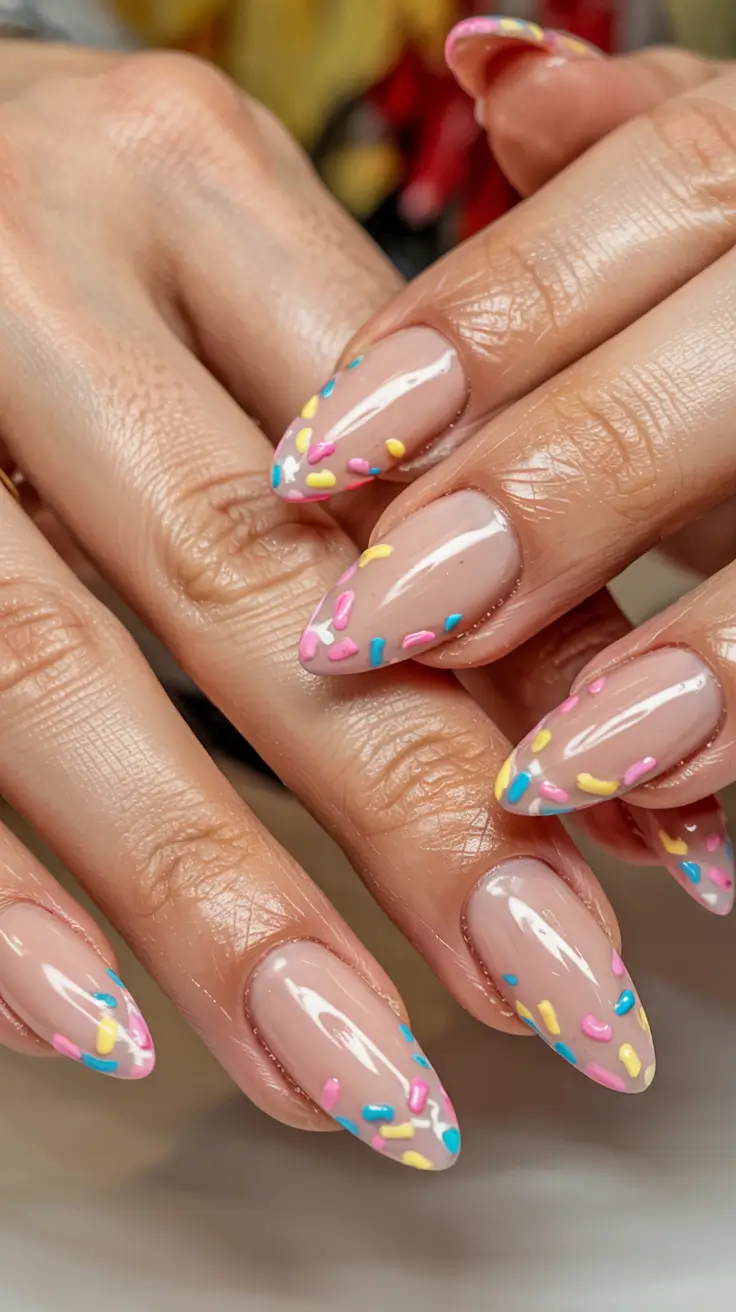
Start with a simple pale nude base, such as one from Essie or DND. The sprinkles are where the fun begins. A dotting tool or a bobby pin can make small lines and shapes with colorful gel polish. In a hurry, nail decals or press-ons with sprinkles work just as well.
With this kind of nail art, I like to dry each sprinkle color one at a time so they don’t blend. It takes a little longer, but it is worth it. I finish with a rich, no-smudge top coat to smooth everything and get that bakery-fresh shine.
It takes me back to childhood birthday parties, only one level up. It is joy in manicure form, and it is the kind of birthday mood you want to carry with you for years.
Negative Space Curves
This look proves that less really is more. Abstract black lines curve across a plain white surface, leaving negative space between them. It feels like a modern art gallery and a birthday mood board at once: clean, edgy and extremely Instagrammable.
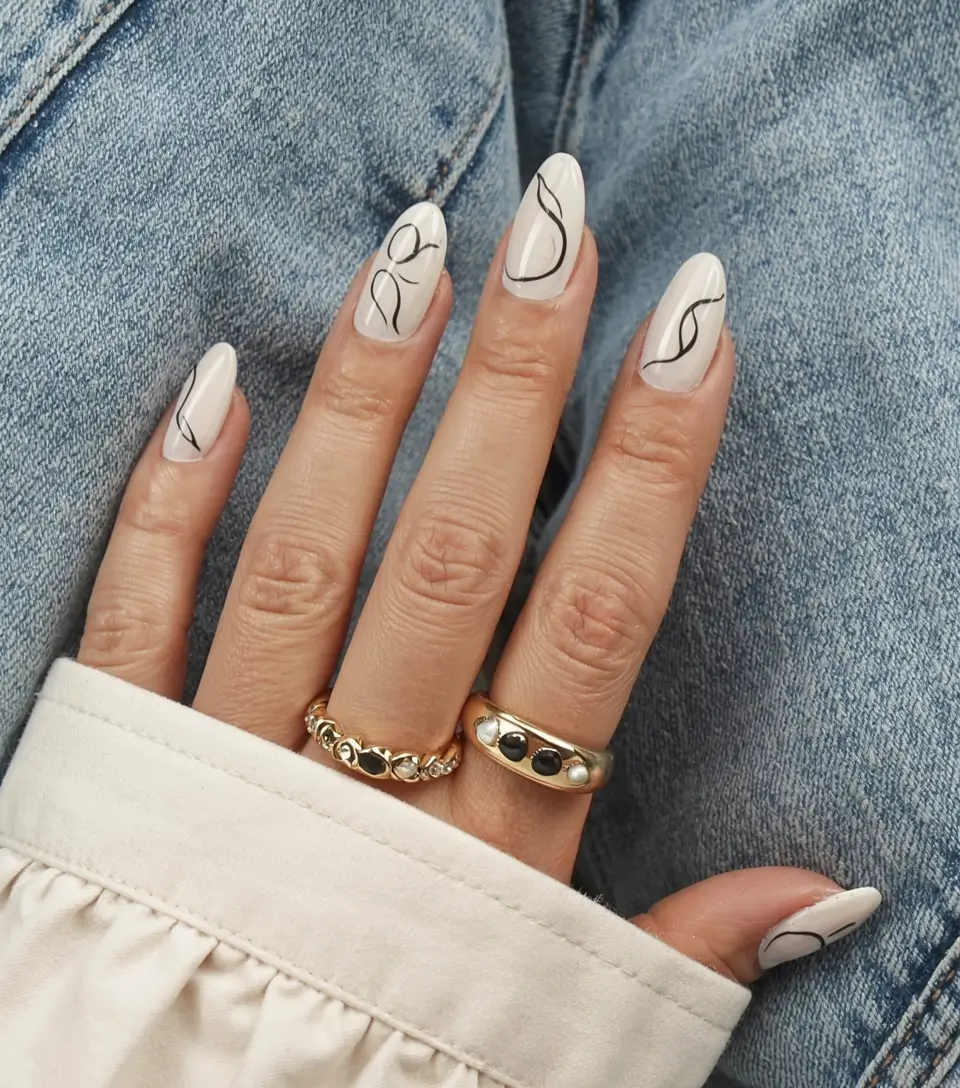
The base is a white gel such as Gelish White Out. For the line art, use a small detailing brush and a gel paint or liner like those from Kokoist or Nail Labo. When you are freehanding, take your time and relax. Curves look more natural when you let them flow.
The best part? It’s easy to maintain. I refresh mine midweek with a clear top coat to keep the shine. You can also experiment with a neutral beige or light pink base instead of white.
Whether your birthday week is about clean nails, a stack of coffee table books or a playlist you love, this mani will keep up with your spirit.
Iridescent Doll Pink
This one is pure high-fashion Barbiecore. The holographic iridescent pink nails are full of attitude. Think unicorn meets mirror ball, with the color shifting in every light. They deserve a careful hand to get right.
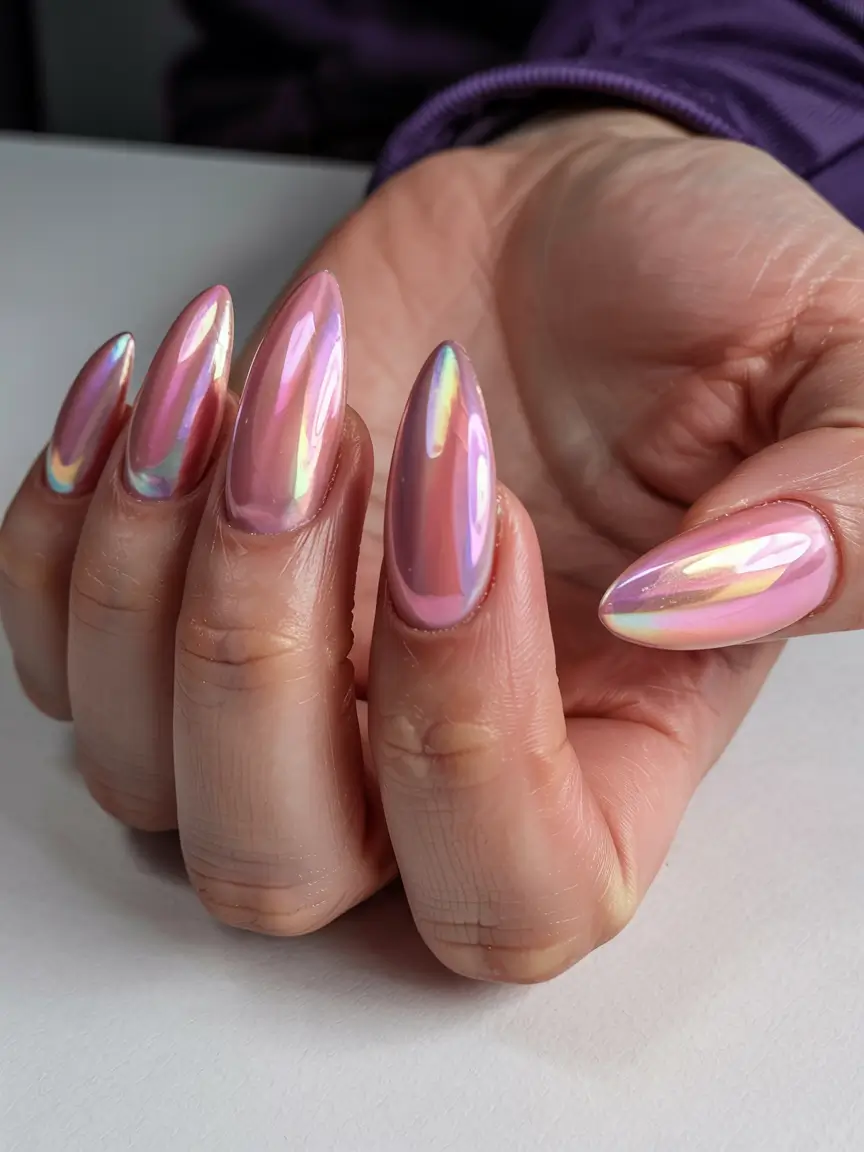
The base is a jelly pink polish with a multi-chrome shimmer. Start with a base such as Beetles Gel Polish in Rosewater Pink, then add an iridescent powder or a layer of chrome flakes. I love the unicorn powders from The Nail Hub.
Use gel for this one. After all the base layers, apply a no-wipe top coat, cure it, then buff the powder in with a silicone applicator. Finish with another gel coat for a glassy shine.
I once went to a birthday night out in a velvet dress and had no time to put on jewelry. These nails became my jewelry. They are playful, refined and totally entertaining, exactly what I would carry into a new year.
Snowy Birthday Sweater Vibes
This design is pure winter birthday: matte white and taupe with warm, sweater-inspired patterns. Dots, swirls and tiny snowflakes keep it cold-weather cozy without feeling dull.
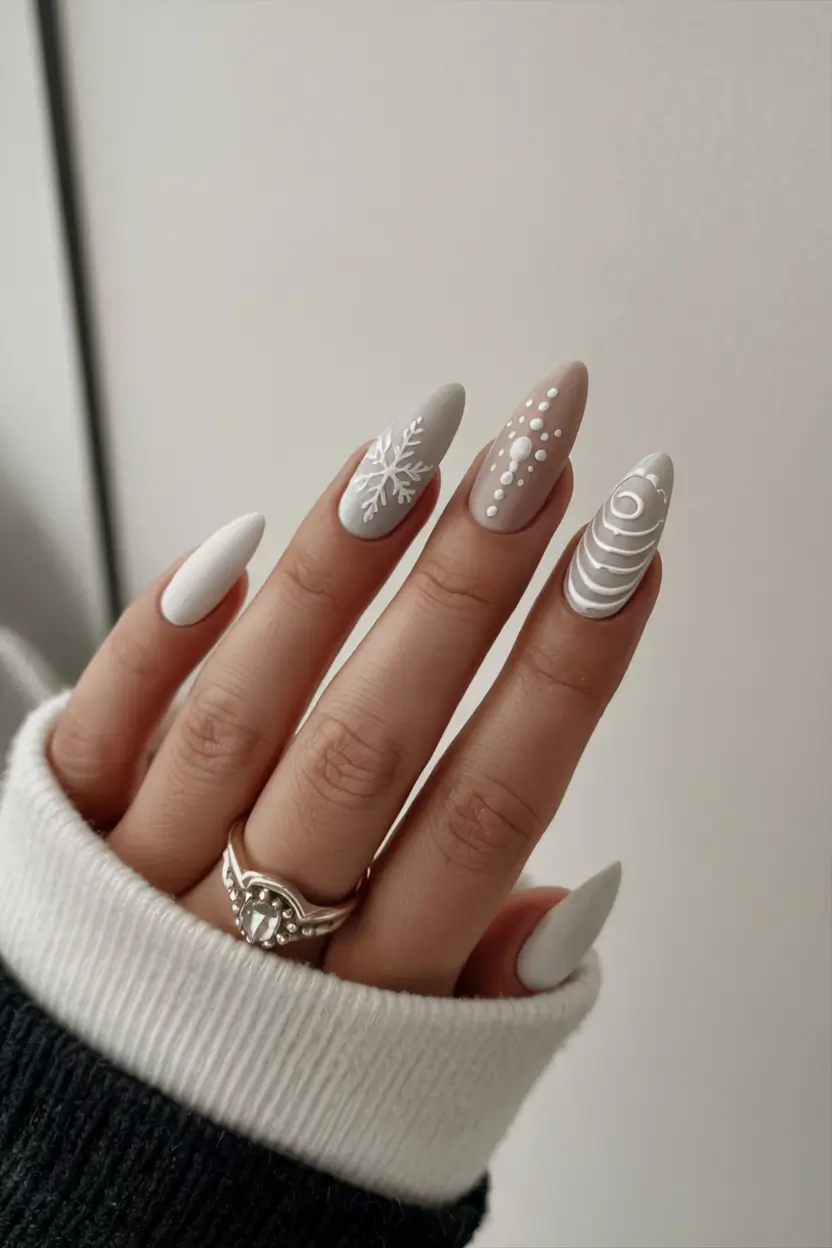
Look for a neutral palette such as Sally Hansen’s Taupe of the List and The GelBottle’s White Lace. Sweater details can be painted with a liner brush, or you can use embossing gel if you want a 3D texture.
Apply the base color, cure it, then carefully draw each detail and finish with a matte top coat. For a raised, knitted look, add one more layer of white over the sweater lines and let it set.
This set is perfect for a January birthday brunch or for snuggling up with blankets and dessert. It offers cozy luxury without being ordinary, like a favorite knit you can wear on your nails.
Gift-Wrapped Glam
This look makes you feel like you are opening a present. Soft blush pinks, a sharp white accent with a small bow, and two fully glittered nails strike a perfect balance between elegant and festive.
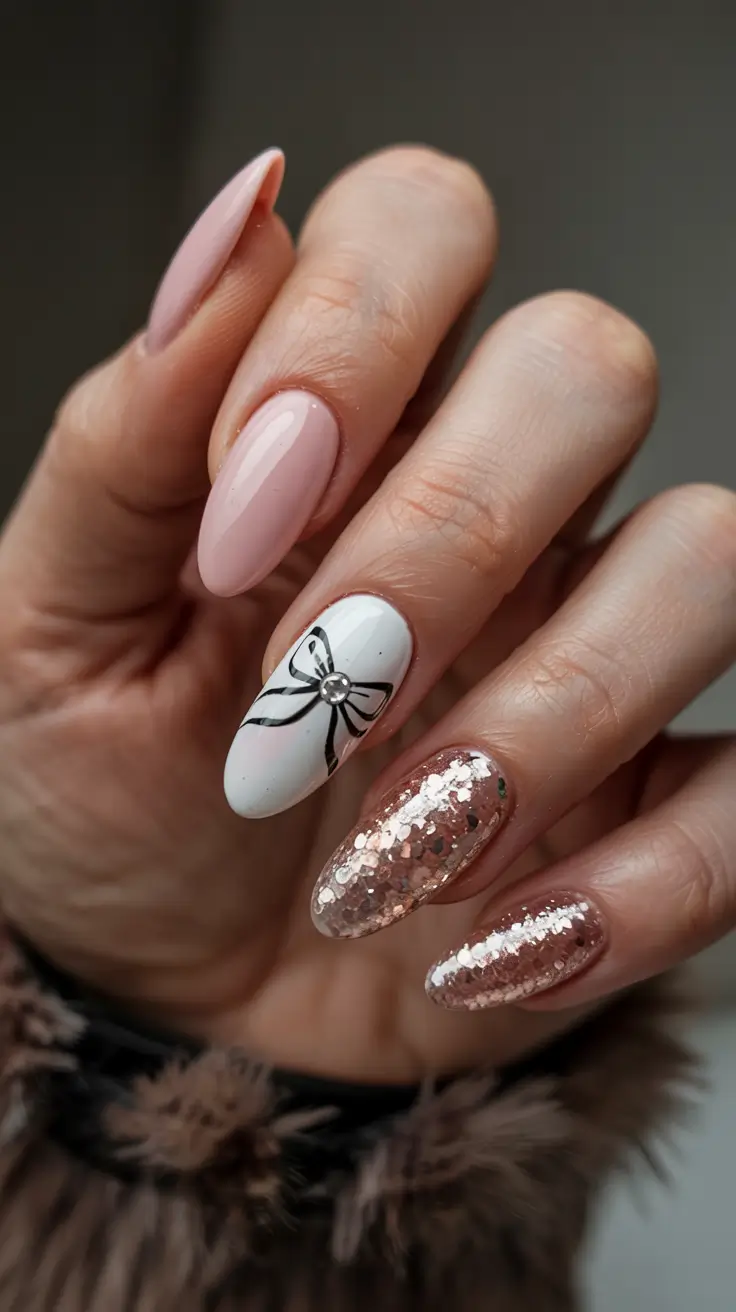
I would use three shades here: Essie’s Fiji for a baby pink base, Essie’s Alpine Snow for the accent nail, and for the glitter moments a chunky glitter like Essie’s Set in Stones or Orly’s Bling. The bow is easy to hand-draw with black nail art gel, or you can use stickers for a shortcut.
This is a mani where I take my time. I start with a nice cuticle oil, shape everything into soft almonds, and build the color in thin layers. For the glitter nails, I use loose glitter to get that thick, saturated sparkle. The bow is the cherry on top.
I wore a version of this to a winter birthday, and you should have seen people smile when they saw my nails. It is adorable and refined, with the kind of magic that only birthdays and bows have.
Confetti Sparkle with a French Twist
This design combines three favorites: sparkly confetti glitter, a French tip and a sheer nude base. The glitter is placed loosely, almost like birthday confetti falling across the nail, and that is what makes it come alive. The result is festive and polished at the same time.
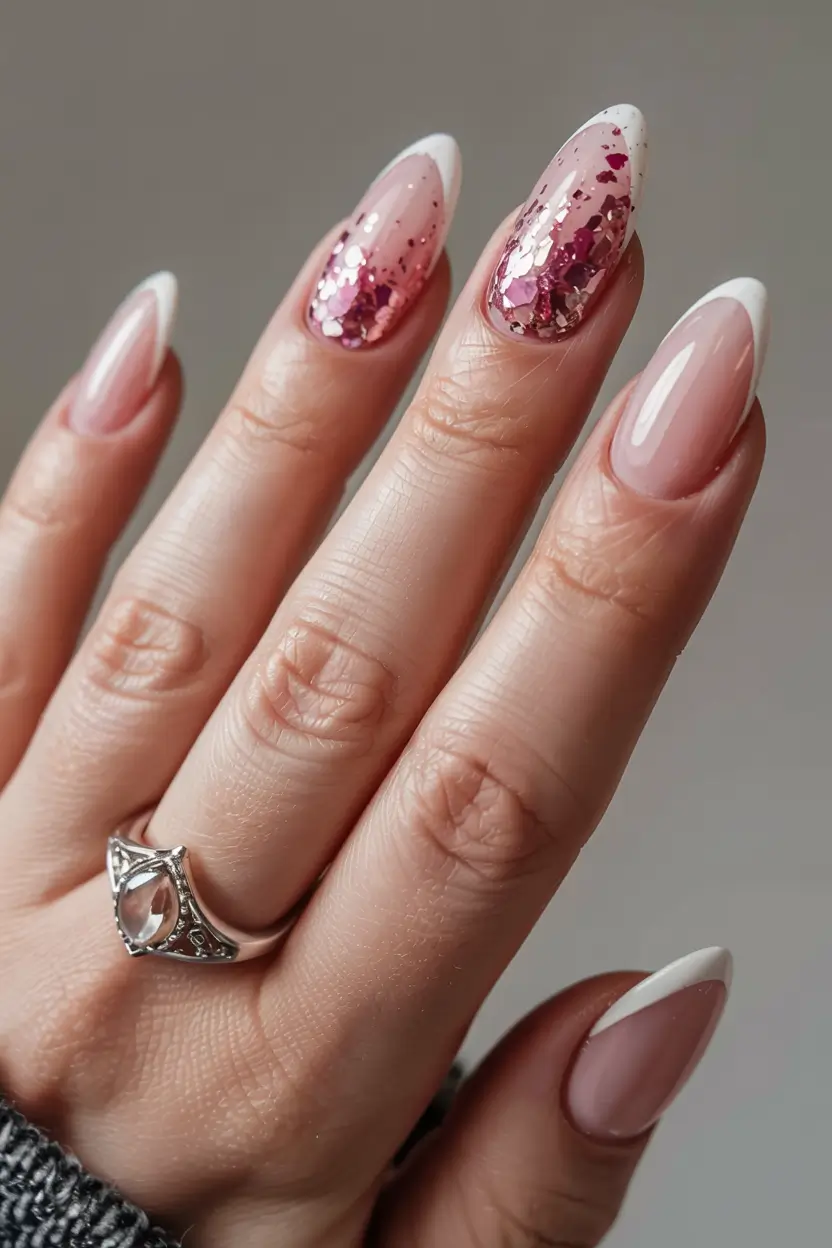
Start with a sheer nude polish such as Essie Ballet Slippers or Mademoiselle as your base. For the glitter, look at INLP’s Glittering Lights or Blushing, or a loose chunky glitter like the ones from Beetles Gel. Paint the white tips with a fine brush, or use nail guide stickers for clean edges.
Some nail artists suggest building it in steps: first a coat of nude, then cure or dry it, then apply glitter only over the tips and a little toward the base. Add the white tips after that, and finish with at least two layers of top coat. A tip I picked up from a nail technician: a silicone brush can dab glitter exactly where you want it.
This one is for the rosé-in-hand crowd. Whether you are blowing out candles or partying with friends, it gives maximum shine for minimum effort, and it is the fanciest of the bunch.
Dark Floral Edge
Light yet bold, this design plays off the contrast between glossy black polish and delicate florals on a nude background. It is gothic and garden party at the same time. The florals wrap around the edges like a hidden detail you only notice when you lean in, and that is what makes it so stylish.
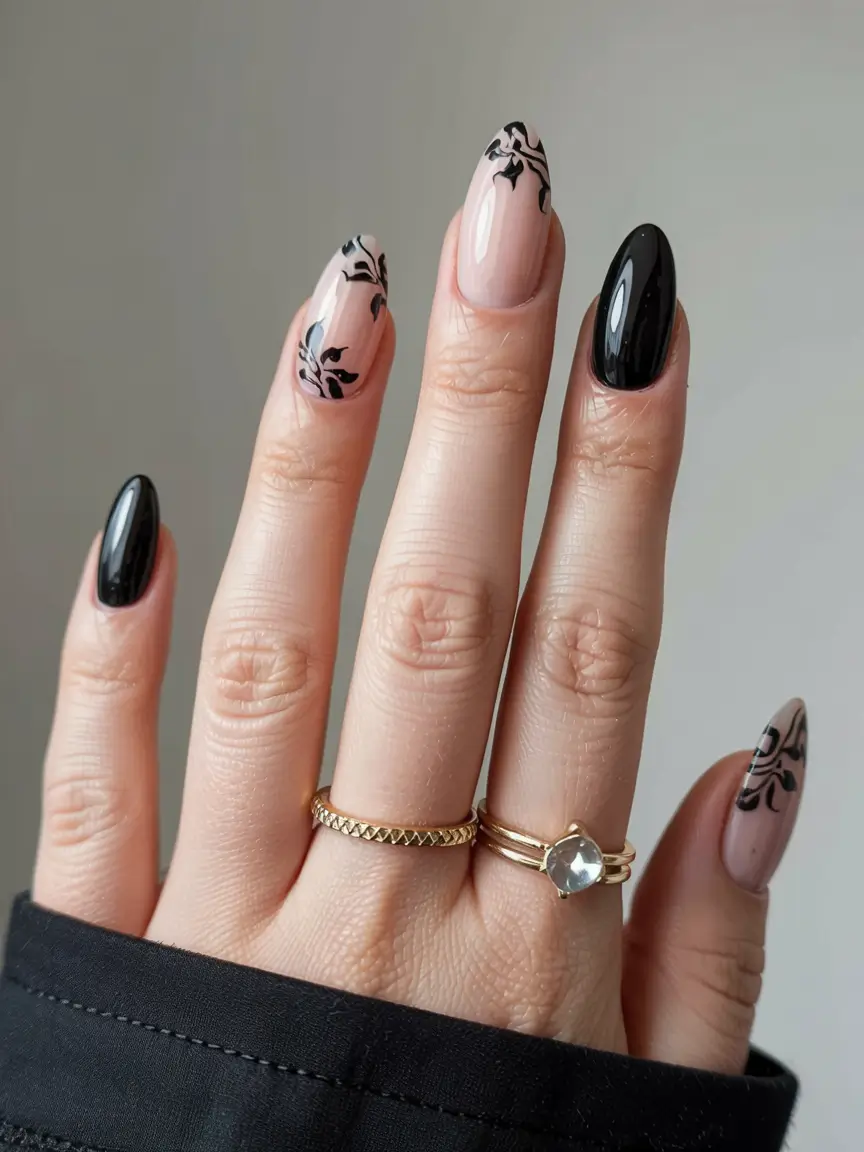
Start with a sheer nude base, such as Bio Seaweed Gel’s Sandy Nude. The black polish should be very shiny; I love Vinylux Black Pool. A micro-liner and black gel paint are enough for the florals. Finish with a top coat of your choice.
Sketch the floral flow on paper first so you get the curves right. If you are short on time, temporary floral tattoo decals let you test what looks good on you. When you’re happy, seal everything with a gel top coat.
I have seen this look on accounts like @nail_unistella, and it never gets old. A minimalist who wants a little drama can wear it, and it especially suits a birthday girl in a black dress with a glass of wine.
Retro Dot Revival
If nostalgia is your love language, this navy-and-white polka dot look is calling your name. Dots look especially charming against a deep blue. It feels both retro and modern, and it is a pleasure to look at.
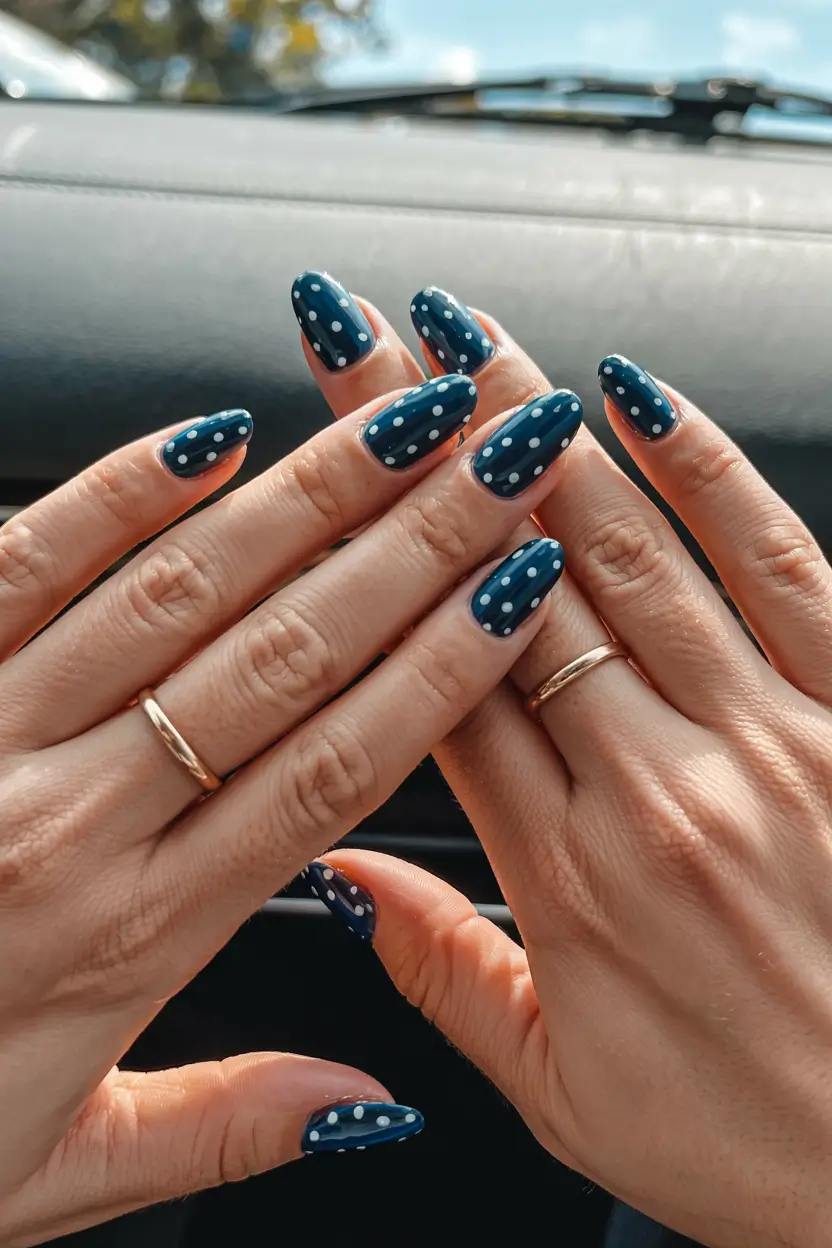
I would use a moody blue like Essie’s Style Cartel, then a clean white like Blanc for the dots. Use a dotting tool or the round end of a bobby pin. These small details are what make it sing.
The key to perfect dots is to let the base polish dry completely and to load very little polish onto your tool so it doesn’t spread. Seal everything with a glossy top coat so the finish looks like patent leather.
My trip to the coast on a birthday weekend, with a manicure that matched my vintage sundress, was exactly this kind of moment. It had great ‘I am the main character’ energy, in the best way.
Chic Simplicity in Dusty Rose
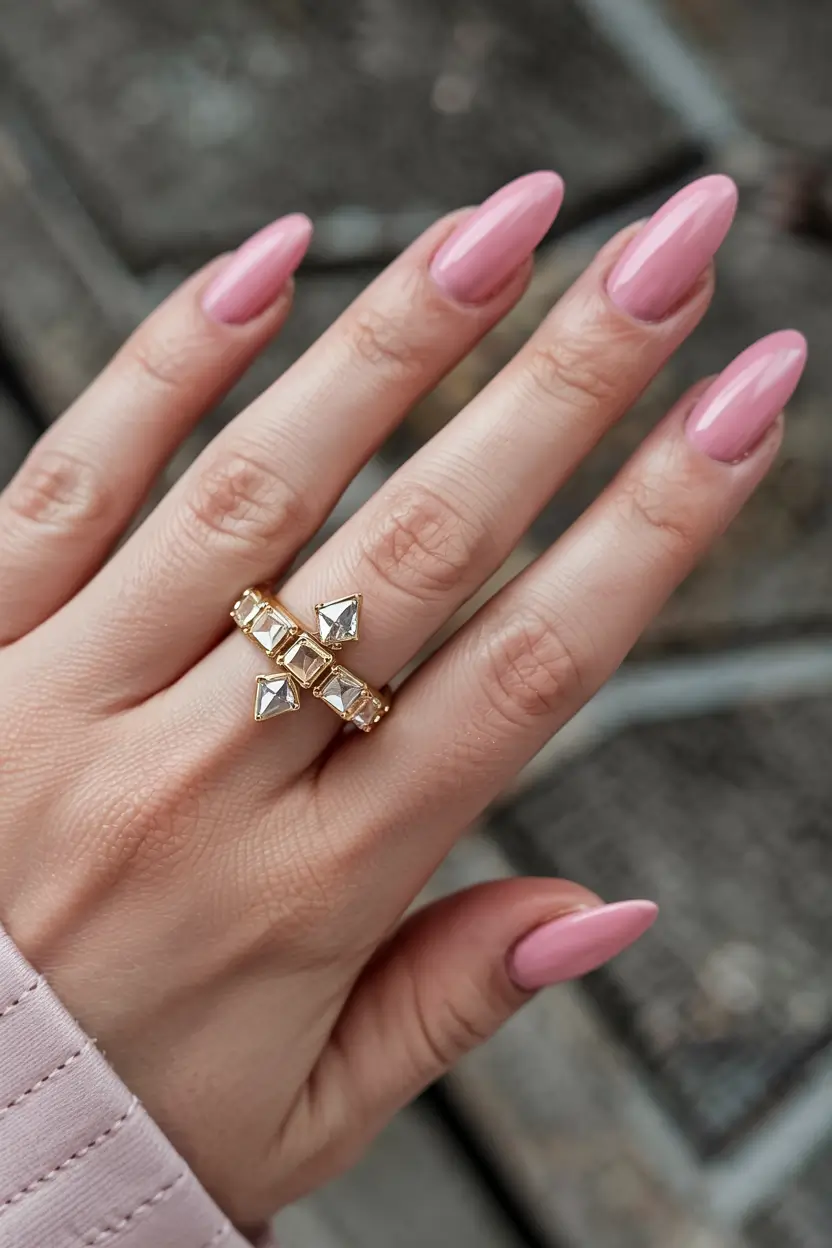
There is something surprisingly classy about dusty rose nails in a soft almond shape. The color is smooth, muted and confident all at once. It is not loud, and it does not ask for attention. It is a birthday look that suits every age.
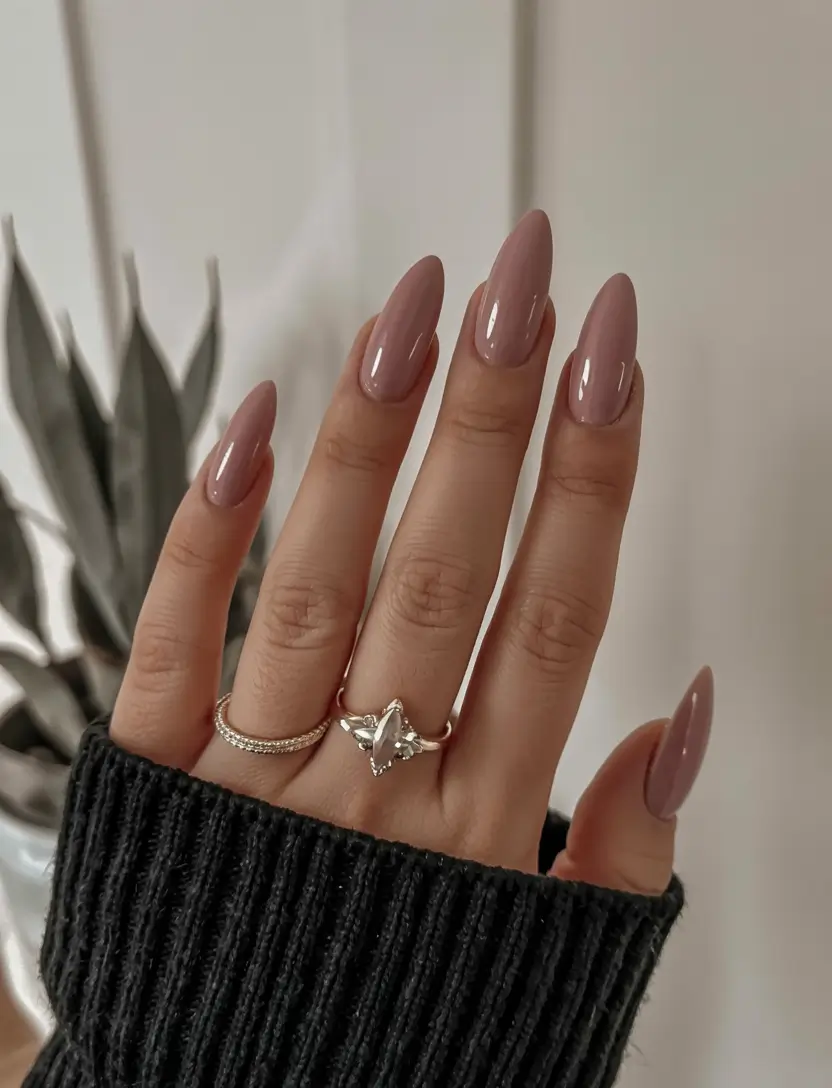
To get this shade, try Zoya Briar or Deborah Lippmann Modern Love. Both have that quiet, sophisticated muted pink. Shaping matters just as much as color here: file the nails into a neat almond or stiletto tip so the soft tone looks intentional.
I don’t always do this at home, but when I do, I start by gently buffing and shaping my nails and tidying the cuticles. I apply two coats of color, then seal everything with a gel-effect top coat. At the end I add cuticle oil. CND’s version smells wonderful, almost like a spa treat.
This is the shade I would wear to a birthday dinner or a classy cocktail night. It looks polished but effortless, and it pairs beautifully with statement rings, so your manicure becomes an accessory of its own.
