
I’ve been scrolling through nail inspo all month and every other set has glitter. Not the sparse kind you regret at removal either. Full-coverage, packed-on, looks-like-you-dipped-your-fingers-in-snow glitter.
So I rounded up 29 examples of Winter Glitter Nails that actually work for real life. Some are low-key enough for the office, others make a statement on their own. After years of picking glitter out of my cuticles, I’ve learned which formulas stay and which ones leave regrets. Whether you have short nails or long, almond or square, there’s something here that won’t chip by lunch.
Midnight Snowflake Glitter Oval Nails
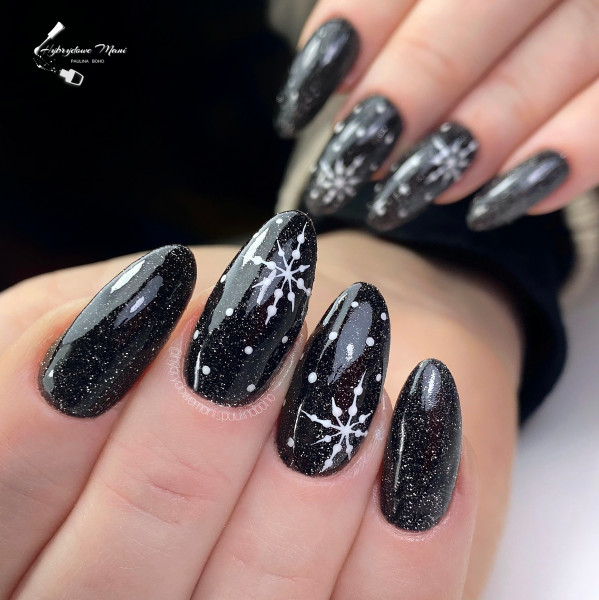
The black base is what makes these work. White snowflakes and tiny dots sit on the accent nails, and the rest get a sheer glitter overlay that catches light without competing. Medium oval keeps it wearable, not fussy. The contrast is sharp enough to read as intentional but the glitter keeps it from feeling flat. A precise observation: the snowflake placement is off-center on each accent, which stops the design from looking like a stamp. That asymmetry is the difference between generic and custom.
Winter Knit Stiletto Nails
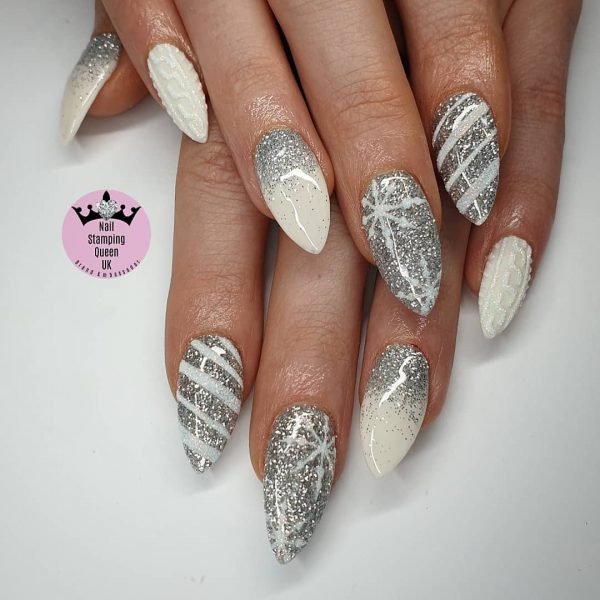
I am picking a side: this maximalist design beats every single-accent-snowflake look I have seen this season. The stiletto shape carries the knit texture, the glitter gradient, the tiny stripes and the scattered snowflakes without feeling crowded. Cream and silver read cozy, not cold, and the glitter gradient from cuticle to tip keeps the eye moving. For a holiday party or a week of winter events, this one earns its complexity. Simpler designs fade into the background. This one does not.
Sheer Pink Glitter French Almonds
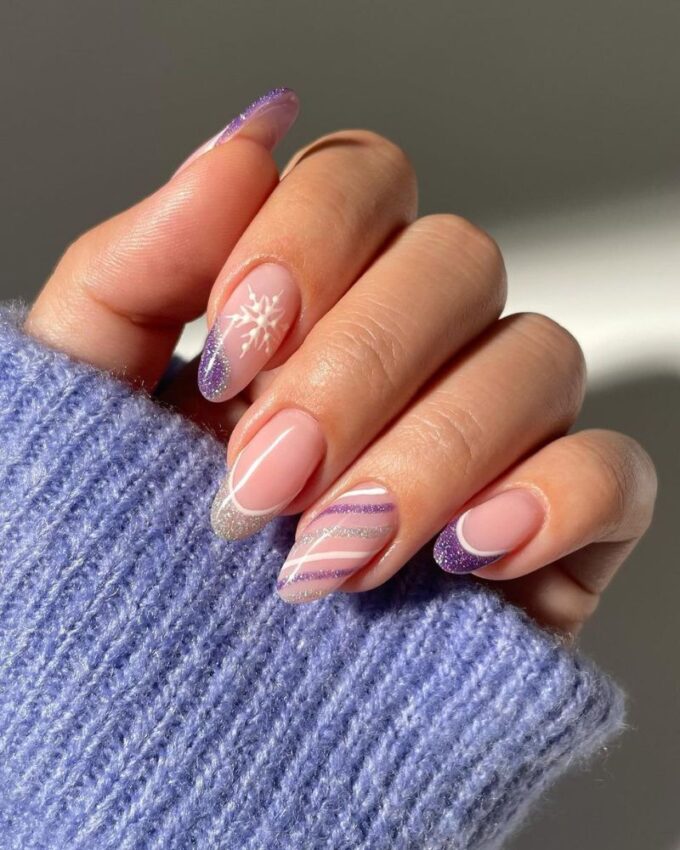
The precision here is the story. A sheer pink base lets the natural nail show through, then a white French line is painted with a steady hand — any wobble reads immediately. On the accent nail, a purple glitter stripe runs parallel to the smile line, and a tiny snowflake sits in the corner. The glitter tips on the other nails are packed densely enough to look opaque. When you sit down, ask for a sheer pink base, a white for the French line, and a purple glitter that leans cool-toned. The almond shape helps the lines stay elegant rather than harsh.
Matte Pink Reindeer Almonds
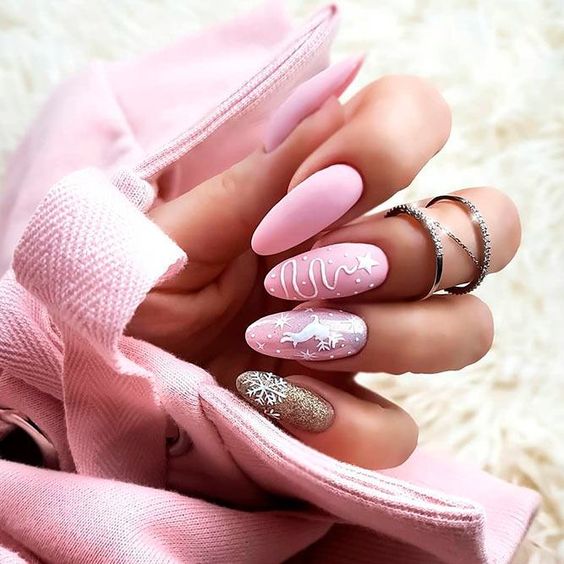
Are you someone who likes their nails to tell a story? These long almond nails feature matte pastel pink with white reindeer and snowflake art on accent nails, plus white squiggles on the others. The matte finish gives it a soft, almost chalky texture that feels modern, not cutesy. The glitter gold and white snowflake accent nail adds a pop of sparkle against the matte. This design suits anyone who enjoys detailed nail art and isn’t afraid of length. The long almond shape is elegant but playful, and the reindeer nail art adds a whimsical touch.
The matte finish has a quirk: it can wear down to a shine on the edges within a week. A quick reapplication of a matte topcoat brings it back. The art itself holds up for about two weeks if you’re gentle. If you prefer low-maintenance nails or shorter lengths, this might not be for you. The upkeep is real, but the charm is worth it for the right person.
Holographic Red Stiletto Sparkle
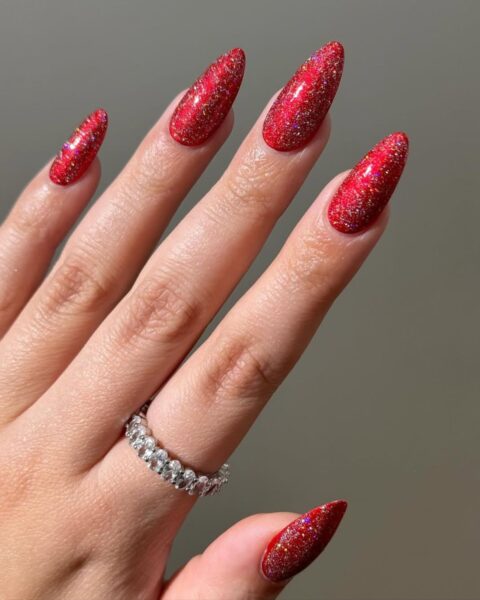
This is a gut punch of color. Holographic red glitter nails cover every nail in full glitter, no bare spots. The bright red with holographic shimmer catches light from every angle, making it impossible to ignore. The medium stiletto shape adds to the drama. It’s intensely sparkly, the kind of manicure that gets noticed before you do. Perfect for New Year’s Eve when you want your nails to match the energy in the room. Bold and unapologetic.
Purple Glitter Accent Oval Nails
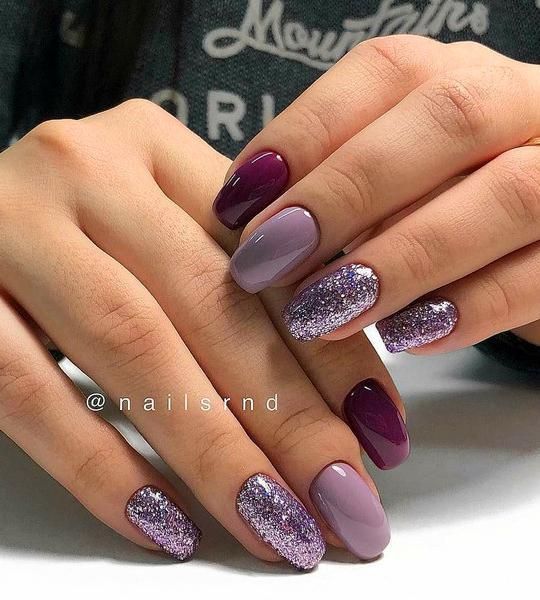
I’ll admit, I almost skipped the purple glitter accent nails. Not because they aren’t pretty, but because I knew the chair time. Getting that deep purple base to sit right under the silver glitter takes a tech who doesn’t rush the layers. The dusty lavender on the other nails keeps it from feeling costumey, grounding the whole set. The honest downside: glitter texture is real. A thick topcoat is non-negotiable or you will snag every sweater. And removal is a soak-off commitment, not a quick file. Book the extra appointment slot, your cuticles will thank you for the patience.
Nude Pink Glitter Cuticle Gradient
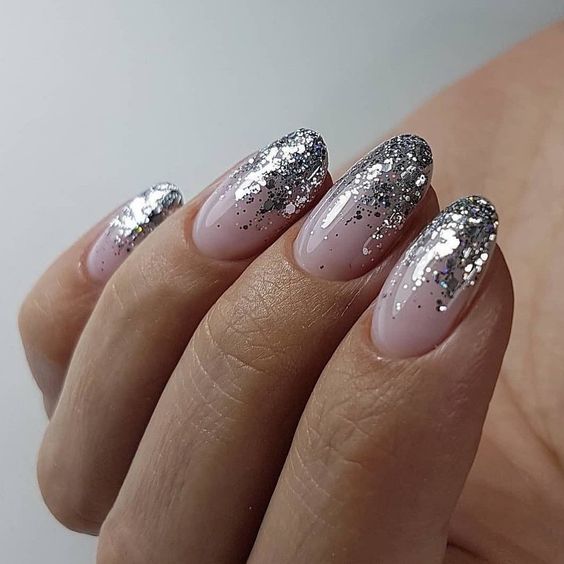
The precise observation: the silver glitter gradient nails work because the placement is deliberate, not scattered. The nude pink base is forgiving, it hides the tiny mistakes a home kit makes. The steps are straightforward: apply the nude base, then use a small brush to pack the silver glitter onto the cuticle area and the tips, fading towards the center. It is salon-leaning because the glitter wants to migrate, so a steady hand matters. But the payoff is a custom gradient that looks like a professional fade. I plan this one for a Sunday afternoon, not a Friday night before an event.
Dark Grey Bow Line Art Glitter Nails
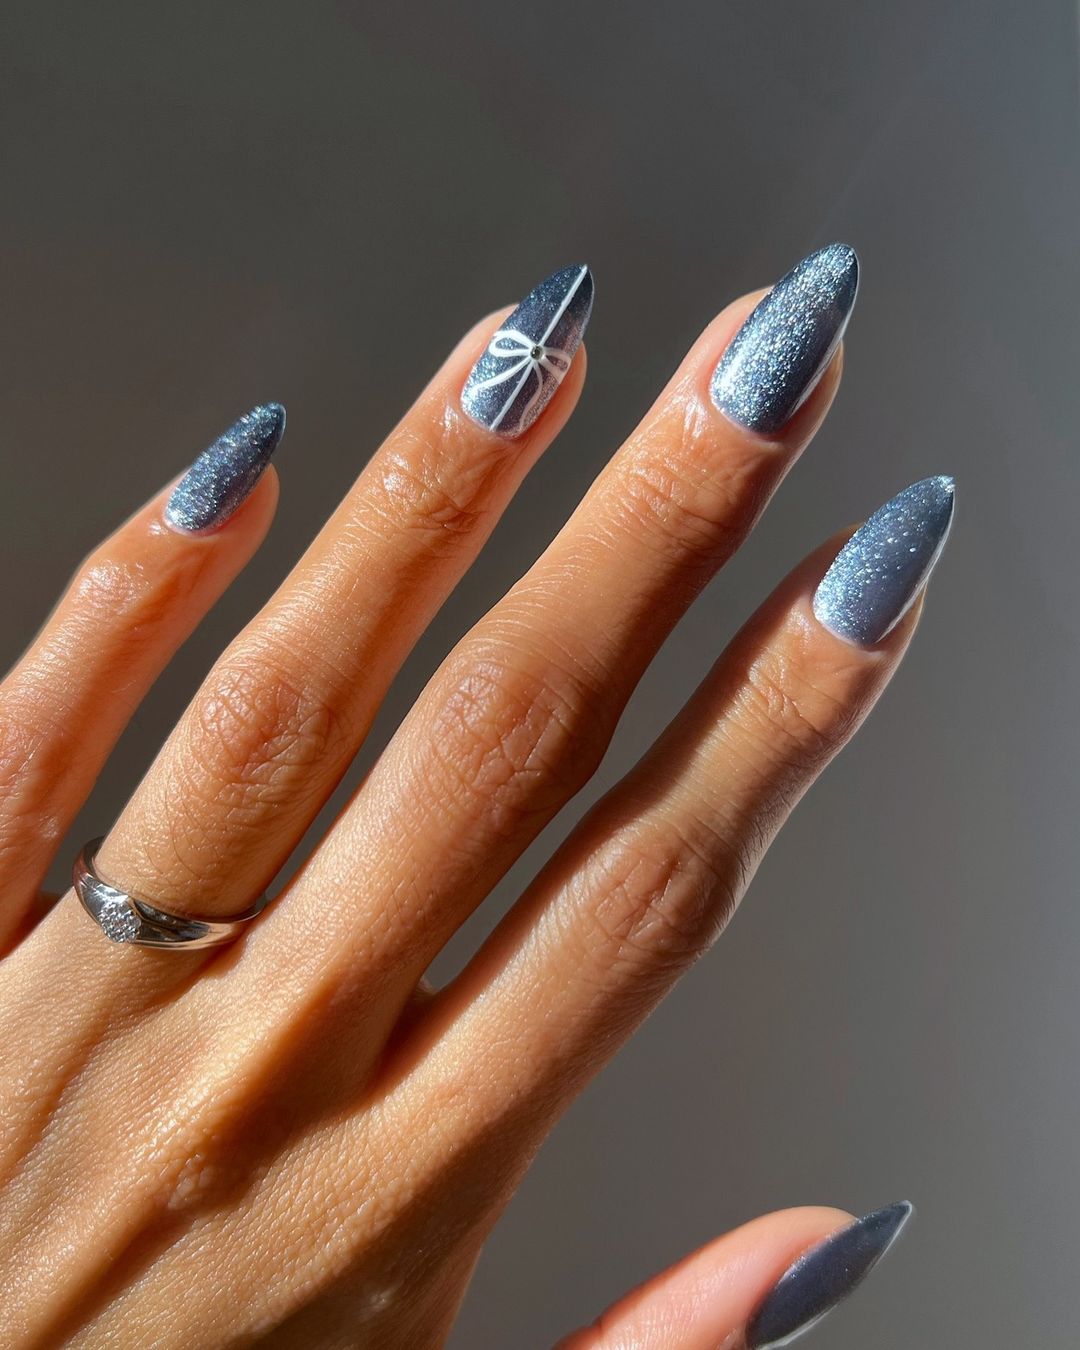
The silver glitter line art on this set is doing the heavy lifting. It is a bow, but drawn in thin, geometric lines rather than filled shapes. The dark grey base is almost charcoal, it lets the silver glitter pop without competing. The medium stiletto length keeps the shape wearable, not weaponized. The chrome finish on the accent nail adds a second texture that breaks up the matte grey.
The upkeep is surprisingly practical. The line art sits flat under the top coat, so it doesn’t catch like a 3D charm would. Expect about two weeks before the cuticle growth becomes obvious against the dark grey. The stiletto shape adds drama, but it also means the tips are the first to show wear. A quick top coat refresh at week one keeps the glitter from dulling. The removal is standard, just soak thoroughly to avoid scraping the art off.
Teal Glitter French Short Nails
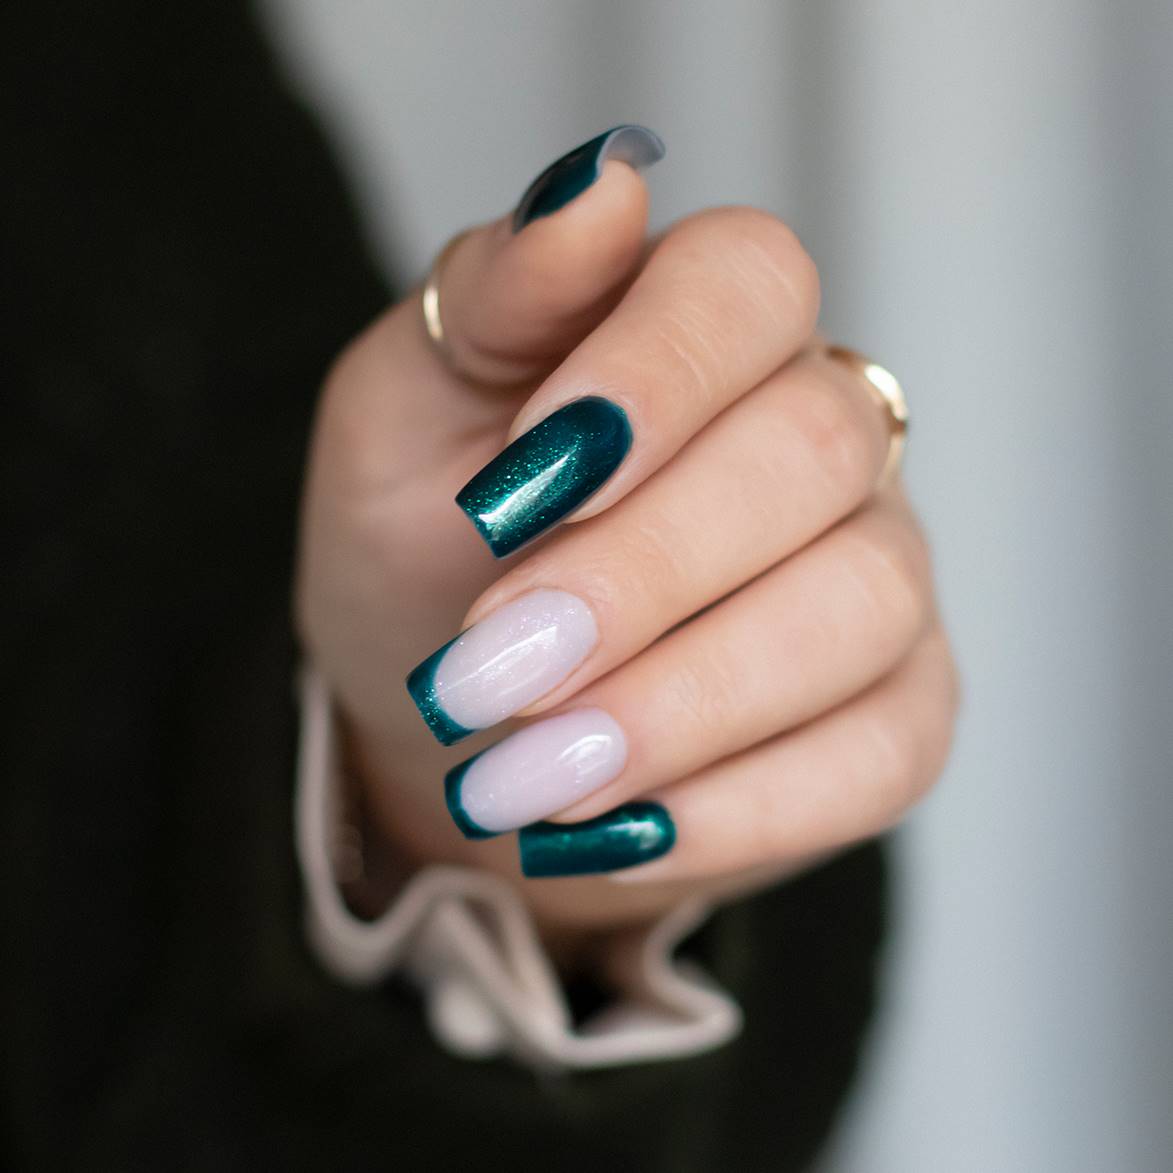
I wanted to hate the teal glitter french tips on short square nails. It sounds like a lot of color for a small canvas. The honest downside is the french tip itself. On a short square, the smile line is tiny, so any imperfection in the application is magnified. The solid glitter accent nail is the more durable choice here. The sheer pink base helps the teal pop, but the contrast is stark. It works, but it is not a forgiving design.
Navy Snowflake Glitter Coffin Nails
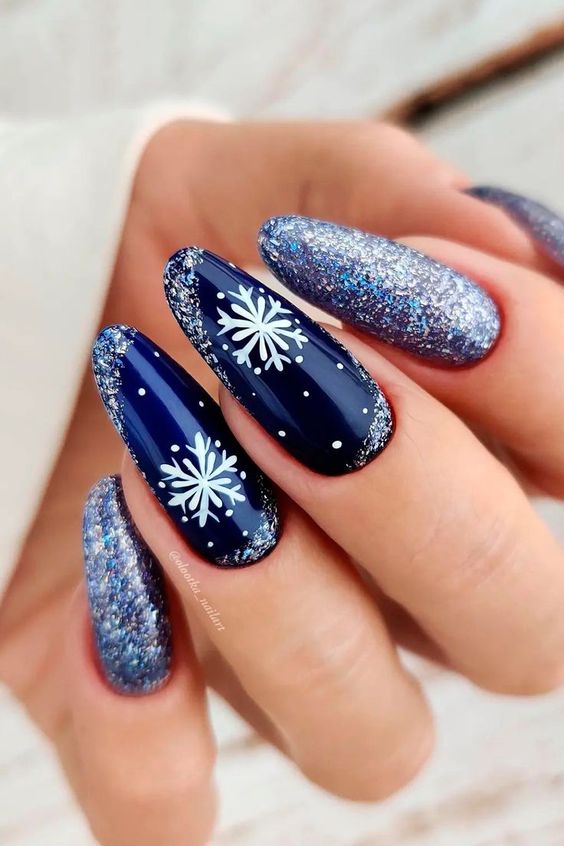
There is a specific light in December where the navy glitter snowflake nails look like a sky full of stars. The deep navy blue base is the anchor. It reads dark enough to be sophisticated, but the silver glitter catches the light in a way a solid black never does. The white snowflake motif is classic, not cutesy. This is a holiday design that works for the office party and the family dinner. The medium coffin shape gives enough surface for the art without being unwieldy. It is festive without screaming ‘ugly sweater’.
Gold Glitter Wave Stiletto Nails
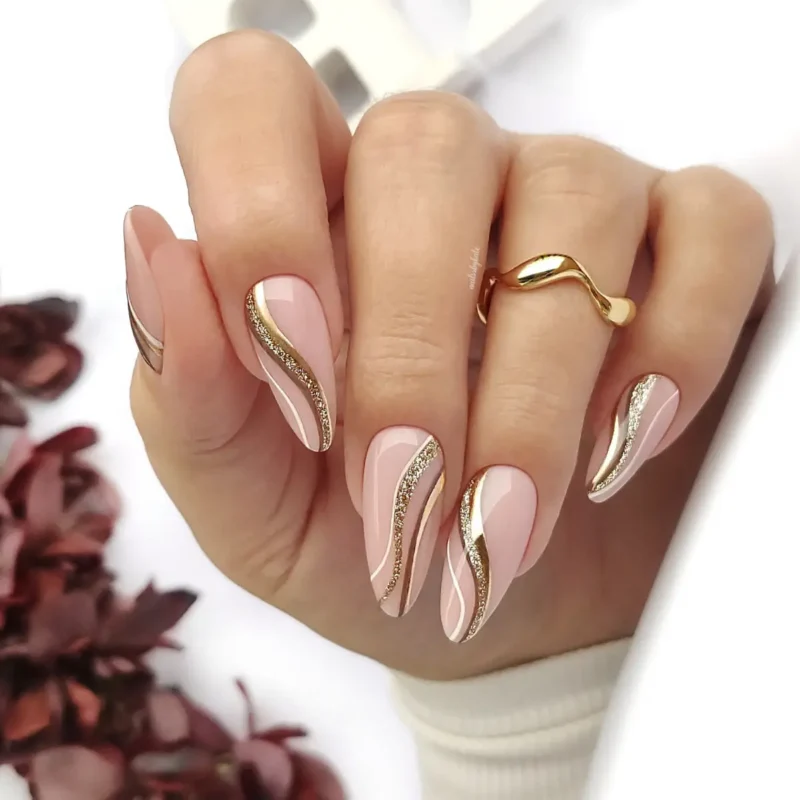
How much do you really want those precise gold stripes? Because this design is not a quick lunch break job. Between the sheer pink base layers, the fine white lines, and the gold glitter wave that requires a steady hand and thin brush work, you are looking at a solid 90 minutes in the chair. Possibly more if your tech is a perfectionist about symmetry. That time translates to a premium, but the result is a New Year’s Eve worthy set that reads elegant rather than loud.
The stiletto shape adds drama but also demands commitment. I would not recommend this for a first-time stiletto wearer unless you are ready for the learning curve. That said, once the gold glitter wave nails are on, they feel like an accessory. Just plan your schedule accordingly.
Light Blue Silver Glitter Square Nails
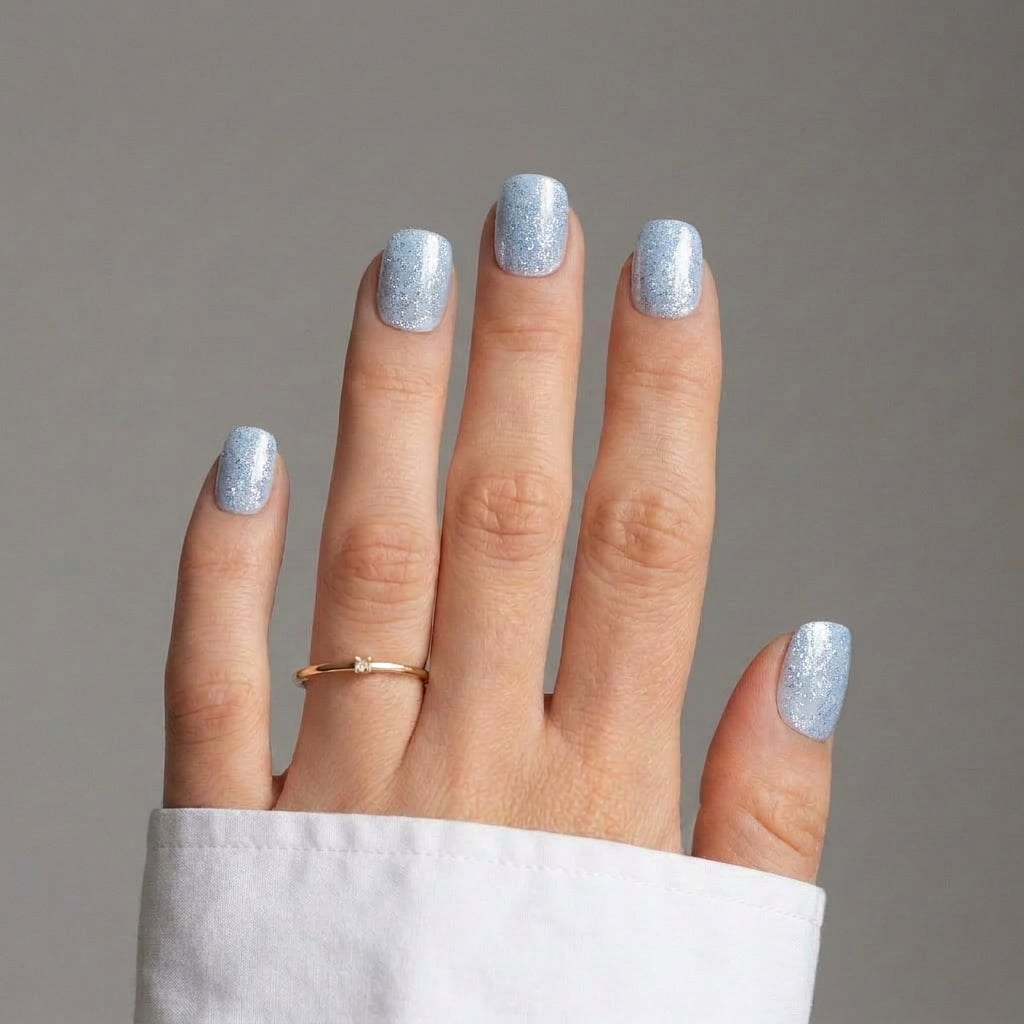
There is something quietly confident about covering every millimeter of a short square nail in light blue silver glitter. No accent nail, no gradient, just a consistent icy shimmer that catches light from any angle. The short square shape keeps it unfussy while the fine silver glitter adds enough sparkle to feel festive. It is the kind of polished winter set that does not try too hard.
Frosted Sky Snowflake Square Nails
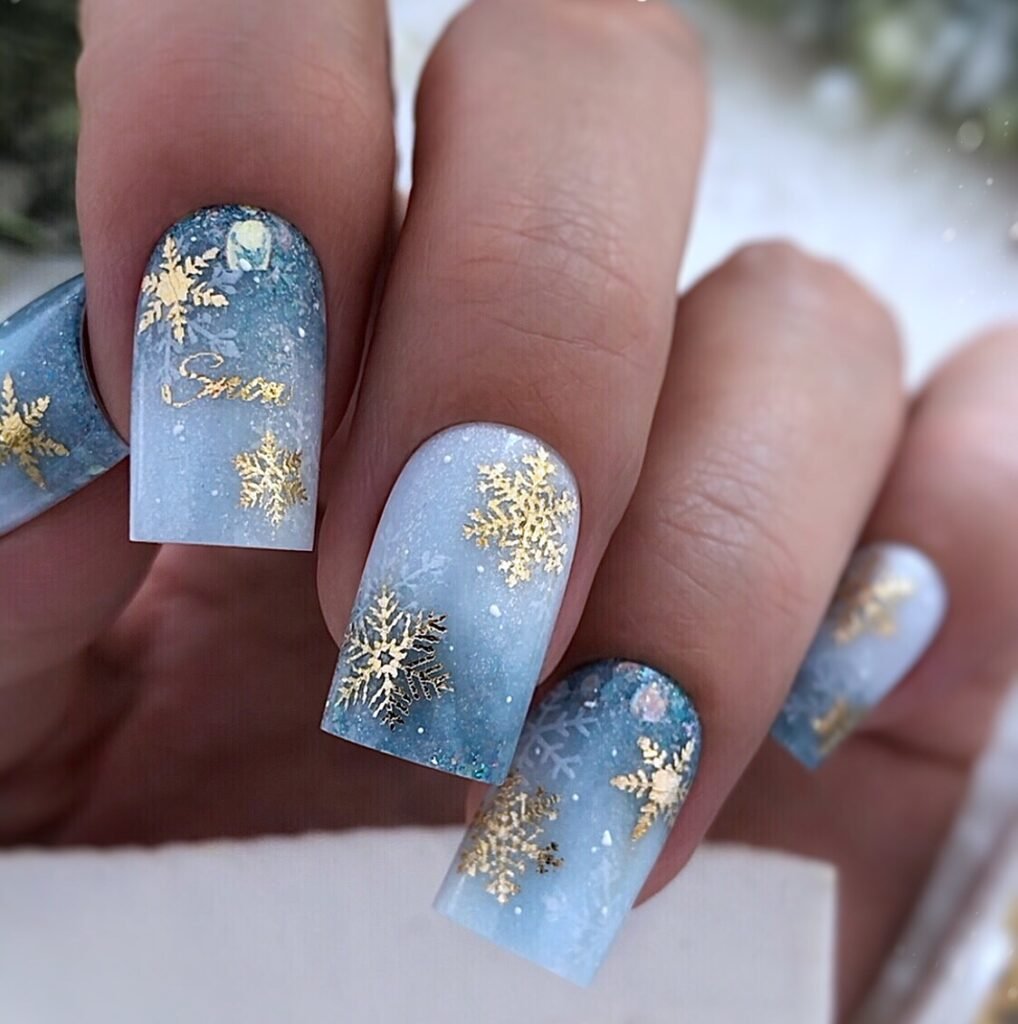
The gradient is the heart of this look. A light blue to white gradient creates the frosted sky backdrop, then large gold snowflake decals are sealed over the top. The execution requires careful decal placement to avoid air bubbles. A few upkeep items to know: the gold snowflake decals can catch on sweater knits if not fully smoothed under the top coat. I recommend at least two layers of top coat over the decals. Also, the glitter base helps camouflage any edge lifting that might appear after a week. Keep cuticle oil handy to extend the life of the gradient.
Silver Glitter Short Round Nails
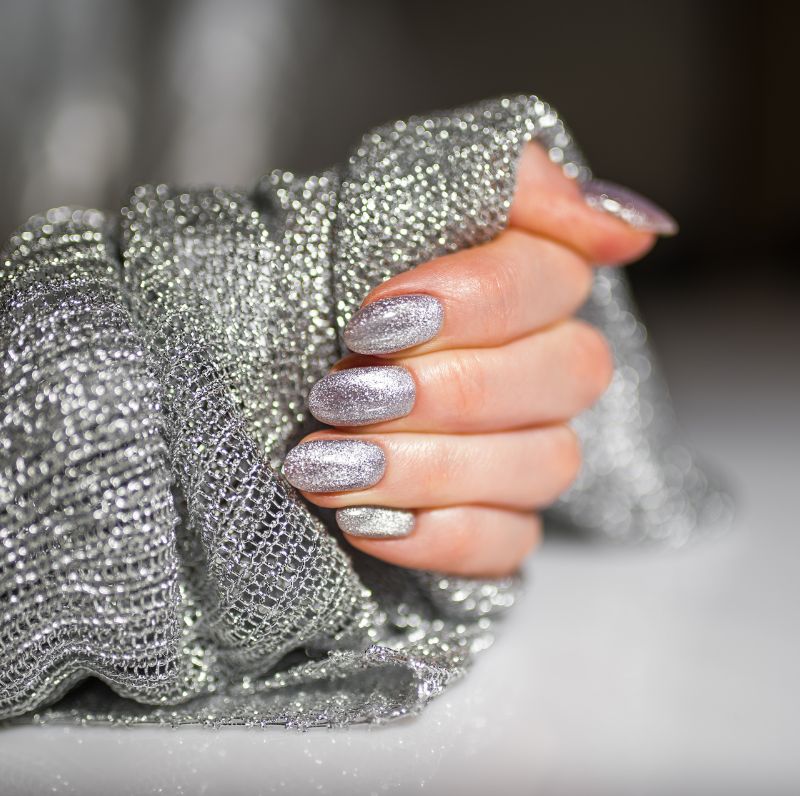
I will admit I was skeptical about full coverage silver glitter on short round nails. It is a lot. But the dense silver glitter nails have a way of looking intentionally over-the-top rather than accidental. The round shape keeps them soft and approachable. Wear wise, full glitter is forgiving and can last through two weeks of hand washing and typing. Upkeep is minimal except for removal which requires a dedicated soak-off session.
Subtle Shimmer Nude Beige Almonds
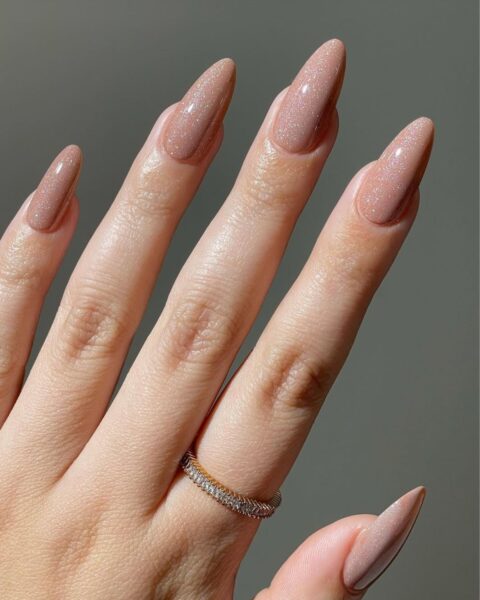
Who needs a glitter that whispers rather than shouts? The nude beige shimmer nails are for those who want sparkle without the full holiday spectacle. The fine shimmer glitter is barely detectable in low light but catches the sun beautifully. This suits anyone with a neutral undertone who finds traditional glitter too obvious for daily wear. The almond shape elongates the fingers while the subtle shimmer adds just enough dimension to avoid looking like a plain nude.
The key to this look is the even application of fine shimmer throughout the base. It requires a patient hand to avoid patchy spots. Once done, it grows out gracefully because the shimmer blends with the nail bed. If you work in an office with strict dress codes, this is your glitter loophole. It reads as professional with a twinkle.
Visual Idea
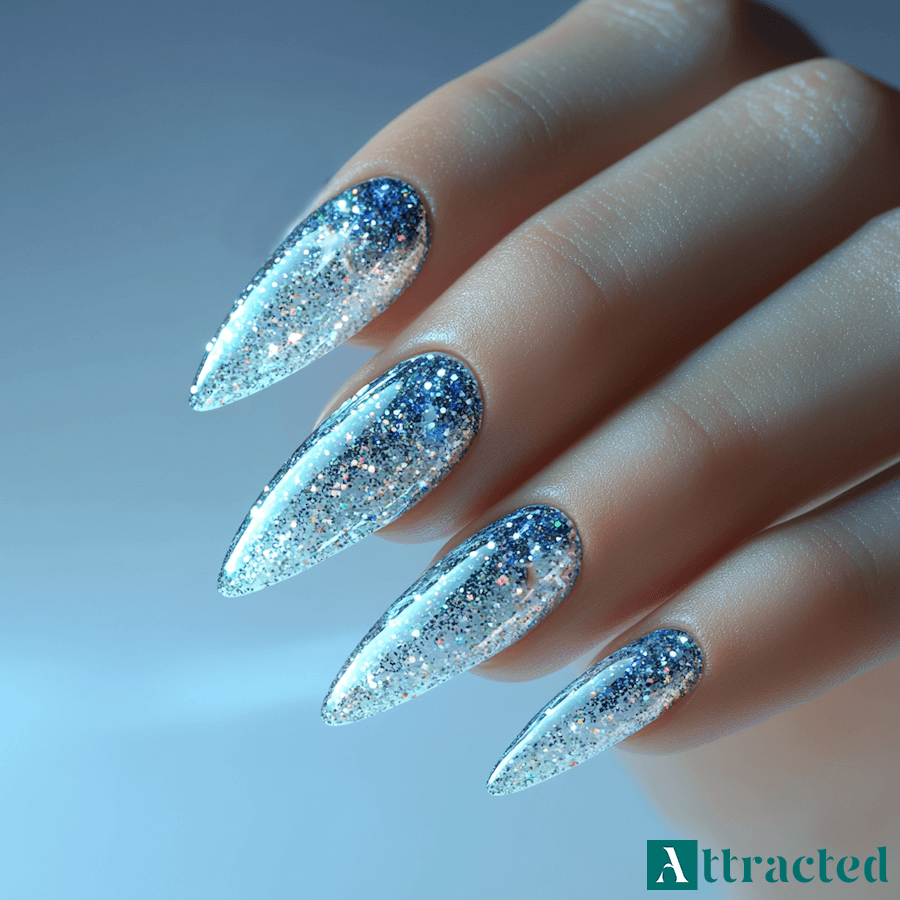
Blue to silver glitter on long stilettos is a statement that demands attention. The gradient is intense, packing dense glitter at the cuticle and fading to a silver shimmer at the tip. It catches light from every angle, which is the whole point. The deep blue base gives way to silver, creating a sense of depth that flat glitter lacks. But here’s the honest downside: that density means removal is a chore. You’ll be soaking for longer than you’d like, and the glitter particles can be stubborn. The payoff is a look that reads as deliberately over-the-top, perfect for a winter event where you want to be noticed. Just know what you’re signing up for, and budget extra time for the takeoff.
Glitter Visual Idea
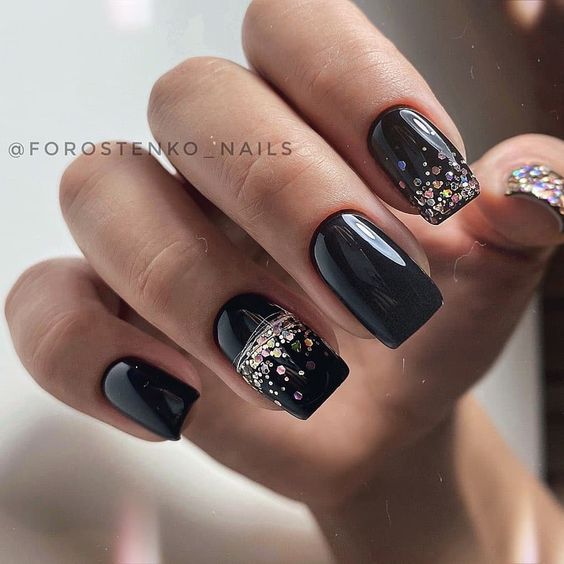
These black short squares with multi-colored glitter accents are the party nail you can actually wear to a party. Unlike full-coverage glitter that screams ‘I’m the main event,’ these let the black base do the heavy lifting. The glitter pops on just the accent nails, making them feel intentional without being overwhelming. Compared to intricate snowflake designs or 3D charms, this is a five-minute decision that still reads as festive. Short square keeps them practical for mingling and holding drinks. Perfect for holiday gatherings where you want sparkle without the commitment.
Matte And Glitter Visual Idea
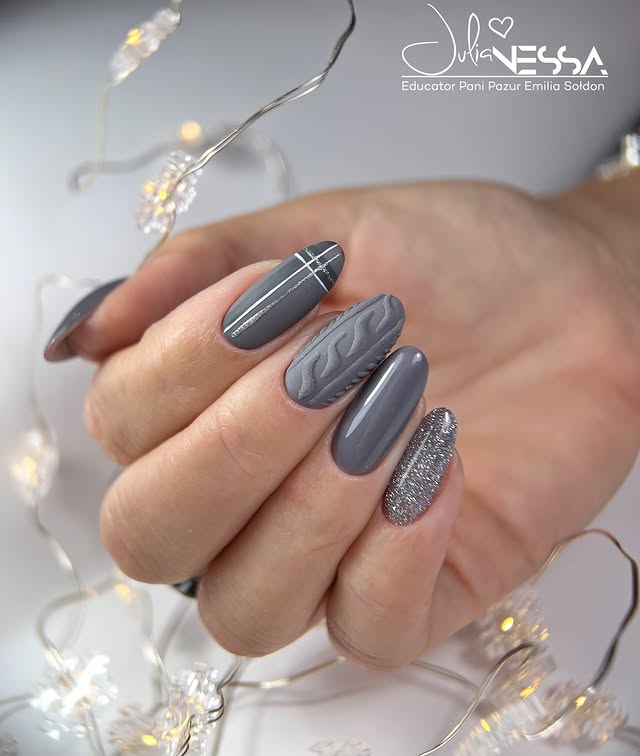
The cable knit pattern on medium grey matte nails is a winter classic, but achieving it at home is a different story. The textured look requires a special gel that holds its shape, and the glitter accent nail needs careful placement to match the salon finish. Medium almond gives enough surface for the pattern without being too long. If you’re set on trying, start with a matte top coat on the pattern nails and a dense silver glitter for the accent. But be warned: the cable knit effect often comes out looking more like a lumpy sweater than a clean design, and the glitter nail needs to be encapsulated properly to avoid snagging. This is one where booking a pro saves you the frustration.
Glitter Gradient On All Nails Visual Idea
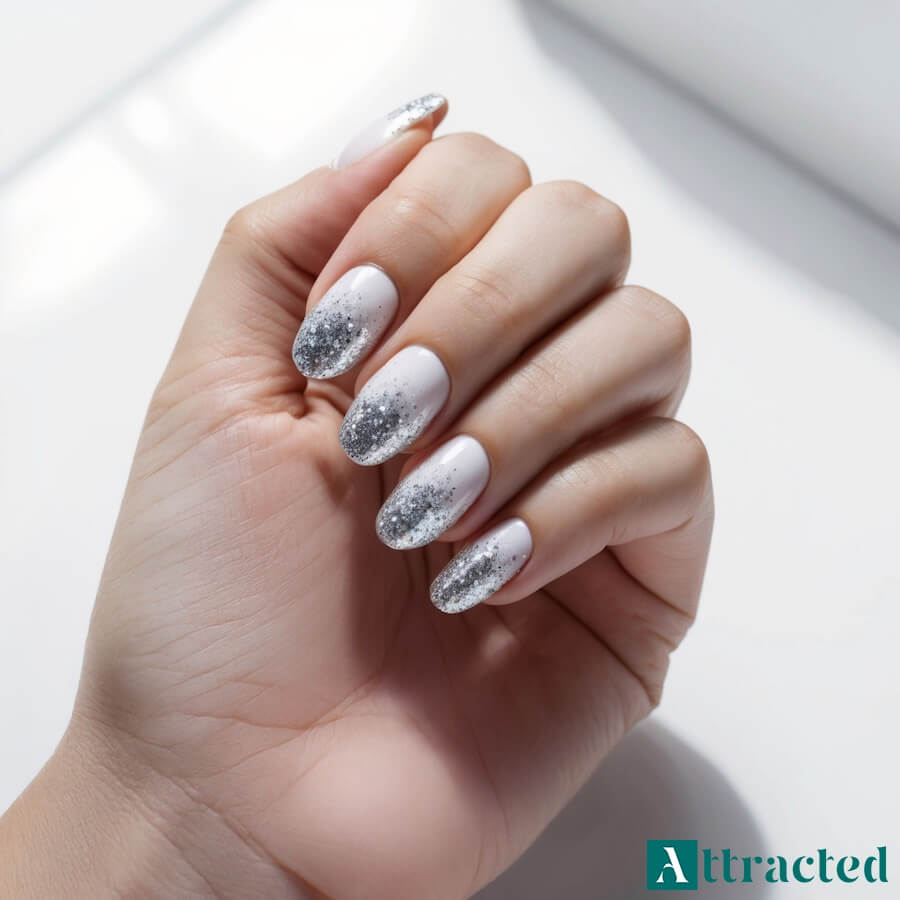
A smooth glitter gradient on all nails is a technical feat that separates salon work from home experiments. The technique involves building the density from the cuticle outward, using a sponge or a brush to deposit glitter in layers. The white base helps the silver pop, and each nail must be consistent to avoid a patchy look. The key is to work in thin layers, curing between each, and to use a no-wipe top coat to lock in the glitter without disturbing the gradient. Medium oval is forgiving for this technique because the curve helps the gradient flow naturally. It requires patience and a steady hand, which is why most people leave this to the pros.
Glitter Glossy Visual Idea
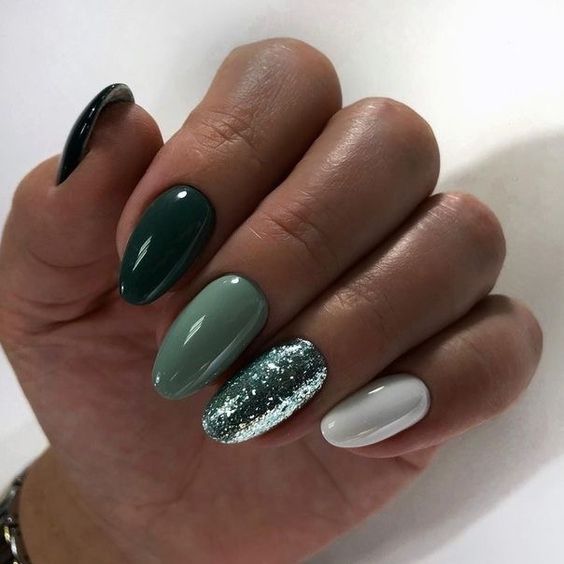
That full glitter nail in the middle is the star of this set. It’s dense, glossy, and catches the light like a disco ball. The surrounding deep green, sage green, and white nails keep it grounded, so the glitter feels like an accent rather than a takeover. If you’re trying this at home, focus on getting that one glitter nail perfect: use a dense glitter gel and pack it on thick, then seal with a glossy top coat. The rest can be simple.
Snowflake Charms And Thin Black Lines Visual Idea
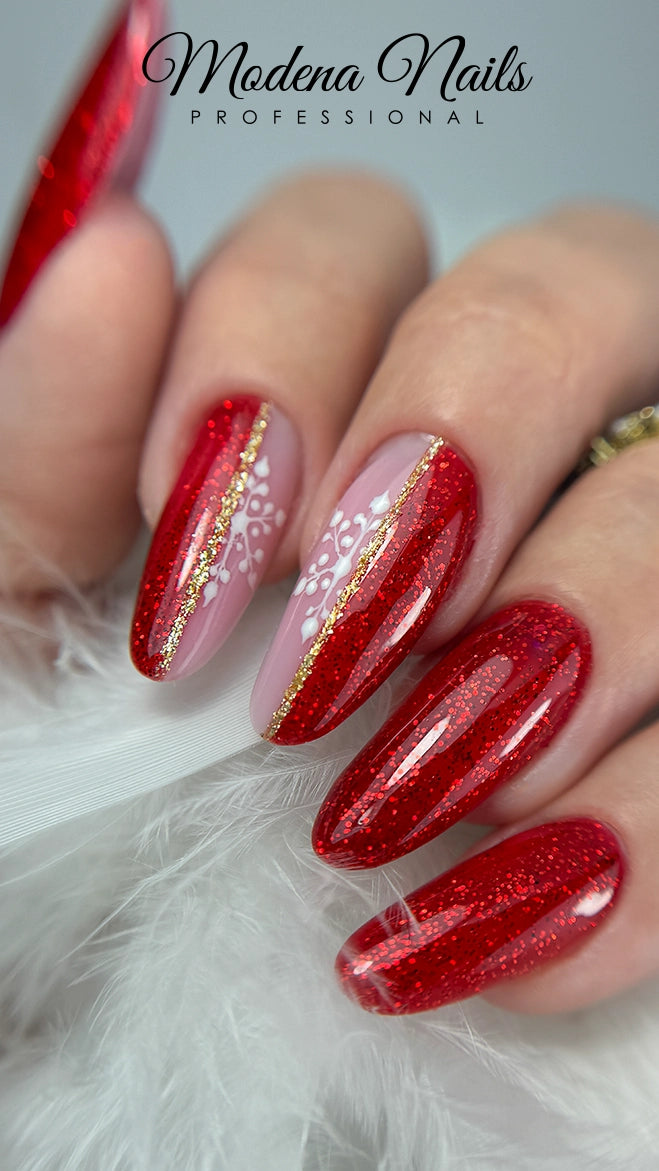
How much is a snowflake charm worth to you? Because this manicure costs more than just the appointment fee. The charms are tiny and fiddly, requiring precise placement with tweezers and extra curing time. The thin black lines demand a technician who can paint a straight stroke without shaking, and the glitter accent nail needs a dense layer that adds more curing cycles. And here’s the honest downside: those charming snowflakes catch on everything. I had one snag on a cashmere sleeve within 48 hours. You’ll be filing down any sharp edges yourself before the week is out. It’s a look that asks for patience and a careful lifestyle, and you’ll be back in the salon sooner than you’d like for touch-ups.
Glitter And White Speckles Visual Idea
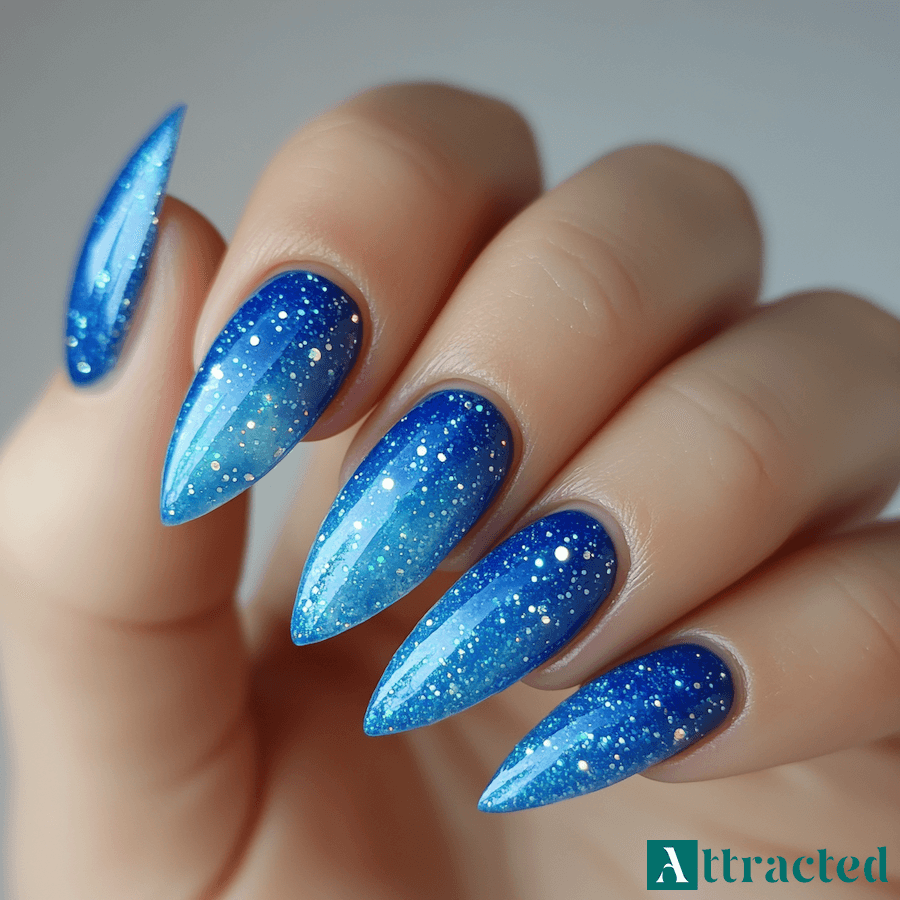
I admit I was skeptical about a blue glitter gradient lasting through a work week. But the dense glitter layer holds up surprisingly well, and the color shift from bright to lighter blue reads as intentional even after a few days. The white speckles add texture and depth without chipping off, and the gradient actually hides minor wear at the cuticles. The gradient effect also means that even if the glitter settles, it still looks intentional.
For upkeep, seal the tips with an extra layer of top coat every few days. The long stiletto shape means the tips are the first to show wear, so keep a file handy for any snags. The glitter can dull from hand washing, but a quick wipe with alcohol restores the shine. I found the design still looked good at day five, though the tips needed a refresh. Plan for a fill at the two-week mark to keep the gradient crisp.
Glitter On Accent Nails Glossy On Others Visual Idea
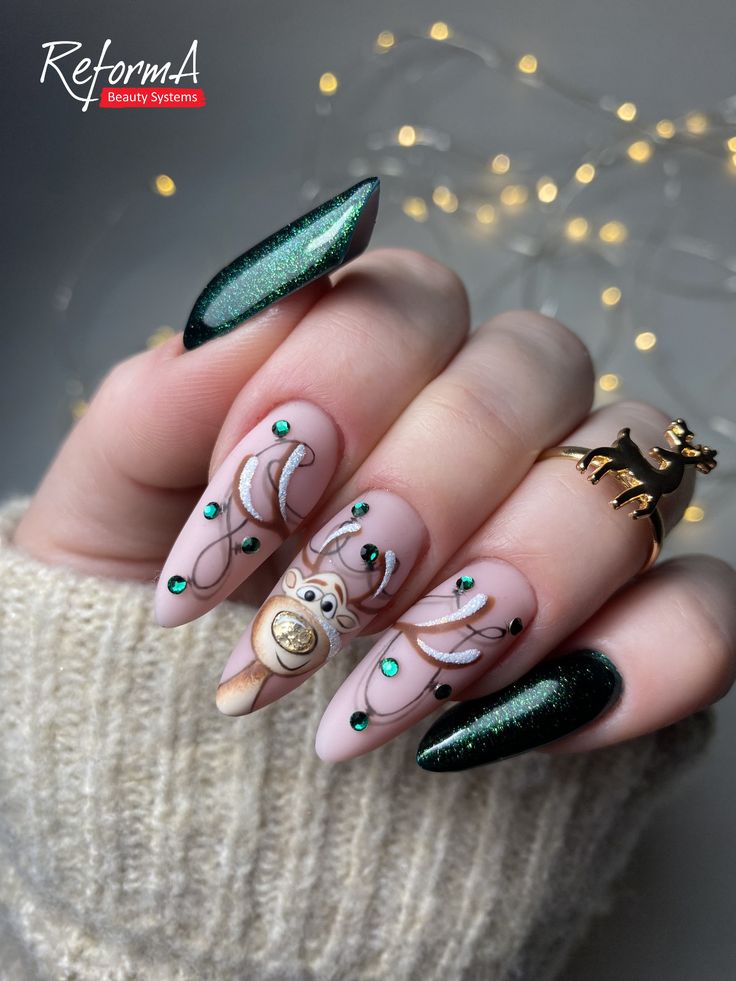
The reindeer is the anchor, but the swirling lines around it are what keep the design from feeling kitschy. The deep green glitter on the accent nails grounds the festive motif, while the nude base on the others keeps the look from being too heavy. The brown and white accents on the reindeer add a hand-drawn quality that contrasts nicely with the glossy finish. The long stiletto shape gives the art room to breathe. This is a Christmas manicure that knows when to stop. The rhinestones add just enough sparkle without overwhelming the scene. It’s a salon-level look that earns its place in a holiday party rotation, and it works because it balances detail with restraint.
Glitter Ombr On Nail Tips Visual Idea
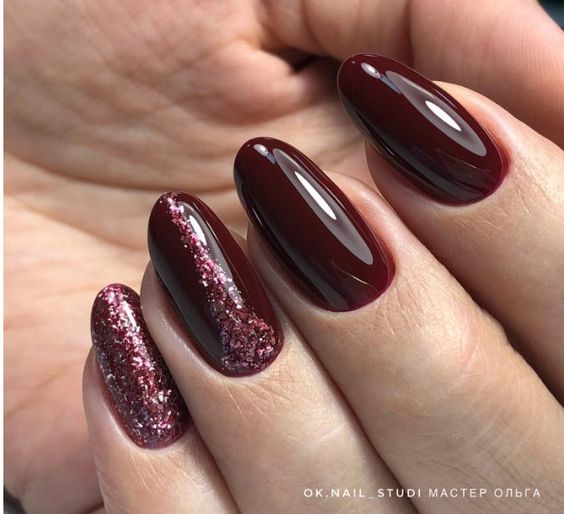
The first snowfall of the year, and these nails match the mood. The deep burgundy base fades into a pink glitter ombré that catches the light like frost on a window. It’s a winter color story that doesn’t rely on snowflakes or reindeer. The medium oval shape keeps it wearable, and the glitter stays on the tips for a balanced look. The ombré technique means the glitter doesn’t overwhelm, and the burgundy base adds depth. This is a seasonal manicure that works because it’s subtle enough for daily wear.
Dense Reflective Glitter Visual Idea
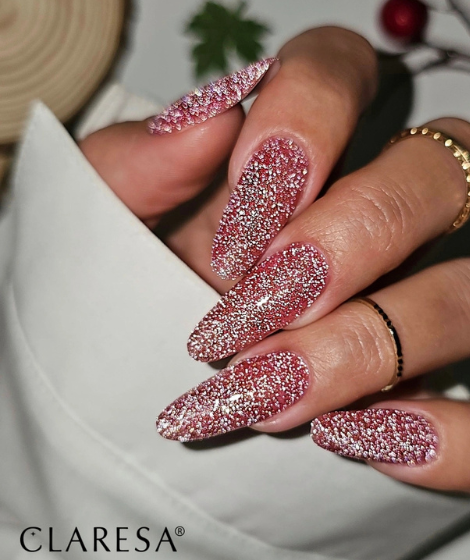
This is not a subtle manicure. The dense reflective glitter on extra long coffin nails is a commitment to sparkle. The deep red base with silver glitter catches every light, making it ideal for New Year’s Eve or a holiday party. But here’s the catch: removal is a project. You’ll be soaking and filing for a while, and the glitter can be stubborn. Also, the weight of the dense glitter can feel heavy on long nails, and the extra length means more surface area for snags. The extra length also makes everyday tasks like typing and zipping a bit more careful. It’s a look that requires patience both during application and at the end.
Winter Visual Idea
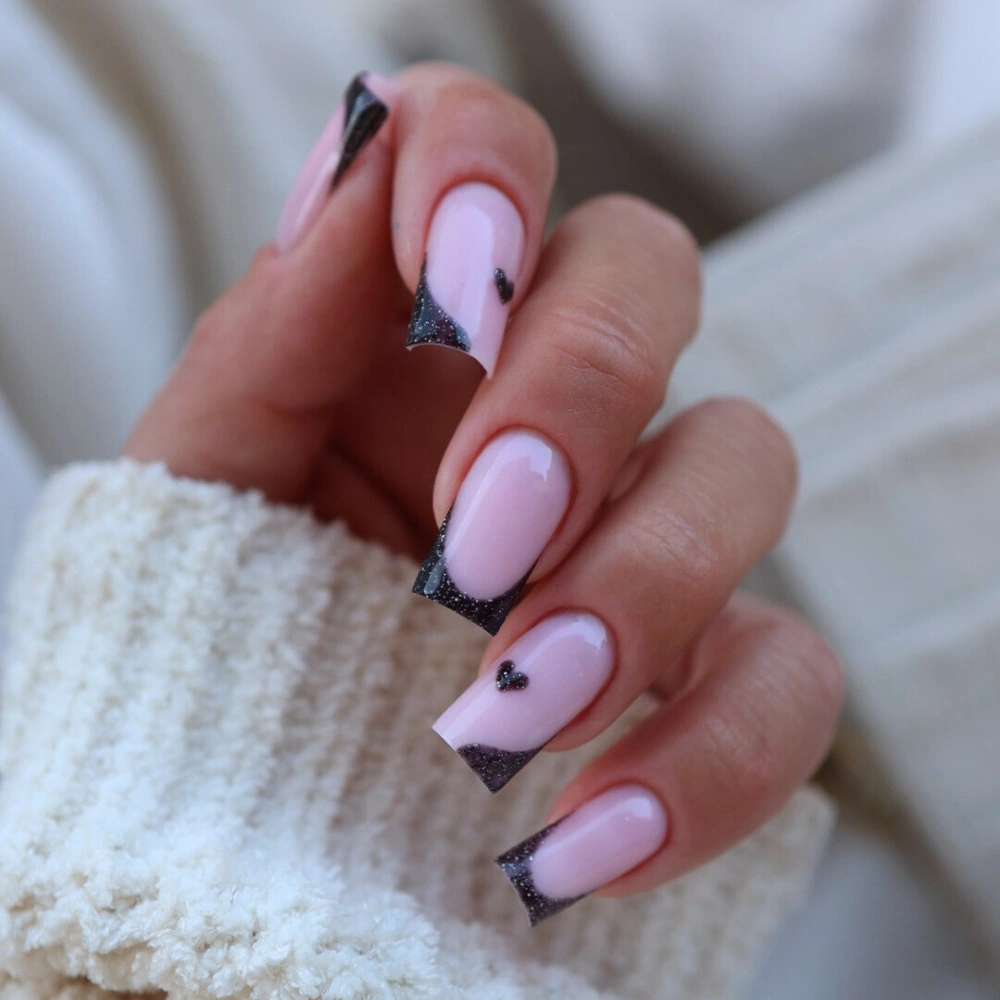
The black glitter tip lands exactly at the smile line. No bleeding, which I respect. The pale pink base is a milky sheer, two coats, so the glitter reads opaque and sharp. It’s a hard line, not a gradient. The technique relies on a steady hand and a dense glitter that doesn’t shift during curing.
The small hearts on the accent nails are the real test. They are drawn with a thin brush over the glitter, not embedded in it. One per nail, perfectly spaced. This is a salon look, not a Sunday afternoon experiment. The long square shape gives the glitter tip a clean runway, and the pale pink keeps the whole thing from feeling heavy. It is precise, it is clean, and it is not quick.
Full Glitter Coverage Visual Idea
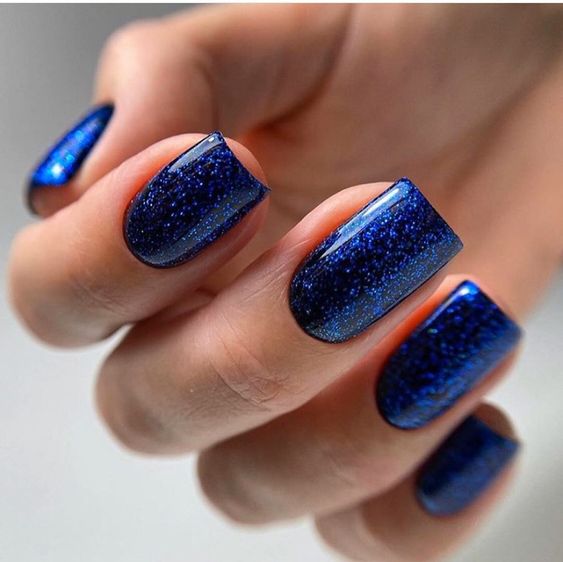
Can you do this at home? Technically yes, but the cleanup is the real test. The deep blue glitter is dense, applied over a matching blue base for opacity. One coat of glitter does the work. It is the most straightforward look in the roundup, which is exactly why I recommend it for a first glitter attempt. The medium square shape keeps it practical. Just know that removal requires patience and oil. Lots of oil.
Clean Visual Idea
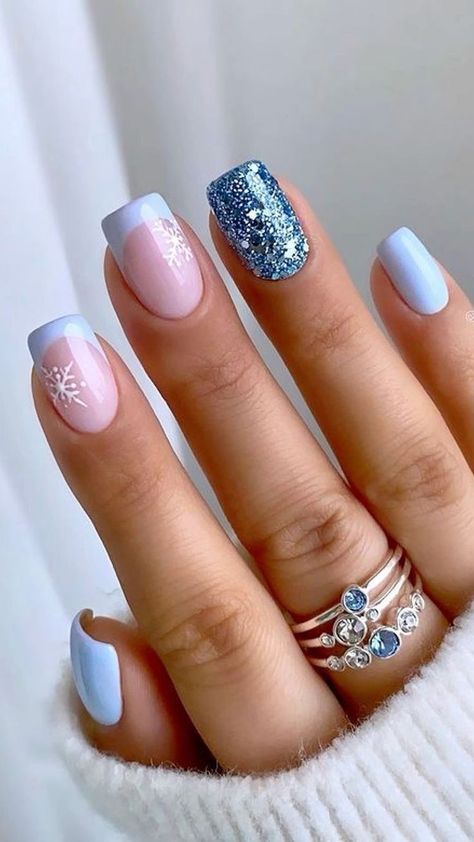
The pale pink base keeps it from feeling like a holiday explosion, and the light blue tips add just enough frost. A single glitter accent nail in matching blue catches the light without overwhelming the rest of the set. Snowflake decals on the French tips give it a deliberate, almost architectural feel. For a warmer take, swap the pink for a soft peach base and use gold glitter instead of blue. If you prefer cooler tones, try a lavender base with silver tips and a holographic glitter accent. The square shape keeps the whole look grounded, which is exactly what a clean glitter design needs.
Sheer Pink Base Silver Glitter Tips Visual Idea
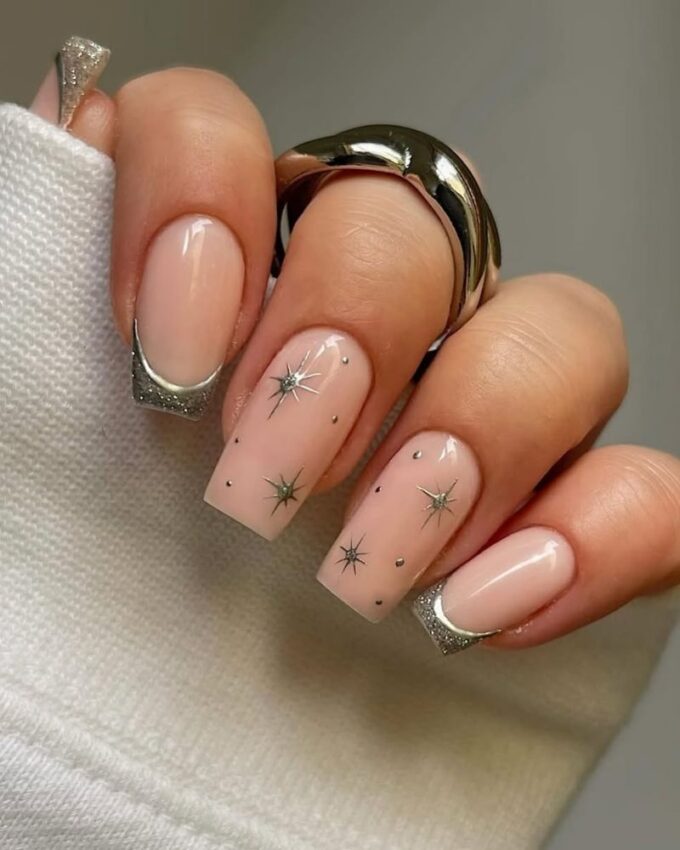
I will admit, I was skeptical about how long silver glitter French tips would stay sharp. The sheer pink base is forgiving, but the glitter edge is where the action happens. On long square nails, the tip gets tapped on keyboards, zippers, and the inside of pockets. By day five, the glitter on my index finger had a tiny bald patch near the corner. Not a chip, just a spot where the glitter had worn thin.
The upkeep is more about precision than frequency. A clear top coat every three days keeps the glitter from scattering, and I file the free edge gently to avoid lifting the tip seal. The starburst and dot accents add visual interest, but they also create texture that catches sweater lint. Worth it for the way the silver catches the light during a gray January commute.
Final Thoughts
After staring at all 29 sets, one thing is clear. Glitter can be subtle. The ones that work best are the ones you forget you’re wearing until you catch a flash under the office lights. I’m booking the navy snowflake coffin next. It hits the right note of festive without overdoing it.
Sometimes less sparkle is more staying power.